
These guidelines are applicable to the following BMW vehicles equipped with the S85 engine:
M5 Saloon (E60 2003-2009), M5 Touring (E61 2005-2010), M6 Coupe (E63 2004-2010) and M6 Convertible (E64 2005-2010).
Before fitting
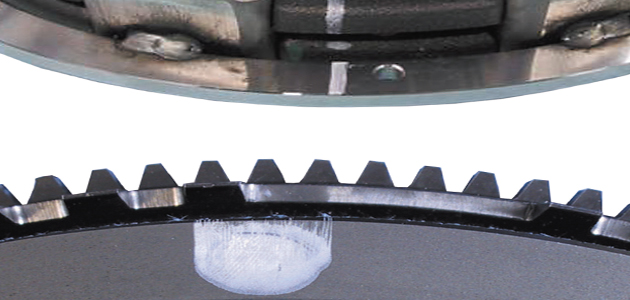
A replacement SACHS MF2-228 twin plate clutch is supplied pre-assembled, with the intermediate disc and pressure plate balanced relative to one other and marked with an alignment check line (Fig A below).
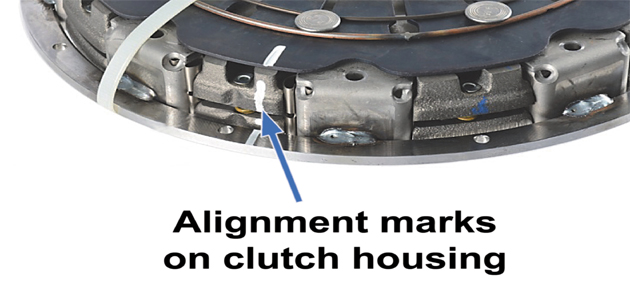
Fig A
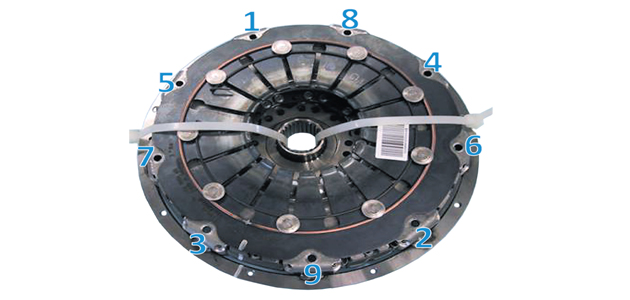
The clutch is fixed in the correct fitting position with transit supports consisting of cable ties and a wire ring. On delivery, check that the cable ties and wire ring are in place, and that the paint marks on the clutch housing are aligned. If any one of these requirements is not met, do not fit the clutch but refer to your supplier for a replacement unit (Fig B below).
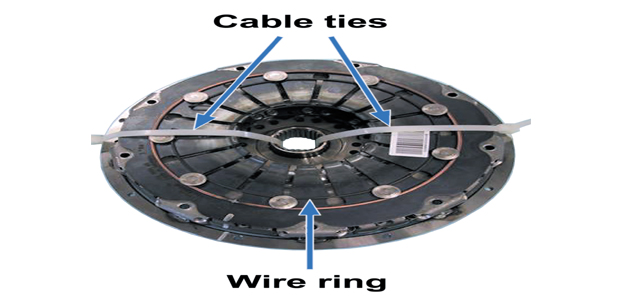
Fig B
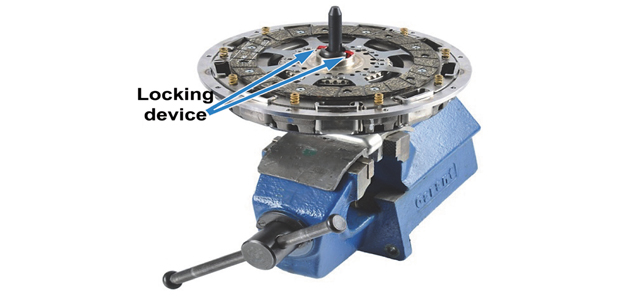
The clutch must be removed and refitted using BMW tool 21 2 300, BMW part number 83 30 0 495 136 (Fig C below).
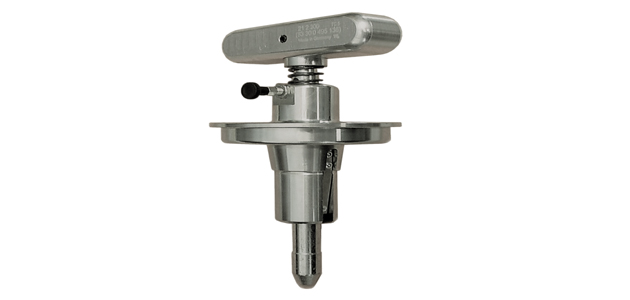
Fig C
Removing clutch from car
Step 1: Press the special tool into the hub of the twin plate clutch until its locking device snaps into place.
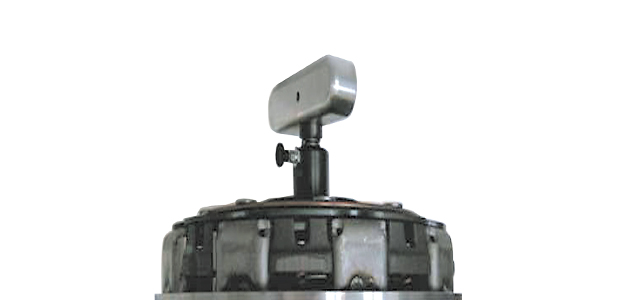
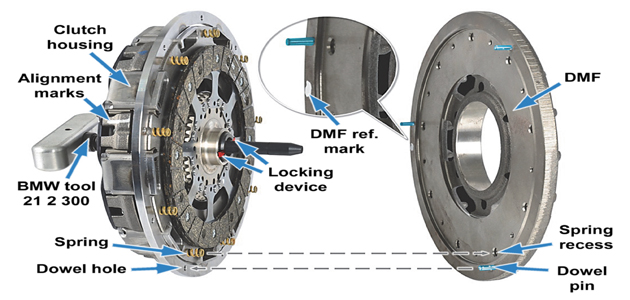
Step 2: Identify the alignment marks on the clutch housing and the reference mark on the Dual Mass Flywheel (DMF), noting their relative positions. When refitting the clutch, the marks on the clutch housing must be offset by 180˚ from the mark on the DMF – not aligned with it.
Step 3: Loosen each of the clutch housing securing bolts by half a turn, following the sequence shown. Continue to progressively loosen the bolts in this sequence half a turn at a time until the preload of the diaphragm spring can no longer be felt.
Step 4: Remove the clutch from the DMF and secure it in a bench vice by clamping the base of the removal tool. If the clutch is to be reused, do not release the locking device on the removal tool.
Fitting new clutch to car
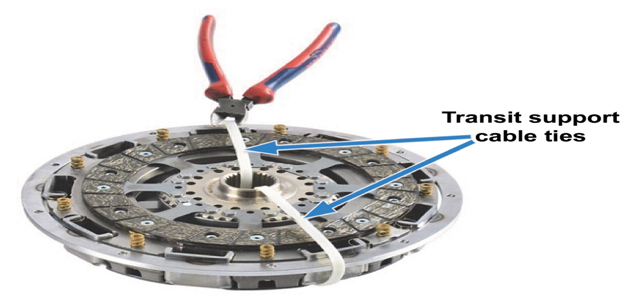
Step 1: Place the new clutch on the bench with the driven plate facing upwards and cut off the transit support cable ties. Leave the transit support wire ring in place at this stage.
Step 2: Clamp BMW tool 21 2 300 in a bench vice and pull the knurled pin to release its locking device.
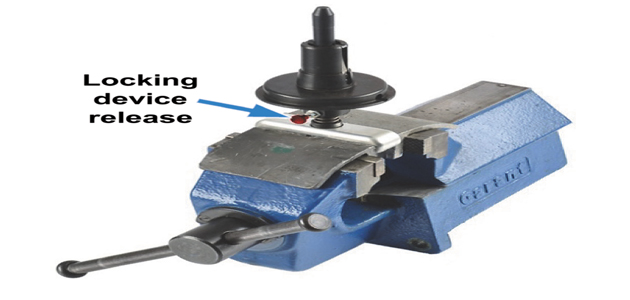
Step 3: Lift the clutch onto the tool and press down until it snaps into place, locking the clutch components in position.
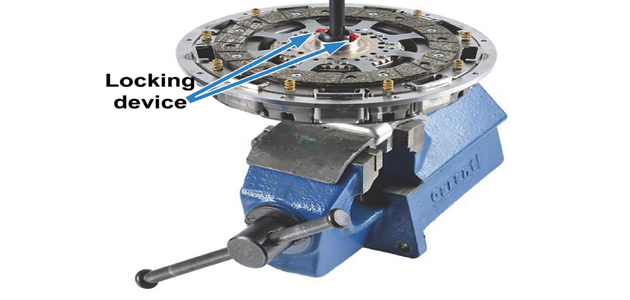
Step 4: Remove the assembly from the vice and offer it up to the DMF, paying attention to the following:
1) The alignment marks on the clutch housing must be offset by 180 degrees from the reference mark on the DMF
2) Each dowel pin must be fully inserted in its corresponding hole on the clutch housing
3) Each coil spring must be fully inserted in its corresponding recess on the DMF
Step 5: Fit the clutch housing to the DMF with the securing bolts, finger tight at first, and then tighten progressively in the correct sequence to the torque setting specified by the vehicle manufacturer.
Step 6 & 7: Remove the transit support wire ring from the diaphragm spring (Figure B refers). Remove the special tool from the clutch hub by pulling the knurled pin to release the locking device.
Refitting used clutch to car
Follow the instructions for fitting a new clutch from step 4 onwards, omitting step 6 as the transit support wire ring will not be present.


