
Choosing the appropriate brake fluid, according to vehicle needs is crucial. It is just as important to check brake fluid regularly and, when moisture content is too high, to replace it.
Testing brake fluid
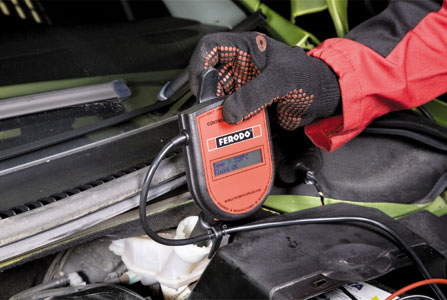
Although many vehicle and brake manufacturers give minimum recommendations, the right time to change the brake fluid should not be based on the vehicle’s mileage or age. The only real way to know is to test the brake fluid. And the only approved way to test it is by boiling it.
Testers
 Conductivity or “pen-type” testers do not boil the fluid. They estimate the water content electronically. In theory, conductivity (and/or capacitance) increases with moisture content, but these testers can potentially fail new fluid and pass contaminated fluid.
This is because the conductivity of brake fluid varies hugely from manufacturer to manufacturer, from batch to batch, and from grade to grade. For your safety and that of your customers, make sure to use an adequate tester.
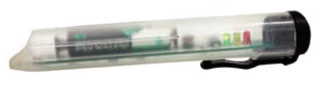
Ferodo brake fluid tester
Ferodo has developed a high-quality brake fluid tester (pictured, below) to ensure you can accurately measure your customers’ brake fluid. It is available under part number FFT100A. In cases where customers require totally accurate water content, Ferodo can determine it by using industry standard techniques such as the wellknown Karl Fisher method for water content.
Replacing brake fluid
Prior to bleeding the system, you should conduct a master cylinder leak pass test. This is done by attaching a pressure gauge to the closest caliper brake pipe. The system must then be pressurized to 50 bar for 45 seconds, during which time there should be no more than a 4 bar loss of pressure. More than a 4 bar pressure drop indicates a master cylinder leak pass that requires further attention.
A second check can also be carried out, but at a lower pressure of 10 bar, still checking for loss of pressure and longer pedal travel to double-check for weaknesses in the system.
The bleeding process – vehicles with front and rear disc brakes
All brake bleeding needs to be conducted in a set order: starting with the brake caliper furthest from the master cylinder (either left or right rear, dependent on the vehicle configuration, i.e. L/H or R/H drive).
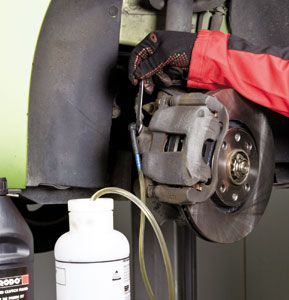 1. With all bleed nipples closed, fit a bleed pipe to the first caliper and loosen the nipple.
2. Using slow, full and firm strokes of the brake pedal, continue until the brake fluid is visually (in the bleed pipe) clean, and clear of air bubbles.
3. With the pedal fully depressed, tighten the bleed nipple and remove the bleed pipe.
4. Continue to the opposite rear caliper and repeat the procedure.
5. After completing the rear calipers, make certain that the front calipers are properly functioning and free of air bubbles by bleeding the front calipers. Start furthest from the master cylinder and finish closest to the master cylinder.
6. Finally, ensure that an adequate pedal pressure is achieved.


