A best practice belt replacement guide on two popular engines from Dayco.
Ford’s 1.8l ‘Lynx’ Engine
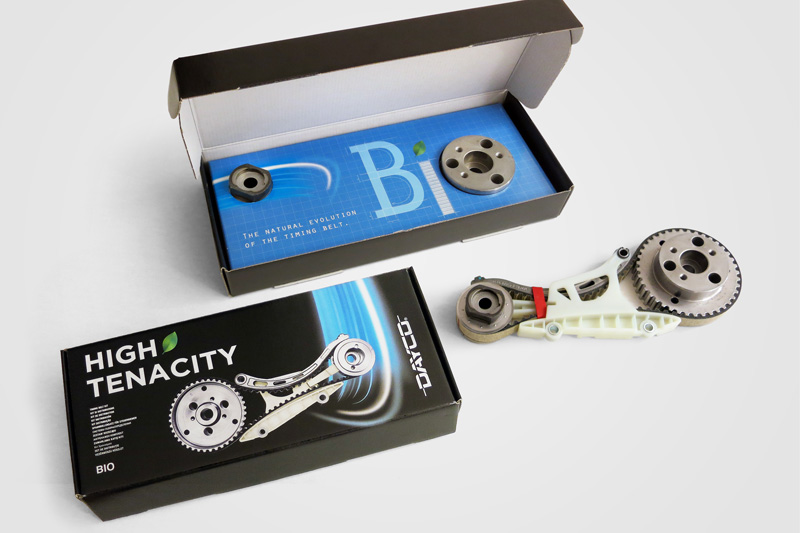
As Ford’s power transmission supply partner, Dayco designed reportedly the world’s first BIO drive system in 2007. This aimed to be the engineering solution to supersede the previous chain driven high pressure injection pump for the popular 1.8L ‘Lynx’ engine, which had been widely used to power various Focus, C-Max, S-Max, Mondeo, Galaxy, Tourneo Connect and Transit Connect models between 1998 and 2013.
Although Ford only specifies replacement of the injection pump drive components when the engine reaches 144,000 miles, Dayco recommends that, as industry best practice and to provide motorists with added peace of mind, workshops follow the vehicle’s service interval for the scheduled timing drive replacement and to substitute the injector pump drive at the same time. As well as avoiding the possibility of a subsequent failure, this policy allows workshops to update older units and replace their chain driven system with the latest BIO version, as it is a direct replacement.
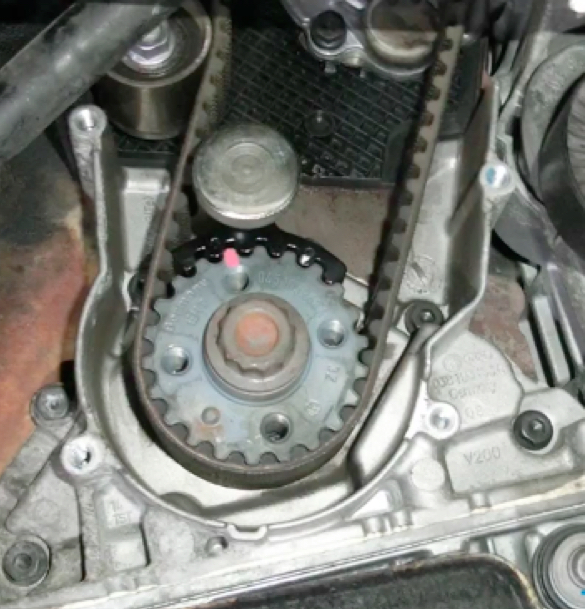
Although the timing belt on this unit is one of the shortest in common use and the drive layout simple, some may be tempted to change just the belt, which can have catastrophic consequences.
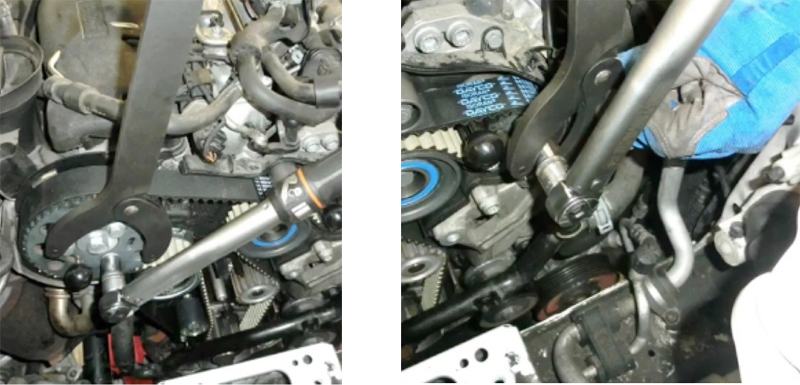
When it comes to the injection pump drive replacement, all the steps necessary for the primary drive replacement need to be followed, endorsing the idea that both should be replaced in unison. However, the replacement also requires the removal of the auxiliary belt idler pulley, injection pump timing drive pulley and the crankshaft pulley, the bolt for which should be discarded, allowing for the removal of the injection drive cover.
Remove the injection drive tensioner, then the gearwheel and the guide plates, which should enable the removal of the belt and the gear on the crankshaft. Dayco BIO kit (KBIO01) (see below) provides all the components – crankshaft and injection pump gearwheels, belt guides and belt – in a single replacement ‘cartridge’. The belt guide bolts should be tensioned to 23Nm and the gearwheel bolt to 50Nm. Once installed, fit a new hydraulic tensioner (ATB2635) and tension to 65Nm.

Refit the cover, followed by the auxiliary belt idler, which should be tensioned to 48Nm. Replace the existing crankshaft oil seal with a new seal and refit the crankshaft pulley, using a new bolt, which needs to be tightened to 100Nm. Refit the injection pump pulley and tension the bolts to 24Nm and replace the rest of the items including all the timing drive components contained in Dayco timing belt kit (KTB470).
Skoda Octavia 2.0 TDI
The 2.0L TDI diesel engine, used in the Octavia, features a timing belt-driven water pump. As belt replacement also requires the auxiliary drive system to be removed, it is recommended that all the system components – primary drive and auxiliary drive – be replaced at the same time.
As with all primary drive system jobs, the work should be undertaken when the engine is cold. Ideally, this would mean that the vehicle had not been run for at least four hours.
Remove the plastic cover to reveal the engine, followed by the mudguard moulding under the right hand wheel arch, which should allow access to the auxiliary drive system, then remove the tensioner and auxiliary belt.
Take out the tie rod beneath the engine and then the crankshaft, or TVD, pulley in order to remove the lower and central timing belt covers. Then, from the top of the engine, move the differential pressure sensor of the FAP with its bracket and the electric fuel pump with its bracket, followed by the fuel filter and cooling circuit tank, so that the top timing belt cover can be removed.
Remove the lower bolt of the engine mounting bracket flange, correctly support the engine and then remove the upper right engine mounting bracket, followed by the bracket flange.
Rotate the crankshaft clockwise to match the timing reference marks on the pulley and lock the pulley in place using the Dayco tool
T10050 (see below). Insert Dayco tool 3359 into the camshaft pulley then a second into the fuel injection pump pulley and loosen both. After loosening the bolt of the tensioner, rotate the tensioner and remove the upper idler in order to take out the timing belt. Then remove the tensioner.
Remove and replace the belt tensioner stud with the new one supplied in the timing belt kit (KTBWP5630), along with the lower and
“As with all primary drive system jobs, the work should be undertaken when the engine is cold. Ideally, this would mean that the vehicle had not been run for at least four hours.”
central idlers with nut and bolt respectively. Remove the water pump from the casting
and, after flushing the system and ensuring the mating surfaces are clean, soap the O-ring and install the new water pump from the timing belt kit.
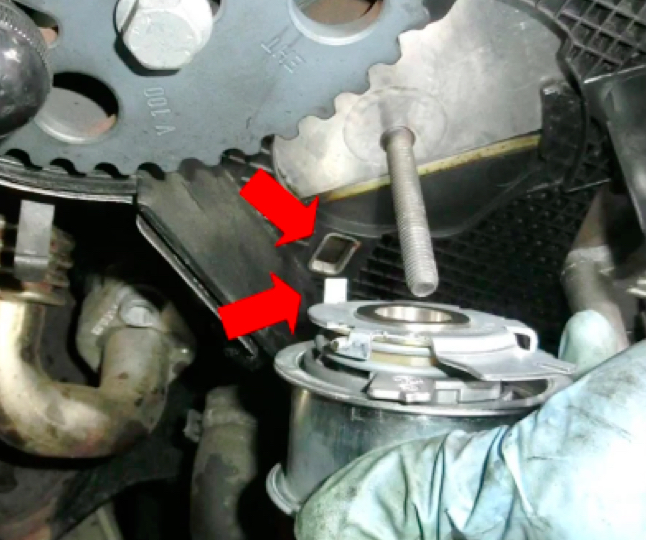
Install the new belt tensioner and nut, but make sure that the tab is inserted into the slot in the housing as shown (see below).
Then, after rotating both the camshaft and fuel injection pump pulleys clockwise, install the new HT (High Tenacity) timing belt, followed by the replacement top idler and bolt from the kit.
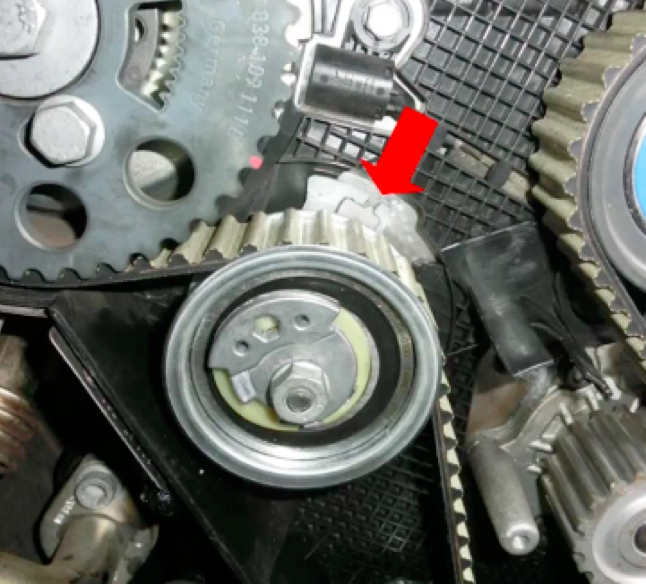
Rotate the belt tensioner with its position index inside the space in the back plate, as shown (see below), and tighten to 20Nm + 45°.
Next, tighten the camshaft pulley bolts to 20Nm + 45° and the fuel injection pump bolts to 20Nm + 90° (see below).
Remove all the timing tools and rotate the engine clockwise several turns to ensure that it is correctly timed and that the belt tensioner index is still in the backing plate space as shown previously.
Remove the alternator pulley bolt and replace the pulley with Dayco ALP2395. Using a 13mm ball-end Allen key, remove the bolt at the back of the auxiliary belt tensioner, located under the rear side of the alternator, and replace the tensioner with APV2511.
After replacing the timing belt covers and other previously removed components, replace the crankshaft pulley with DPV1123, and tighten the bolts to 10Nm + 90°. Finally, replace the auxiliary belt with 6PK1070.


