
The Renault GU9 engine is fitted to a wide range of vehicles and used by several vehicle manufacturers to power their light commercial vans.
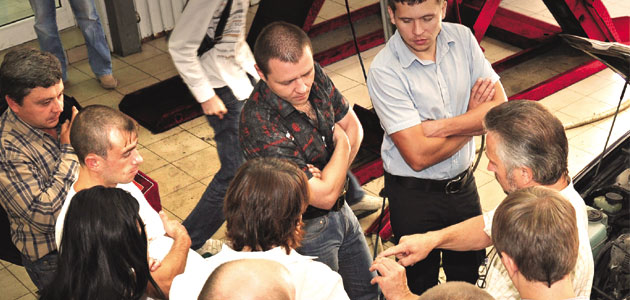
Technically speaking, the cambelt replacement procedure on this engine is well documented and may be considered a relatively straightforward procedure. For a group of experienced technicians from the North East – with a variety of engineering and vehicle workshop backgrounds – it was not quite so easy.
After removing the old belt, all seven technicians found it impossible to fit the replacement and the belt appeared to be too short. Opinions about how to solve the problem varied. Perhaps an incorrect part number had been supplied, or an engine modification had been overlooked?
One technician suggested removal of the guide pulley as a quick fix. At least that would allow the belt to fit.
The correct form of remedial action was, however, right there in the fitting data.
Although each had been supplied with correct parts and the appropriate vehicle data, all of the technicians on this training exercise had made an incorrect assumption. They assumed (wrongly) that the removal procedure was unimportant and had taken off the cam belt before moving quickly on to the next step – ignoring a vital detail.

Right first time
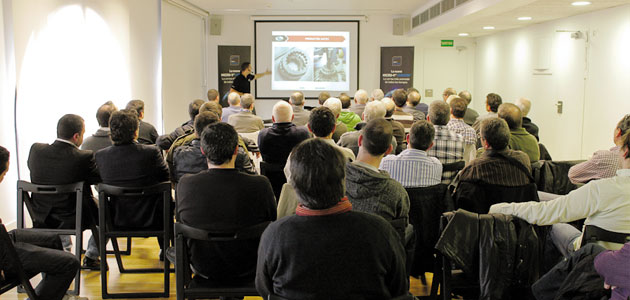
12 technicians from the West Midlands have helped stage a ‘first’ for the Gates Technical Workshop Series for drive belt systems.
Events usually comprise of drive belt specialists from a range of different garages however, on this occasion all were drawn from the same fast fit, tyres, exhaust, service and maintenance repair group.
Bilston-based EF Eurofit runs ten branches in and around the Wolverhampton area and was delighted to take up the training opportunity, which was organised by a local motor factor.
The feedback from the technicians was great with those in attendance commenting on the fact that they’d all remembered some fundamentals that they had forgotten, heard a bit more about some things they already knew and also learned a lot about installing different drive systems.
This Technical Workshop focused on Synchronous Belt Drive Systems (SBDS) and some specific models, but others can involve Auxiliary Belt Drive Systems (ABDS) or a combination of the two.
They are always organised in association with local motor factors, at a time to suit the garage, with most events taking place in the early evening after the garage has closed.
On re-examining the manufacturer’s recommended procedure, it emerged that they had left the exhaust cam pulley on the shaft. It was this oversight that appeared to make the belt ‘too short’. It must be removed as part of the stripping down procedure and, with the exhaust cam pulley removed, the pulley can be placed inside the belt. The pulley can then be refitted to the camshaft.
Summary
The procedure must be followed to the letter, from start to finish, and this case proves that the removal procedure can be just as important as the installation. There must be no short cuts and no additional ‘steps’.
Removing the guide pulley would have provided the technicians with the clearance required. However, the guide pulley bolt is particularly long so there is a real risk of cross threading – an unnecessary risk that could have compromised the drive.
Additional issues
Further fitting mistakes are common. For example, in order to remove the cam pulley and preserve the timing, a special cam locking tool is required. This also incorporates a lever arm, which comes into contact with the pointer on the tensioner.
As the tensioner is adjusted into the belt, the lever arm will rise to indicate the pointer position. It is a procedure that must be repeated, with an essential difference the second time around.
The first time, the lever arm must be level with the top of the tool. The second time, the raised part of the lever arm must be level with the top of the tool.
More often than not, technicians misread the instructions, repeating the same procedure twice. If this happens, the tensioner will be set in ‘high tension’, allowing the curser to make contact with the end stop. When that happens, the end stop will break, causing the spring to detach. The belt will no longer have any tension and the inevitable consequence will be catastrophic engine failure.
Two essential new cooling system guides from Gates
Gates is increasing its technical support for garage technicians by publishing two essential documents on cooling systems diagnosis, service and repair.
As a major supplier of OE quality replacement parts for cooling systems, the catalogue includes thermostats, radiator and expansion tank caps, curved hoses, flexible hoses, straight hoses and the necessary heater hose connectors.
1. Diagnosis Made Easy
This 16-page booklet highlights the major cooling system diagnostic issues. White smoke from the exhaust pipe, rising fuel consumption, irregular water coolant levels, liquid under the car, unusual noises in the system – and steam – are just some of the symptoms that can indicate problems within the cooling system.
2. Cooling System Troubleshooting Guide
Armed with a clearer understanding of what to look for, the professional technician can use the more comprehensive 60-page illustrated Cooling System Troubleshooting Guide, to identify and trace the faults.
Technicians are guided step-bystep. It opens with essential information before attempting a repair and goes on to consider causes of various problems, including those related to hoses, pipes, thermostats, water pumps and bearings. Contamination, corrosion and component failure are among the issues examined.
Users follow a logical route from initial diagnosis to appropriate resolution of each problem.
The guide concludes with a quiz, designed to help technicians re-cap the major issues – from identifying first evidence of a fault to basic fault diagnosis and fault rectification.


