This month’s guide from ContiTech shows you how to avoid errors when changing belts on the Fiat Doblo (263) 1.6 D Multijet variant.
EQUIPMENT REQUIREMENTS:
THE RECOMMENDED LABOUR TIME FOR THE REPLACEMENT IS 2.7 HOURS AND FITTERS NEED THE FOLLOWING SPECIAL TOOLS TO COMPLETE THE PROCEDURE:
1. CAM SHAFT LOCKING TOOL (OE NO.1870836000)
2. CAM SHAFT LOCKING TOOL (OE NO.1870896900)
3. FLYWHEEL LOCKING TOOL (OE NO.1860898000)
4. CRANKSHAFT LOCKING TOOL (OE NO.2000003000)
5. COUNTERHOLD (OE NO.1870815000)
Large numbers of the 1.6 D Multijet diesel engine are installed in Fiat vehicles, yet significant errors are frequently committed when changing the timing belt. To ensure that the belt change operation goes smoothly, fitters should adhere to a specific installation guide.
The manufacturer recommends inspecting and, if necessary, changing the timing belt at 150,000 km, or after five years for vehicles without a particulate filter. In the case of vehicles with a particulate filter, inspection after 140,000 km or five years is recommended.
Preparatory work
Identify the vehicle using the engine code and then disconnect the vehicle battery. DO NOT turn the crankshaft and camshaft once the timing belt has been removed. Turn the engine in the normal direction of rotation (clockwise). ONLY turn the engine at the crankshaft pulley, not at the other pulleys, and make sure you comply with all tightening torques. Jack up and prop the front of the vehicle.
You should then remove: the engine cover, engine compartment underpanel, front right wheel, engine compartment underpanel, ancillary unit belt & tensioning pulley and the idler of the ancillary unit belt. Then remove the air intake hose from the air filter housing and the air filter housing, air intake pipe from the turbocharger, air flow sensor, engine mount bolts, engine mount and timing belt guard. Then locate the engine support beam.
Removal – camshaft belt
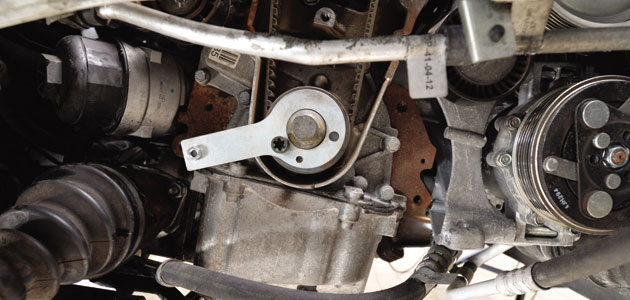
Remove the cover from the flywheel and insert the locking tool (186089000) into the flywheel.
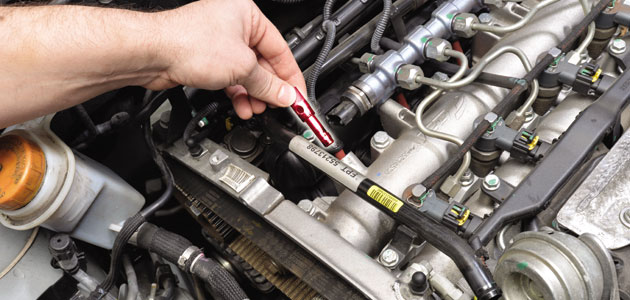
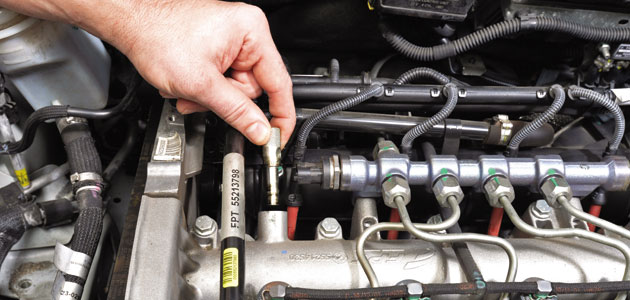
Unscrew the crankshaft pulley bolts and remove the crankshaft pulley. Remove the locking tool (186089000) from the flywheel and set the valve timings to mark. Disconnect the fuel pressure sensor plug so that the bolt can be removed from the camshaft housing.
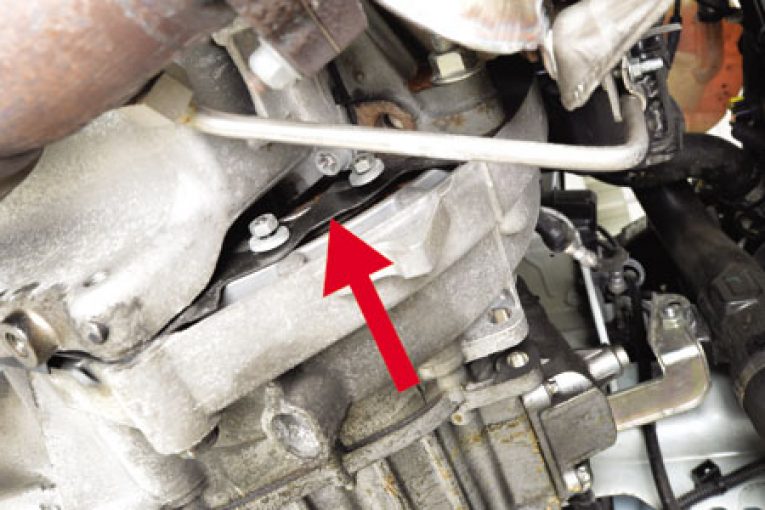
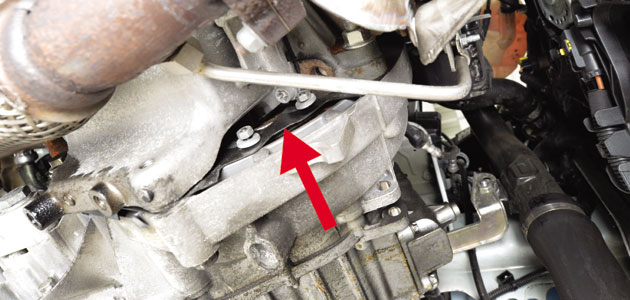
Unscrew the bolt from the crankshaft housing.
Insert the locking tool (1870896900) into the camshaft housing.
Remove the bolt from the crankcase cover next to the crankshaft pulley before placing the gauge (2000003000) on the crankshaft pulley.
After checking the valve timing setting, the gauge can be removed again and the tensioning pulley can be released by loosening the tensioning pulley bolt. The timing belt can now be removed.
Installation – camshaft belt
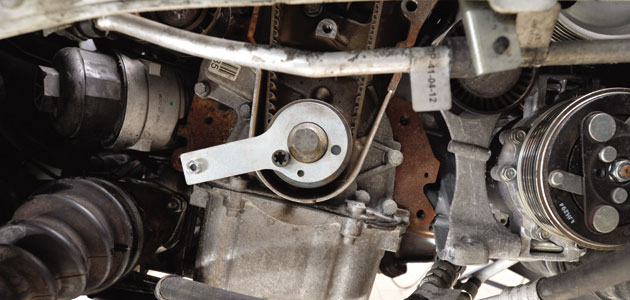
Fit the new tensioning pulley and idlers. Loosen the camshaft pulley by mounting the counterhold (1870815000) on the camshaft pulley and loosening the camshaft bolt.
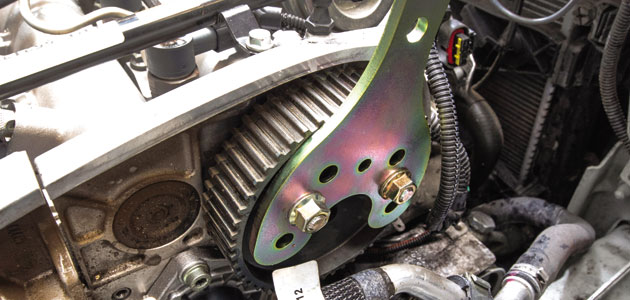
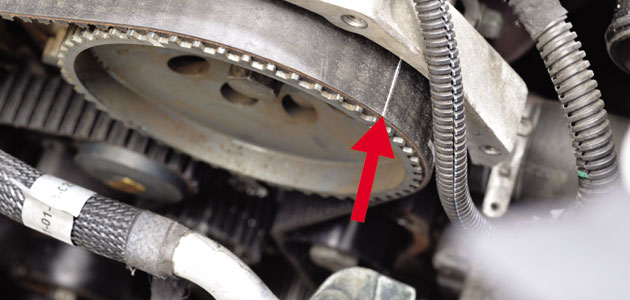
The camshaft locking tool (counterhold) (1870836000) can now be inserted. Fit the timing belt on the crankshaft pulley – starting clockwise – but take care to ensure that the timing belt is not creased during fitting. The timing belt must be tight between the pulleys on the tight side. Make sure the markings on the timing belt align with the markings on the camshaft pulley, crankshaft drive pulley and high-pressure pump pulley.
Then place the gauge (2000003000) on then crankshaft pulley again, secure with the bolts and check the valve timings.
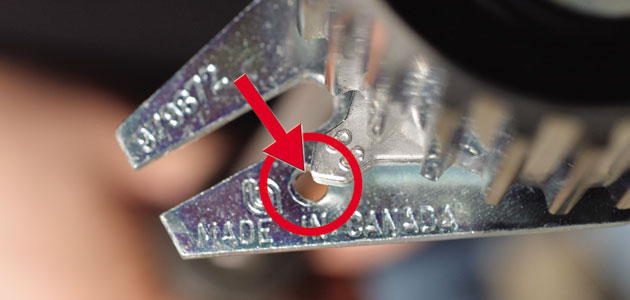
Press the tensioning pulley spring down using a screwdriver until the tensioning pulley pointer is aligned with the bore.
Tighten the tensioning pulley bolt to 23-28 Nm. Retighten the camshaft pulley bolts to the required torque using the counterhold (1870811500).
The tightening torque should be 28-31 Nm + 40°.
Remove the locking tools and then turn the engine through two revolutions in the direction of engine travel. Set the engine to TDC cylinder 1 and insert the camshaft locking tool and crankshaft pulley gauge. If the locking tool can’t be inserted, correct the valve timings. Now check the timing belt tension again. Remove the locking tools and gauge, and then locate and tighten the screw plug with the new O-ring in the camshaft housing again (13-16 Nm). Remove the holding tool and fit the components in the reverse order of removal.
Fit the timing belt guard, crankshaft pulley (tightening torque 23-28 Nm), ancillary unit belt & tensioning pulley and the idler for the ancillary unit belt. Then fit the engine mount bolts and engine mount, air intake hose from the air filter housing and air filter housing, air intake pipe from the turbocharger, air flow sensor, engine cover, engine compartment underpanel, front right wheel and engine compartment underpanel.
Record the changing of the original ContiTech timing belt on the sticker supplied and place this in the engine compartment. Then carry out a test run or test drive to ensure the procedure is complete.
TOP TIP: ALWAYS REPLACE THE TENSIONING PULLEY, IDLERS AND WATER PUMP AT THE SAME TIME AS CHANGING THE TIMING BELT.


