A lane camera calibration needs to be carried out for a number of reasons. These are: when the windshield is replaced, when a lane camera is replaced, when the position of the camera on the vehicle body has been adjusted, and when a diagnostic trouble code (DTC) indicates that a calibration has not been performed.
Vehicle preparation
Set up and perform the calibration frame levelling procedure by following these steps:
- Park vehicle on flat and level surface with front wheels pointing straight
- There should be no black and white patterning in front of vehicle
- Ensure there are no obstacles within 3m ahead and behind, and 1.5m to each side. There should be no reflective material on the ground within a 3m perimeter
- Calibration should be performed in a windless environment
- Ensure engine oil and coolant are at specified level
- Ensure fuel tank is full
- Ensure spare tyre is inside vehicle
- Ensure standard tools are inside vehicle
- Ensure the vehicle carries no extra load
- Adjust tyre pressure to recommended value
- Ensure nobody is in vehicle
- Clean windshield
- Attach VCI and diagnostic tool to vehicle Tap ‘Diagnostics’, then ‘Auto VIN’ button in top-left of screen to read vehicle ID number, and identify vehicle model and equipped systems. Confirm, then select ‘ADAS Calibrate’, and finally, select ‘Front Recognition Camera’
Note: The VM may market the system by another name, so consult user guide. Vehicle preparation may vary between vehicle and system, so follow preparations on the MaxiSys ADAS tablet to ensure accurate calibration.
Tools required
- Calibration frame CSC0600
- Target board holder CSC0600/02
- Target board CSC0601/15
- Two wheel clamps with laser attachments
- Tape measure
Calibration stand set-up
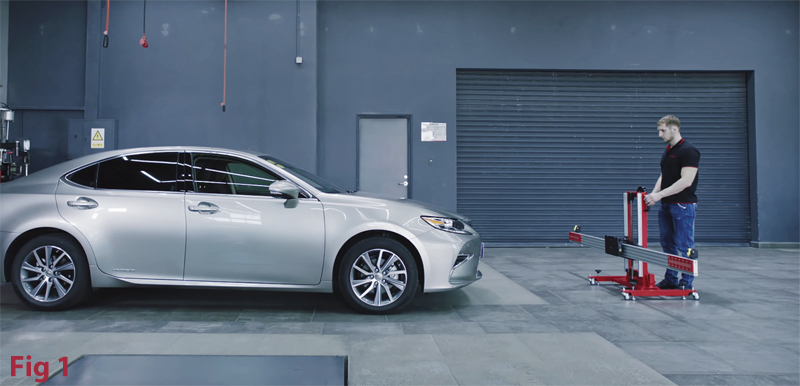
- Place calibration frame on level floor in front of vehicle. Neither pattern board nor the pattern board holder should be attached to the frame (Fig 1)
- Rotate fine-tuning bolt until marked lines align
- Loosen handle and rotate fine-tuning bolt until scale value is zero, then secure the crossbar
- Align sliding plate pointer with marked line. Tighten bolt to secure
- Turn on laser and aim at front-centre of vehicle
- Adjust crossbar height until level with centre of front wheels
- Move frame to reach required distance between vehicle emblem and the back of the crossbar, keeping laser spot centred
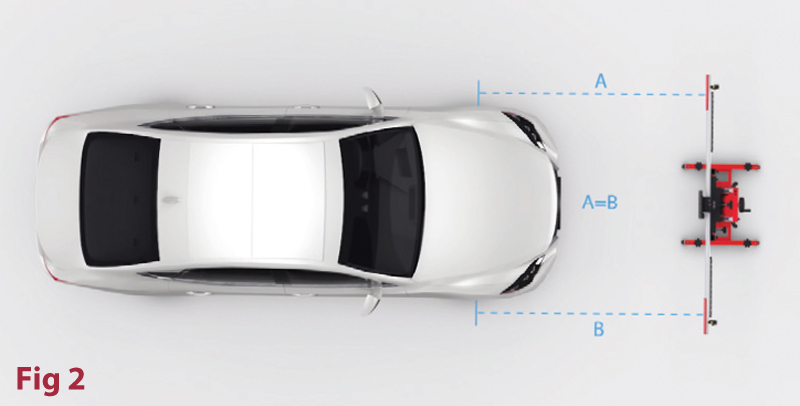
- Ensure both sides of crossbar are equidistant from centre of front wheels (Fig 2)
- Turn off laser once positioned, then rotate bolts at the base until lightly touching ground
- Securely attach two wheel clamps
- Insert connecting shaft of laser into clamp port and ensure laser calibration board faces front of vehicle. Then tighten bolt
- Turn on lasers attached to rear wheels and adjust until point hits rulers on each side of crossbar cover plate
- Rotate fine-tuning bolt until rulers on both sides have same value lit by lasers. Then secure crossbar
- Lift cover plates on both ends of crossbar
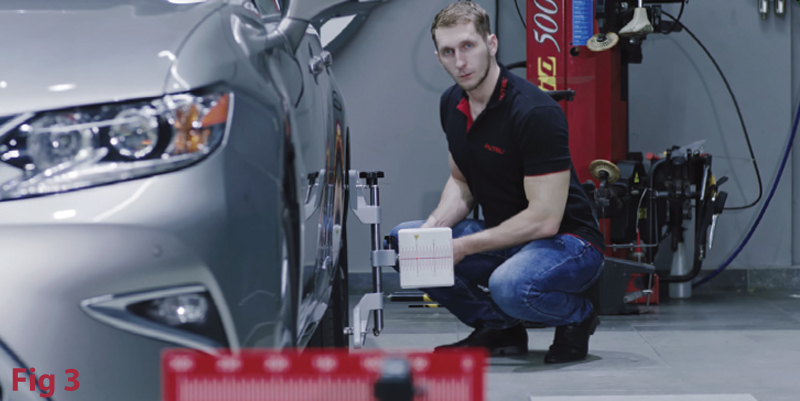
- Adjust lasers on rear wheels to control up and down movement of reflected lasers (Fig 3)
- Reflected laser must shine on scale board of laser-coordinated board on at least one side
- Rotate centre bolt left/right until scale values lit by reflected beams are same on both sides – now calibration frame is parallel to vehicle
- Close cover plates on both ends of crossbar. Close lasers on wheel clamps then remove
- Lane camera calibration
- Tighten sliding plate bolts on target board holder crossbar Attach target board holder to main crossbar and tighten bolts to secure holder
- Attach target board to sliding plate of target board holder
- Rotate bolts on base of frame, referencing bubble level to ensure crossbar is level
- Loosen ruler to touch ground
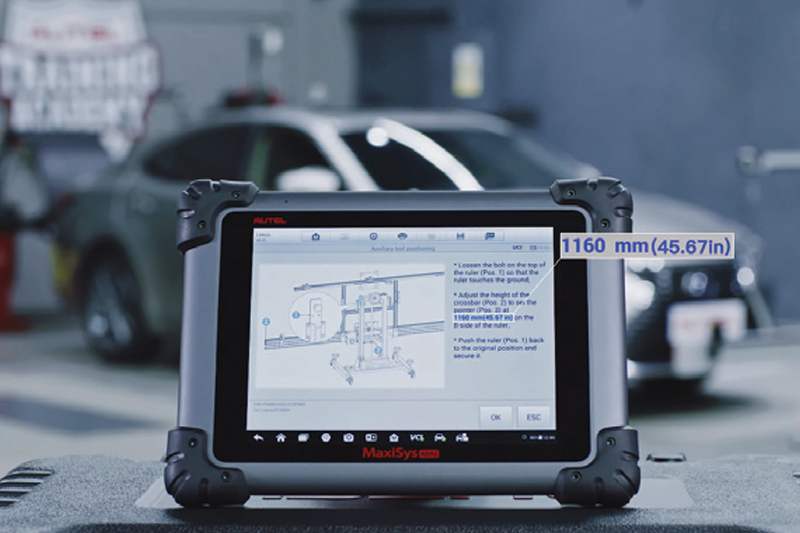
- Adjust crossbar height to set the pointer at specific height value (seen on tablet) on b-side of ruler (Fig 4)
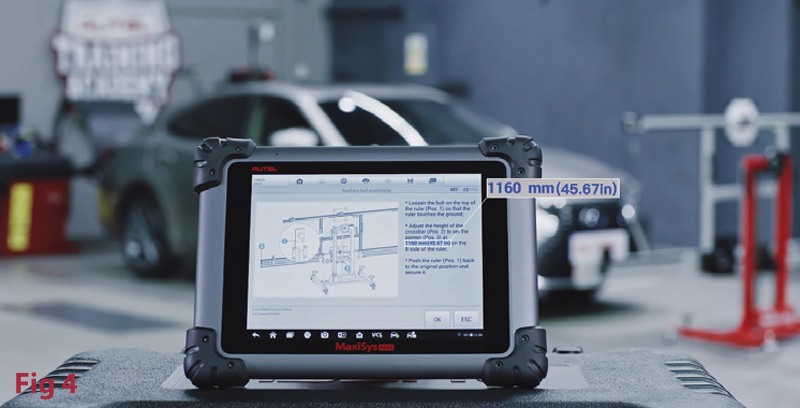
- Push ruler back to original position and secure
- Ensure engine is not running with ignition on
- Tablet screen will display relevant parameters of lane camera
- Tap ‘OK’ button on tablet
- After confirming adjustment is complete, tap ‘OK’
- Tablet screen will display parameters of ECU camera. Confirm and tap ‘OK’
- Slide target board to middle of target
- board holder crossbar, aim pointer at marked line, then tap ‘NEXT’ (Fig 5)
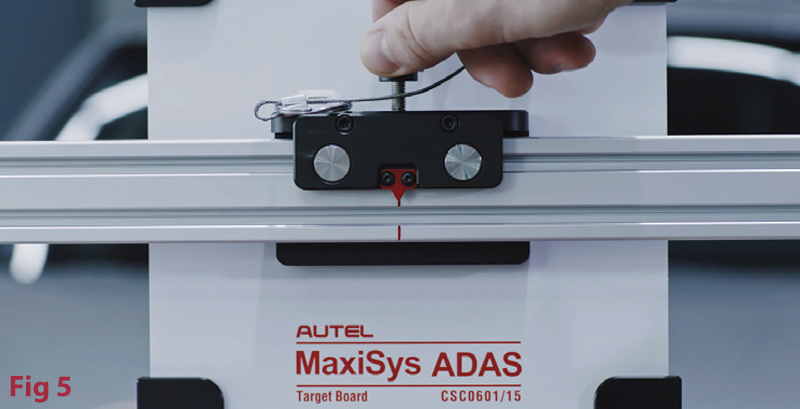
- Follow displayed instructions and perform actions within three minutes
- Slide target board to left of target board holder crossbar and set pointer at value displayed on tablet. Tap ‘NEXT’
- Follow displayed instructions and perform actions within three minutes
- Slide target board to right of target board holder crossbar and set pointer at value displayed on tablet. Tap ‘NEXT’
- Tablet will display message when lane camera calibration is successful
For more information, click here.


