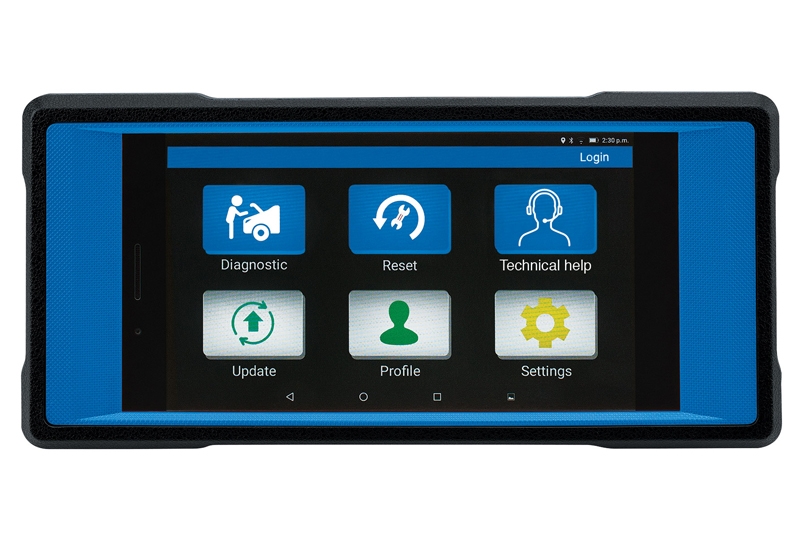
This product guide features the Draper Expert Wireless Diagnostic & Electronic Service Tablet (12044) – an easy-to-use, multifunctional diagnostics tool with full system diagnosis coverage for a range of vehicle manufacturers.
Key Service Functions:
- Oil reset
- Electronic parking brake reset
- Battery management system reset
- Steering angle sensor reset
- ABS brake bleeding reset
- DPF reset
- Injector programming
- TPMS reset
- Anti-theft key programming matching
When using the tablet for the first time, it’s best to follow the guidelines below.
First steps:
- Charge: Connect the power adapter to the tablet’s USB port and charge it up
- Start: Press the ‘power on’ button to start the tablet
- Connect: You’ll need an internet connection to register and activate the tablet, as well as to update the diagnostic software and APK. Simply tap ‘Settings’ on the home screen, then ‘WLAN’ and connect to your network
Register and update:
■ Tap the App to create a new account
■ Once you’re logged in, the next step is to activate the VCI Connector. Simply input the product serial number and activation code, then tap ‘Activate’
■ Once you’ve successfully registered, you’ll be prompted to update the diagnostic software. Tap ‘Yes’ and ensure there is a strong wireless connection during the download
Preparation and use:
■ Now you’re ready to use the tablet. Switch the ignition on. The battery voltage should be 9 to 14V and the throttle should be in a closed position
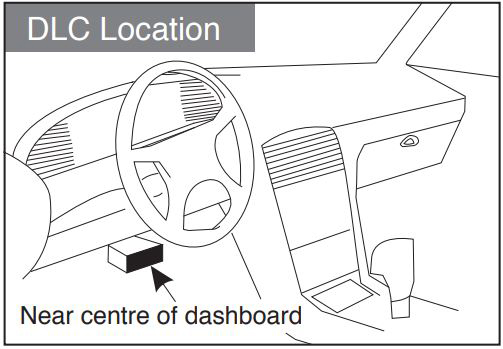
■ Locate the vehicle’s DLC (data link connector), which is generally located on the driver’s side, about 12” away from the centre of the dashboard
■ Select the desired diagnostic connector according to the vehicle DLC type
Start diagnostics:
■ Tap ‘Diagnostic’ from the home screen
■ Select the vehicle model
■ Select ‘software’, followed by ‘test system’
■ Finally, select the desired test function
Tips for use:
■ Remember to remove the VCI connector from the vehicle’s DLC and re-insert it into the slot on the back of the tablet after use to avoid losing it. We recommend connecting via the extension lead – so you see it and don’t forget it. Just in case, the machine will give an audible warning if you forget
■ The software is updated constantly, so to enjoy the full features and maximum functionality, we recommend you update the unit regularly. Just tap ‘Update’, select what you want and let the machine do the rest
■ You can customise the unit to print detailed diagnostics reports featuring your company’s name, as well as record multi- channel, real-time diagnostics information during a test drive for subsequent analysis and download diagnostics data for before/ after testing – all using the built-in software
■ Don’t forget, it’s also a fully functioning tablet; you can take photos, and record videos with sound, which enhances your record keeping and gives proof to your customer that the issue they had has been fully investigated and rectified.