
The quality of a water pump generally depends upon the use of high-grade components, as these ensure a component repair in workshops and satisfied customers overall.
Even the best selection of materials, however, can’t prevent premature water pump damage that can be caused by ignoring fitting instructions. The following examples describe typical damage patterns and their causes.
Water pump leakage
PROBLEM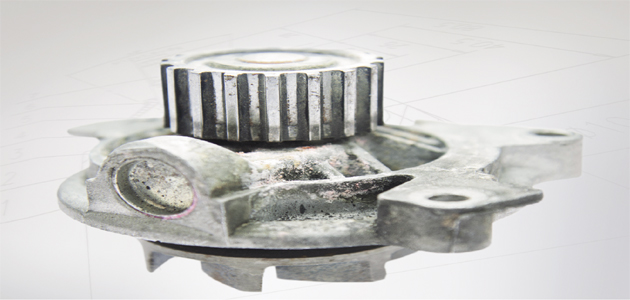
A leaking radial seal results in water pump leakage. The radial seal reacts sensitively to particles and will not seal properly. It should be noted, however, that small amounts of fluid egressing from the bleed hole shortly after installation are harmless, as the sealing elements do not settle until after the run-in period.
POSSIBLE EFFECTS
- Coolant loss
- Risk of engine over-heating
- Possible damage to the shaft bearing
MEYLE MASTERCLASS!
Thoroughly flush the cooling system prior to installing the new water pump to remove contaminants. Follow the flush procedures recommended by the vehicle manufacturer and use the specified fluids.
Defective bearing
PROBLEM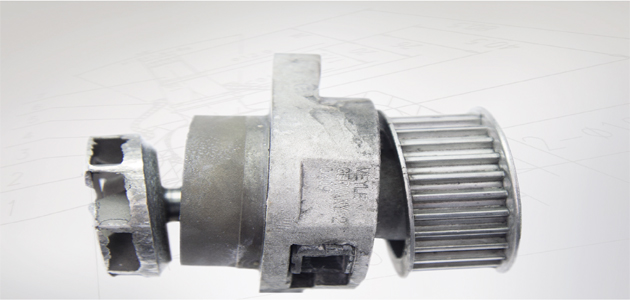
Excessive strain frequently caused by incorrect belt tension results in bearing damage – the result of which is often bearing failure.
POSSIBLE EFFECTS
- Noise from the pump
- Water pump failure
- Engine damage (worst case scenario)
MEYLE MASTERCLASS!
When tensioning the belt, observe the vehicle manufacturer‘s specifications and use the recommended special tooling. We recommend that all belt drive components be replaced. Unusual noise coming from the belt drive must also be checked immediately.
Damage to the housing
PROBLEM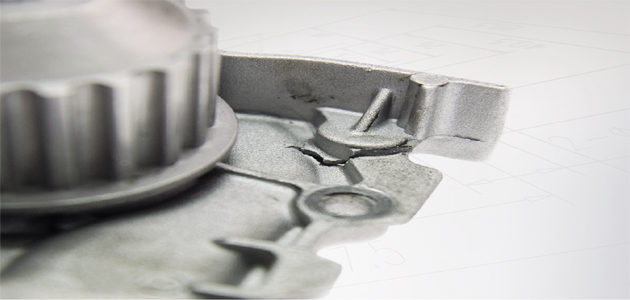
Incorrect alignment when installing the water pump and over-tightened screws lead to strain, which can cause fissures in the housing. These structural damages lead to leaks and, eventually, failure.
POSSIBLE EFFECTS
- Water pump leakage
- Engine damage
MEYLE MASTERCLASS!
To ensure strain-free installation, clean the seal face thoroughly and handtighten the screws. Follow the installation procedures recommended by the vehicle manufacturer and apply the specified torques.


