Note: Always remember to wear safety goggles, hat and boots when working under a car. 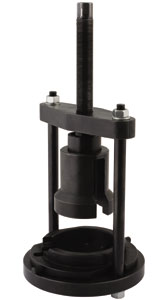
First Line’s innovative bush fitting tool FLST100 revolutionises the notoriously labour intensive process of replacing the rear trailing arm suspension bush on the Ford Mondeo/Galaxy/S-Max and Volvo S60/S60II/V70. It can save up to three hours (one and a half hours eachside) labour as it dispenses with the need to remove the arm, disconnect the brake lines, brake cables or even the road wheels!
STEP 1
With the vehicle on a wheel-free ramp, support the relevant wheel with a suitable stand. Remove the lower shock absorber mounting bolt and remove the lower outer track control arm fixing.
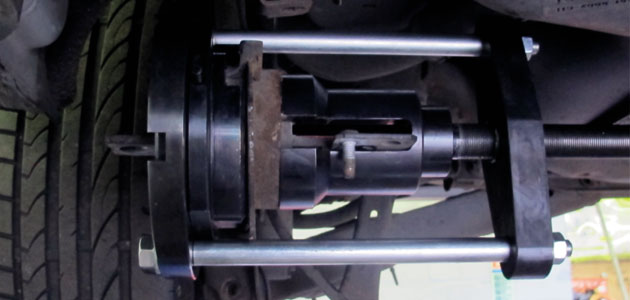
STEP 2
Remove the trailing arm bush mounting, unclip the brake pipes/cables from the arm and lower the arm just enough to fit the tool.

STEP 3
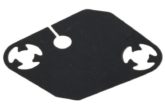
As the new bush must be positioned correctly in ALL directions, it is important to note and mark the orientation of the old bush.
STEP 4a
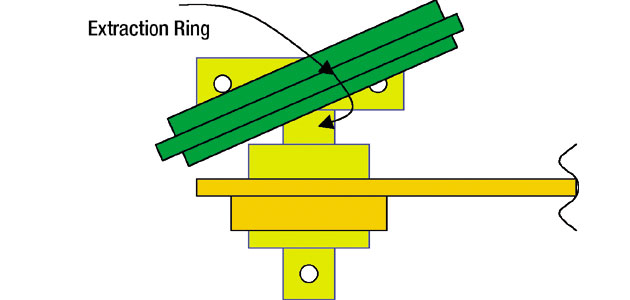
Remove any hard rust and dirt that will prevent the tool from fitting squarely on the arm and mount the extraction ring (without its pins) using the slot to allow the ring to be fitted over the “T” shaped plate of the bush, ensuring the correct orientation of both flats on the extraction ring.
STEP 4b
STEP 5a
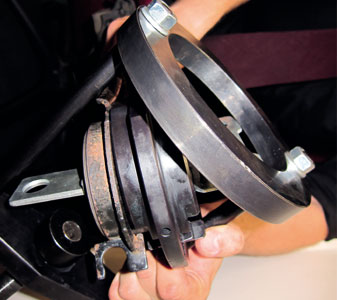
Lubricate the press frame force screw with molybdenum disulphide grease and wind the force screw out fully. Fit the press frame over the “T” section of the bush and engage it with the extraction ring. Then fit the slotted extraction cup.
STEP 5b
Ensure the cup seats correctly in the bush and wind in the force screw until the cup sits into the bush and all components are correctly aligned.
STEP 6
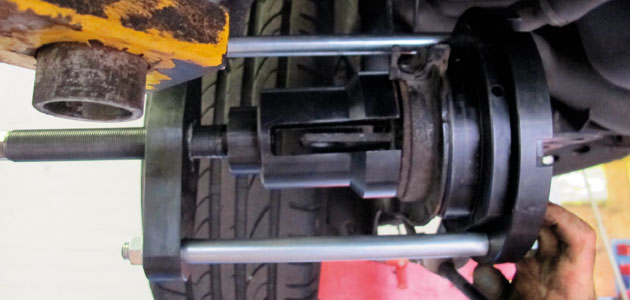
Using a suitable wrench (not a power, impact or air gun) continue increasing the load until the bush is pushed out. Be ready to catch it.
STEP 7 – Fitting the new bush
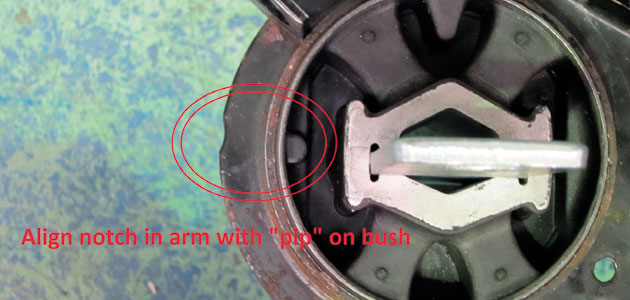
After cleaning the suspension arm to accept the new bush, ensure that the bush is correctly positioned and, because the bushes are either left or right handed, the correct bush is to be used. The new bush must be positioned correctly in ALL directions, so ensure the new bush is in the same position that the old bush came out from. The depth pins will ensure the correct lateral insertion is obtained.
STEP 8a
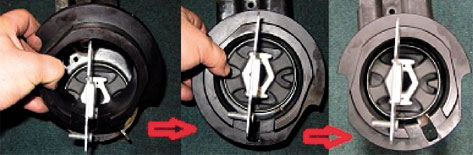
Take the fitting/extraction ring and position it against the opposite side of the arm to the direction that the old bush came out from.

STEP 8b
There are two machined flats on the ring that allow the ring to sit flat against the arm. Then fit the press frame.
STEP 9
Grease the force screw, ensuring no dirt or rust has contaminated its thread. Place the new bush in position and place the slotted cup in its position, which, remember, is not central, so ensure it is correctly aligned with the bush centre plate and that the leading edge aligns with the bush.

STEP 10
Wind the force screw in to apply a small amount of load. Double check the bush is correctly aligned in its radial plain. Apply a small amount of grease to the insertion pins and fit the three pins into the holes provided on the side of the insertion ring.
STEP 11
Using an appropriate wrench on the force screw, push the bush in until it seats against all three pins. Check alignment and remove the bush tool.
STEP12
After reassembly of the rear suspension the rear wheel alignment must be checked.
Check out the technical video showing you how to use the FLST100