A full clutch replacement guide for a Vauxhall Corsa, 1.3 CDTI from the experts at Schaeffler Automotive Aftermarket.
Equipment Used:
Engine Support, Transmissions Jack, Thin-Walled 36mm Socket and Two-post Ramp.
This month, Schaeffler’s Alistair Mason replaced the clutch and dual mass flywheel (DMF) on a Vauxhall Corsa 1.3 CDTI, while also taking a close look at a modified concentric slave cylinder (CSC) replacement.
The customer had complained that he could smell intermittent burning and that engine revs increased when driving up steep hills, in a high gear. A short road test confirmed the clutch was at the end of its service life and a clutch replacement was needed.
For this job, an engine support, transmission jack and a thin-walled 36mm socket are needed, as well as a two-post ramp.
Procedure step-by-step
With the vehicle positioned on the ramp, slacken both front hub nuts using the 36mm thin-walled socket and open the bonnet. Remove the engine cover, battery cover, battery and, after disconnecting the wiring loom clips and relay, remove the battery tray.
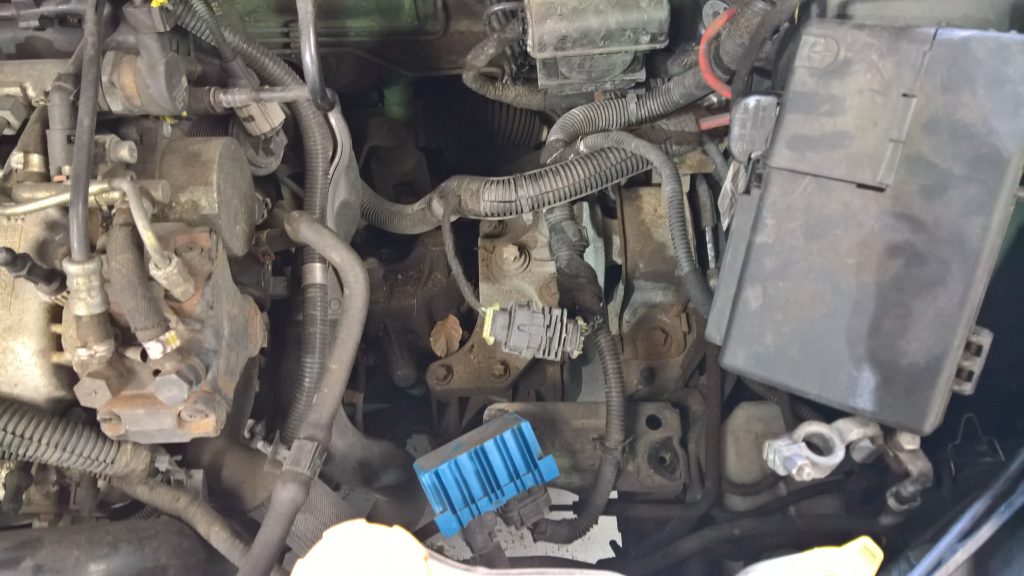
With the battery tray removed, access to the gearbox and bell housing area is unimpeded (see below).
Next, detach the intake hose at the turbo, remove the hose retaining bracket from the front of the bell housing and ease the hose downwards, out of the engine bay, leaving it connected to the intercooler.
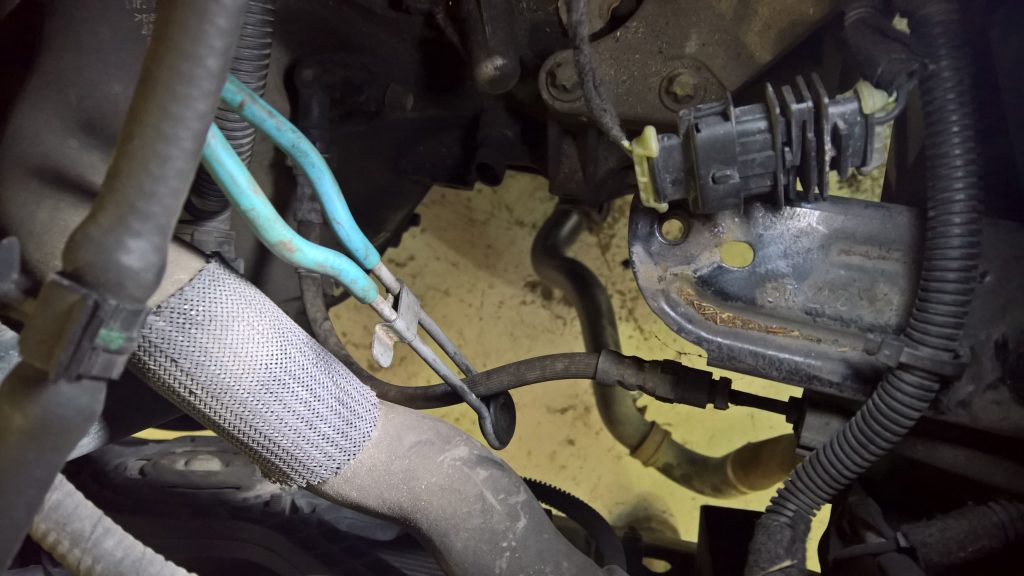
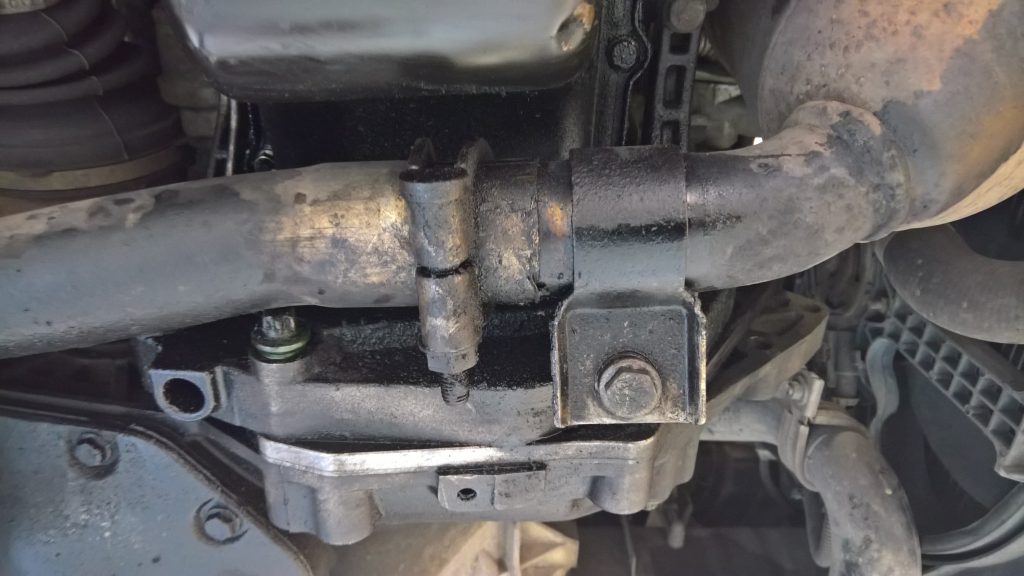
Disconnect the reverse light switch multi- plug and clamp the flexible part of the hydraulic clutch pipe (see below).
Then, separate the clutch pipe at the bell housing connection by easing back the retaining clip. The top bell housing bolts can now be removed and, consequently, the retaining pin for the upper gear linkage assembly can also be detached (see below).
Next, raise the ramp to waist height, remove both front wheels, both front hub nuts, disconnect both bottom ball joints and then detach both driveshafts, which may cause some gearbox oil to drain out, so it is advisable to have an oil drainer ready.
Continue to raise the ramp to gain access to the underside of the vehicle. Then, remove the sub-frame cross brace, disconnect the exhaust front pipe bracket from the bottom bell housing, and release the two bottom bell housing bolts – note: the exhaust can be eased to the side to release the bolts and the bolts will stay in the location (see below).
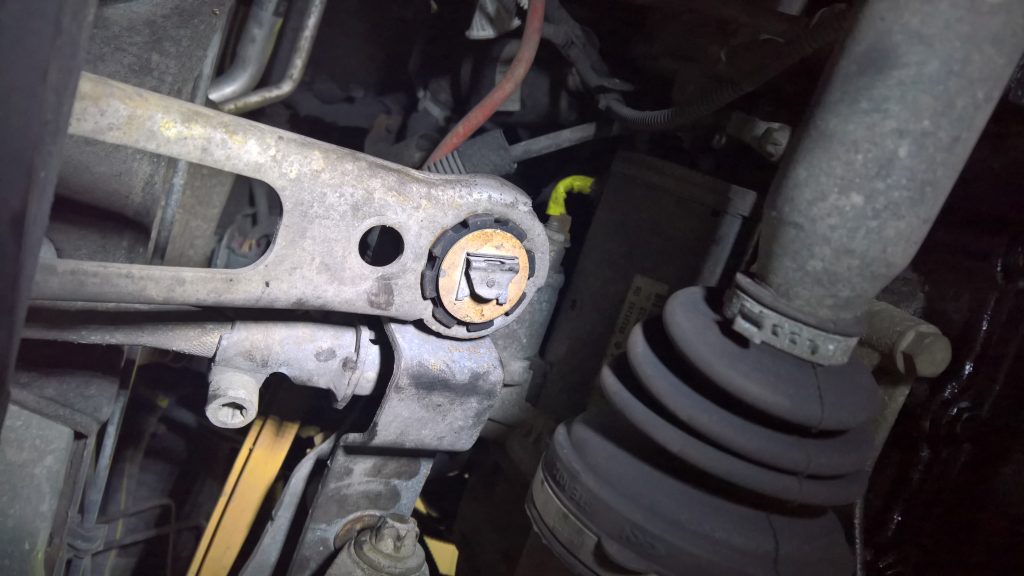
Remove the complete lower pendulum gearbox mounting, which paves the way to disconnect the lower gear linkage pivot point assembly. This can be achieved by removing the retaining clip (see below).
Support the engine, using either an engine beam, sub-frame attached support, transmission jack or large axle stand. Next, remove the upper gearbox mounting, lower the engine slightly, support the gearbox using a transmission jack and then remove the remaining bell housing bolts. Finally, ease the gearbox away from the engine and lower on the transmission jack.
Remove the clutch. On this occasion, when inspecting the DMF, ‘bluing’ was evident, which was caused by excess heat when the clutch was slipping. For this reason, flywheel replacement was advised and authorised by the customer.
Remove the DMF and inspect it for any leaks. Once satisfied there are no leaks, clean the back of the engine with brake and clutch cleaner, so the new clutch and flywheel assembly will be contamination-free.
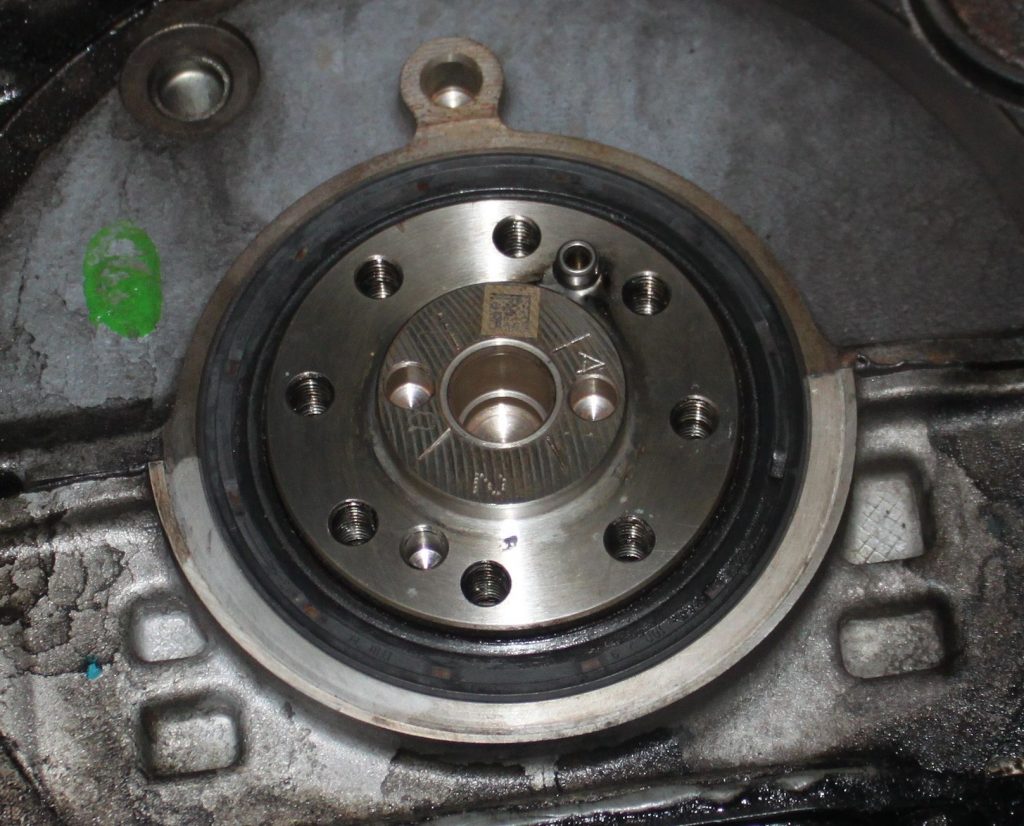
Ensure the new DMF is correct; locate the DMF on the crankshaft and that the dowel has been found in the back of the flywheel (see below). Fit new flywheel bolts, tighten evenly and sequentially, and then, finally, torque to the manufacturer’s specification.
Replace CSC
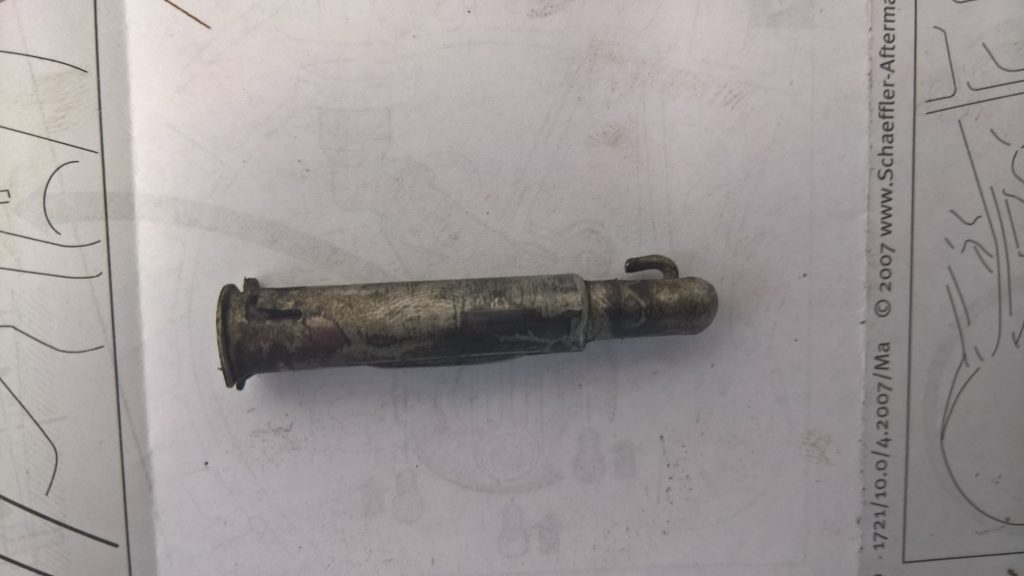
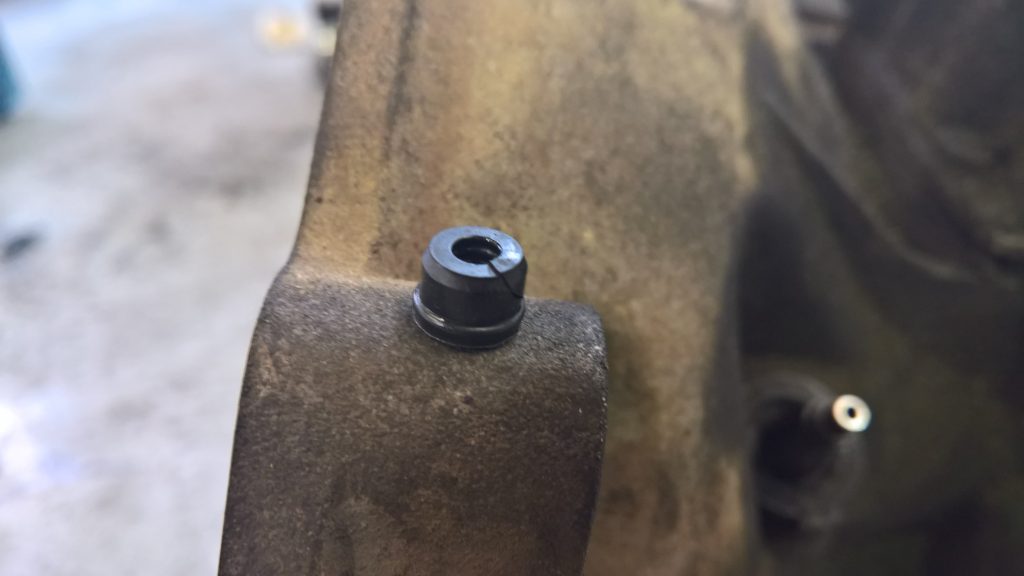
Firstly, and most importantly, locate the ‘top hat’ seal which will be located on at the end of the CSC pipe or in the end of the hydraulic pipe connection that attaches to the CSC. Once removed (see below), discard.
Next, remove the metal pipe from the CSC. Once this has been undone, remove the pipe and plastic bush from the bell housing and discard. Subsequently, detach the three CSC retaining bolts and remove the CSC, ensuring the sealing O-ring is also separated. At this point, clean the bell housing using brake and clutch cleaner. Find the new O-ring on the CSC mounting (see below). Then, carefully fit the new CSC. As the gearbox input shaft oil seal is integrated into the new CSC, screw the three new CSC retaining bolts tightly and torque to the manufacturer’s specification.
Crucially, and worth remembering for every repair, never operate/squeeze the CSC until it is fixed into position, as this can cause damage to the new unit.
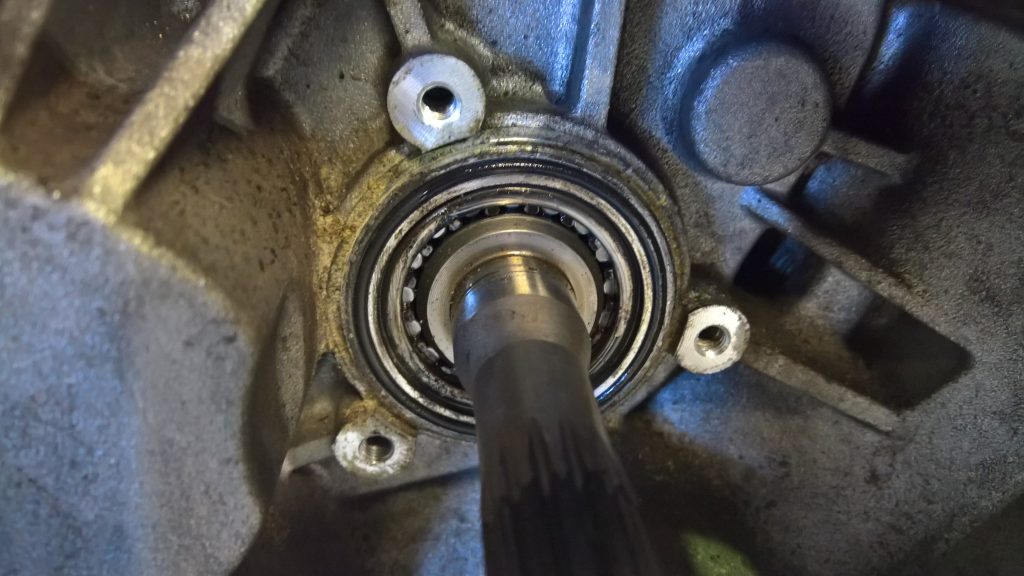
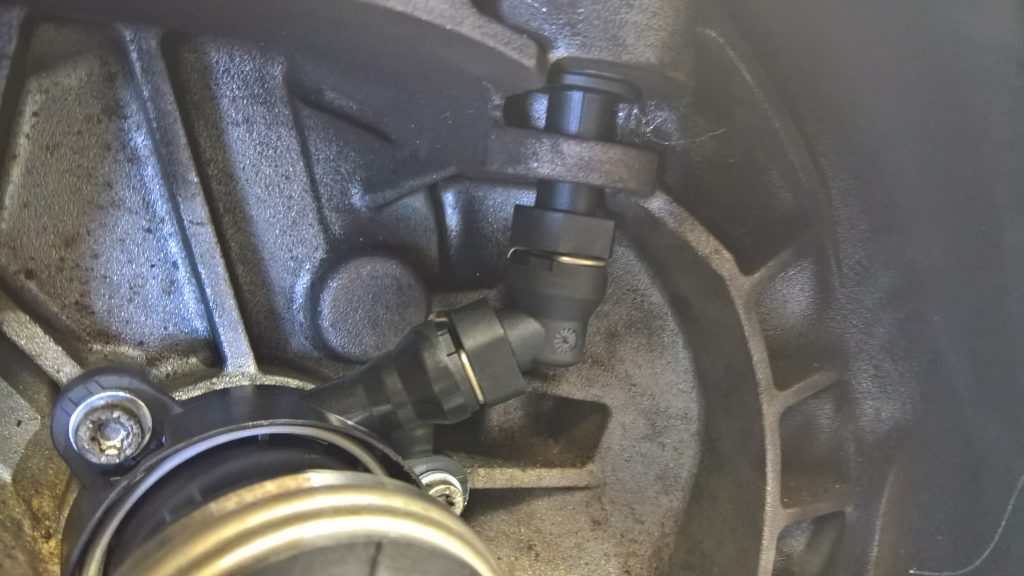
With the CSC fixed in position, insert the plastic connection pipe through the bell housing and ‘click’ into position (see below). Ensure the gearbox input shaft is clean, then lightly lubricate it with high melting point grease, then slide the new clutch plate onto the splines – this will guarantee the clutch plate is the correct fitment and will evenly distribute the grease. Next, remove the clutch plate and wipe off any excess grease.
Now, fit the new clutch to the DMF using a clutch alignment tool to ensure the clutch plate is aligned correctly. Confirm ‘gearbox side’ – or ‘getriebe seite’ – is facing the gearbox and then mount it onto the DMF using the new bolts that are included in the clutch kit. Clutch bolts are manufactured to critical length, and it is important that these are used. Bolt into position and then tighten and torque evenly and sequentially.
Before reinstalling the gearbox, it is best practice to flush the old clutch fluid out of the system, so it doesn’t contaminate the new CSC. To achieve this, place an oil drainer under the clutch pipe, remove the pipe clamp and then fill the reservoir and allow the fluid to flow through the system.
Once flushed, re-clamp the pipe, but before refitting the gearbox, check the alignment dowels are still installed in the engine block. Once sure, refit the gearbox, finding the two bottom bell housing bolts as the component is located on the dowels and secure it in place.
Refit all parts in reverse order of removal, torqueing to the manufacturer’s instructions when required. It is best practice to bleed the clutch as soon as possible, to ensure correct operation, with a bleed bottle with a one-way valve. This allows air and fluid to pass out of the system when the pedal is pressed and then sealed when it is released – remember, keep topping up the clutch fluid reservoir when bleeding.
Once the repair is complete, check and top-up the gearbox oil as required, and reset the electrical systems, as the battery has been disconnected and then carry out a full road test to ensure a quality repair.


