Full timing belt replacement guide for a Lexus RX 400 H, 3.3l petrol engine with Dayco kit KTBWP8330.
The 3.3L petrol engine (3MZ-FE) used in the Lexus RX 400 H and manufactured between 2005 and 2008, features a timing belt- driven water pump. As replacing the belt allows easy access to the water pump, Dayco recommends that all the system’s components – including the water pump – are replaced at the same time.
This step-by-step technical guide will help technicians through the process, avoiding complications and ensuring a first rate professional job. As with all primary drive system jobs, the work should be undertaken when the engine is cold. Ideally, the vehicle will not have been run for at least four hours.
Start by removing the battery cover, followed by the cover over the brake fluid reservoir, then the battery clamp, before disconnecting first the negative, then positive, cables from their terminals. Once the battery has been lifted out, detach and remove the battery tray and then its support. This provides access to the engine’s reaction rod, top bracket and reaction rod support, all of which need to be removed in order to reach the top timing belt case.
Remove the offside front wheel and the cowling behind it to reveal the crankshaft pulley, which also needs to be detached, but because the vehicle is a hybrid, it has no auxiliary belt to take off beforehand. With access to both ends, remove top and bottom timing belt covers, followed by the flange above the water pump.
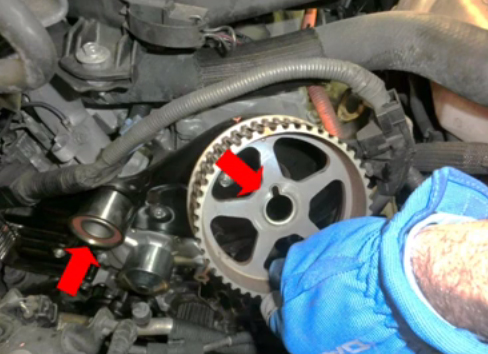
After making a note of its installation direction, remove the guide flange on the crankshaft and use the crankshaft pulley bolt to rotate the shaft clockwise, align the timing marks on the camshaft and crankshaft pulleys, and then remove the timing belt tensioner, belt and idler. Lock the camshaft on the front bank of cylinders and remove the pulley.
Now remove the water pump and engine-side timing belt cover bolts and, while slightly raising the cover, slide out the water pump.
After flushing out the cooling system to remove any debris and cleaning the water pump facing, cover both sides of the gasket with a thin layer of sealant before carefully positioning it on the new water pump, Dayco DP247. Position the water pump and refit it, along with the engine-side timing belt cover, with their respective bolts.
Install the new idler, Dayco ATB2004, tightening its bolt to 43Nm and refit the camshaft pulley, tightening its bolt to 125Nm (see below).

“As with all primary drive system jobs, the work should be undertaken when the engine is cold. Ideally, the vehicle will not have been run for at least four hours.”
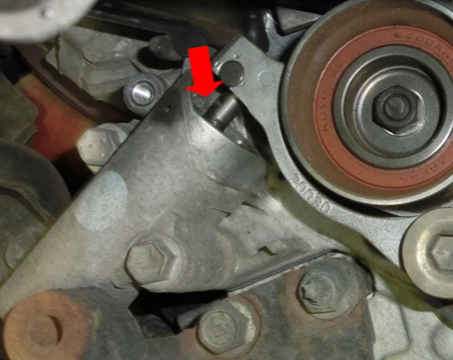
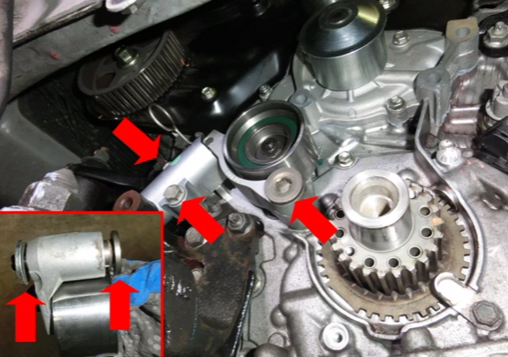
Provided there is no oil leaking from its piston, (see below) the tensioner’s hydraulic actuator can be reused, otherwise it must be replaced.

However, even if it can be reused, it must be removed, in order to be reset. Slowly compress the piston, lock it with a suitable pin and leave it in its normal operating position for about an hour to stabilise the oil it contains, then reinstall and tighten its bolts to 27Nm. Install the new tensioner, Dayco ATB2265, and tighten its bolt to 34Nm (see below).

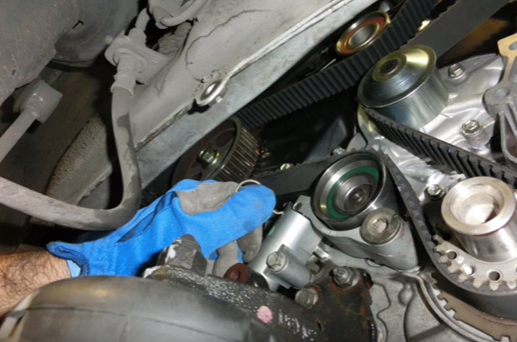
Fit the new timing belt, Dayco 94539, following the direction of the arrows printed on its back, while letting the loose section of the belt face the tensioner. Then, ensuring that the timing marks on the camshaft and crankshaft pulleys are aligned, remove the pin from the hydraulic actuator (see below).

Rotate the engine clockwise through two full revolutions and check that the camshaft and crankshaft timing marks are still aligned and, provided they are, refit all of the items previously removed, following the reverse order of their removal, tightening the crankshaft pulley bolt to 220Nm.
Finally, refill the cooling system, start the engine and carefully check for leaks and ensure the radiator fan is operating correctly. Then, once the engine is cold, check the level of the fluid again.


