Schaeffler REPXPERT Alistair Mason explains to PMM how to replace the front and rear wheel bearings on a 2012 Audi A6.
With vehicles parked up for prolonged periods of time during this year’s lockdowns, we now enter the season when large puddles are hard to avoid and potholes appear from nowhere. All these factors can contribute to reducing the service life of a wheel bearing.
As a safety critical component, FAG wheel bearings are the obvious replacement choice because they are manufactured for the vehicle manufacturers, to the highest standards. Supplied with everything required to make a full repair, they provide professionals with a complete repair solution that reduces installation errors, and come with a two-year, unlimited mileage warranty against manufacturing defects.
The front wheel bearing is a bolt-on unit known as a Generation 2D, which is a double-row sealed tapered bearing that incorporates the ABS encoder ring. The unit bolts directly onto the hub carrier, while the hub flange has to be pressed into the new bearing and the bearing preload is set by torqueing the hub bolt.
The rear wheel bearing is a Generation 2, which is also double row sealed, but this one uses angular ball bearings. Again, it incorporates the ABS encoder with the bearing preload set by the torque of the hub bolt.
These front and rear wheel bearing units are used extensively across the Audi range and will be found on A4, A5, A6, A7, A8 and Q5 models. The workshop equipment required for this procedure is:
- Vehicle lift (two post is ideal)
- Hydraulic press
- Bearing carrier removal tool
Front wheel bearing replacement
The scheduled time for this procedure is 1.8 hours.
With the vehicle placed on the ramp, but still at floor level, slacken the wheel bolts and centre hub bolt. Raise the vehicle to waist height and remove the front wheel, then the brake calliper, by removing the carrier to hub carrier bolts. Detach the brake pad warning light loom from the hub carrier and secure the calliper assembly, so not to strain the flexible brake pipe. Now, remove the brake disc by removing the small Torx bolt and easing the disc off the flange, remove the four Torx bolts, then secure the brake disc back plate and remove the back plate.
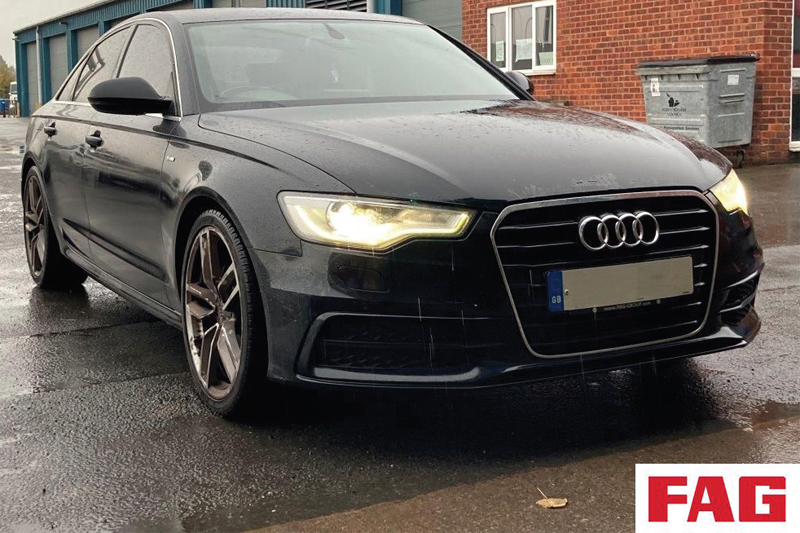
This now provides good access to the ABS sensor, so remove the Allen bolt and ease the ABS sensor out of the hub carrier (Fig 1).
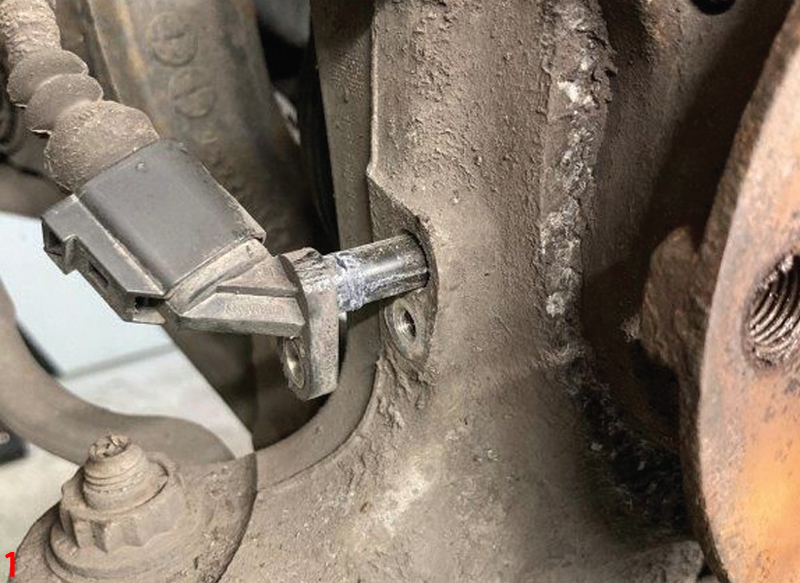
Remove the centre hub bolt previously slackened, then the plastic driveshaft cover from the inner wing, retained with two plastic nuts (Fig 2), and the six driveshaft flange bolts from the inner driveshaft joint. Ease the inner driveshaft joint upwards and the outer CV joint can be removed from the hub assembly and the driveshaft from the vehicle.
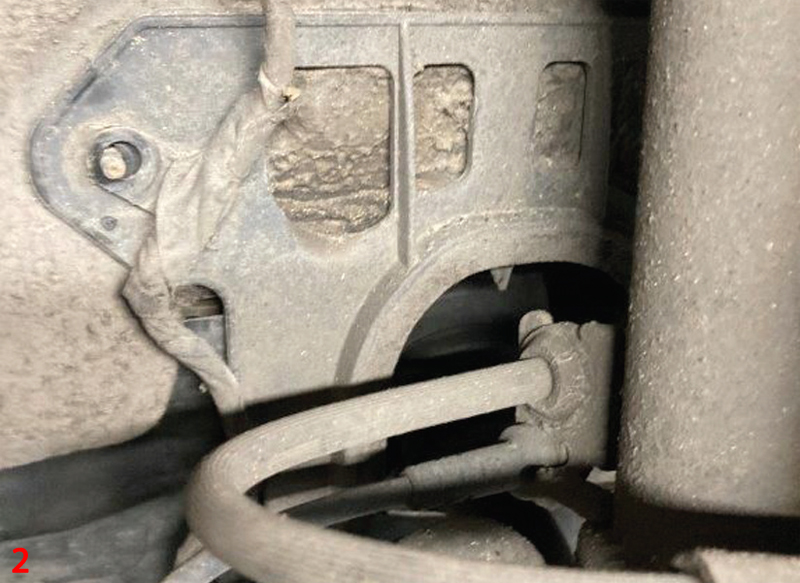
Detach the four wheel bearing carrier bolts (Fig 3). However, the steel bearing carrier is likely to be seized into the aluminium hub carrier, so a special tool and the following procedure will be required to remove it.
- Mount the ‘push plate/ring’ directly behind the drive flange
- Position the five ‘push pins’ through the drive flange
- Insert the small ‘sleeve/bush’ in the end of the drive flange
- Mount the large ‘push plate’ onto the large threaded bolt, lubricate the bolt and position onto the drive flange (Fig 4)
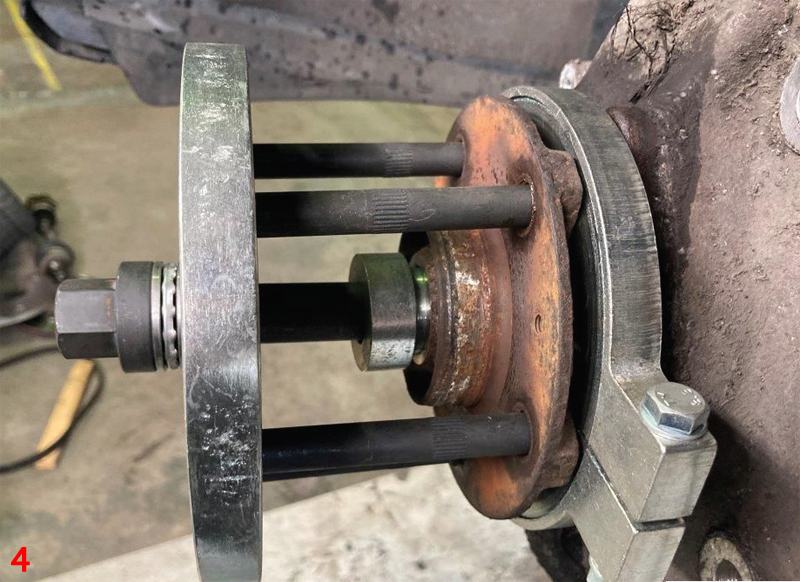
- Mount the small mandrel that pushes on the back of the drive flange onto the threaded bolt and fit the large nut hand tight (Fig 5)
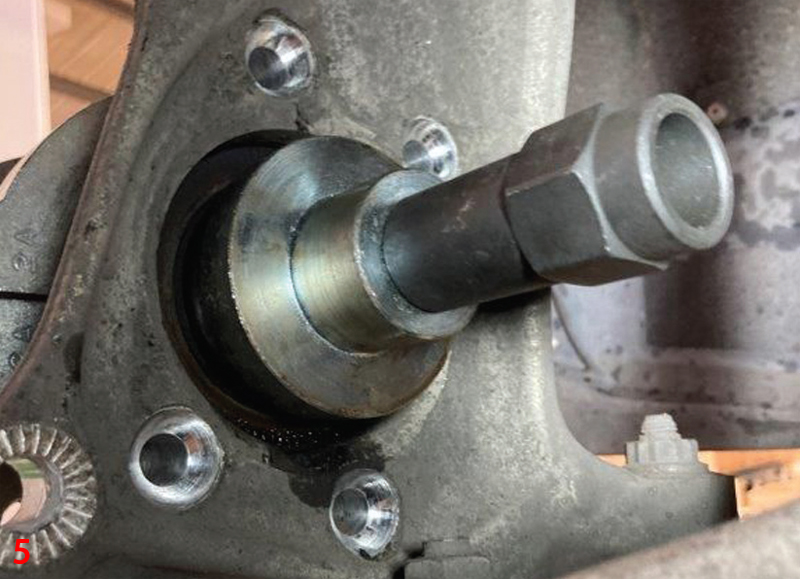
- As the bolt is tightened, it will draw the drive flange out of the wheel bearing; the inner race may stay fixed to the drive flange, which can be removed later
With the drive flange removed, the bearing carrier assembly can be removed by the following procedure:
- Screw the two threaded location pins into the large ‘push plate’ and insert the large threaded bolt
- Lubricate the large threaded bolt, mount the large ‘push plate’ and threaded bolt into the wheel bearing
- Insert the larger mandrel on the rear of the bearing and secure in place with the large nut
- Adjust the two threaded location pins to ensure the large ‘push plate’ is square to the wheel bearing carrier
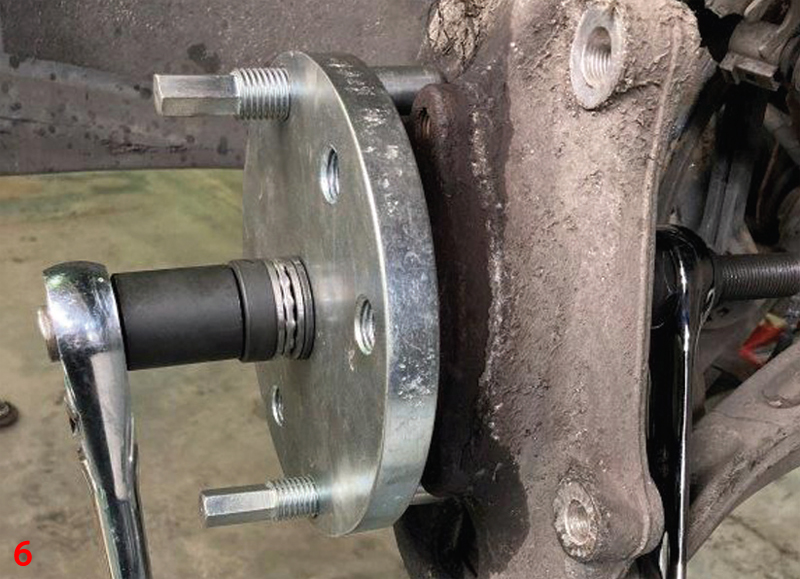
- Tighten the bolt (Fig 6) until the wheel bearing carrier is removed
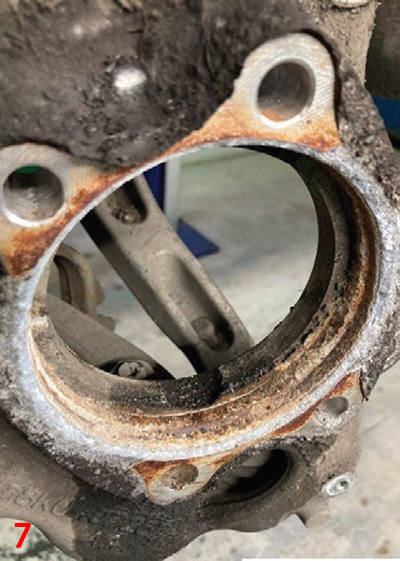
With the wheel bearing assembly removed, the galvanic corrosion can be seen (Fig 7), but this can be removed using a wire brush and/or Emory cloth.
Now, remove the bearing inner race from the drive flange using a bearing separator and a hydraulic press (Fig 8).

Press the drive flange into the new bearing, but always support the underside of the inner bearing race when pressing in the drive flange, so not to damage the bearing (Fig 9).
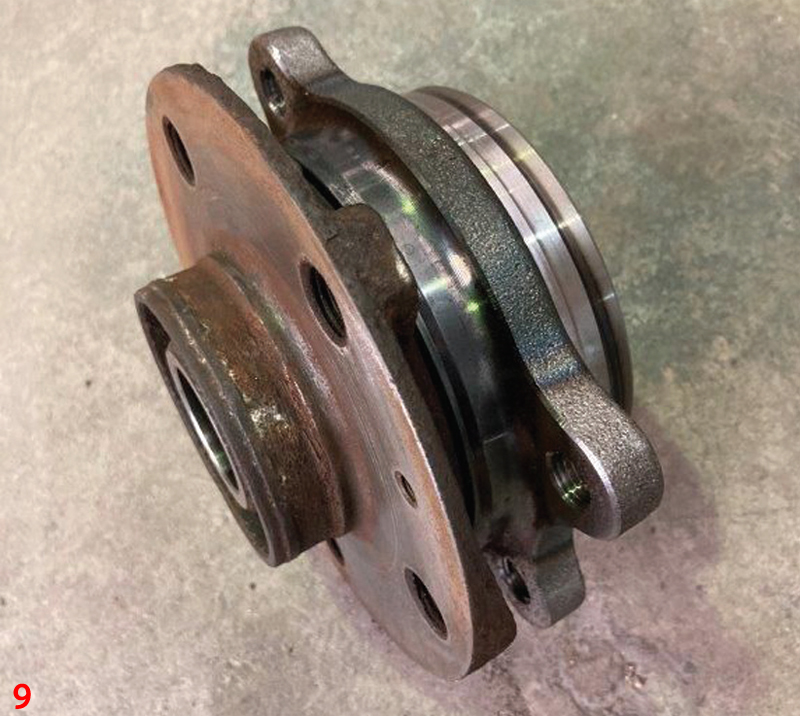
The new wheel bearing assembly can now be mounted on the hub carrier and secured in position with the four new wheel bearing carrier bolts supplied in the FAG bearing kit. Tighten the bolts in an even manner and torque to the manufacturer’s specification.
Installation is in reverse order of removal, but always use the new hub bolt that is provided and torque to the correct specification when the vehicle is lowered to the floor. Torque all other bolts as required during installation and it is best practice to clean the face of the drive flange and the hub mounting point on the brake disc to ensure a flush fit, so it does not cause brake judder.
Rear wheel bearing replacement
The scheduled time for this procedure is 0.7 hours.
After slackening the wheel bolts with the vehicle on the floor, raise the vehicle lift to waist height and remove the wheel, the rear brake calliper, and then the brake carrier, followed by the small Torx bolt that retains the brake disc, then take off the disc.
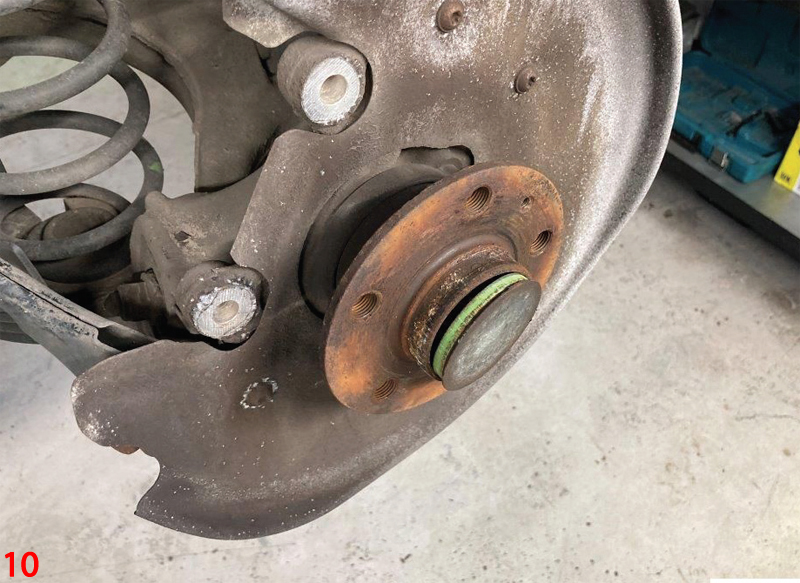
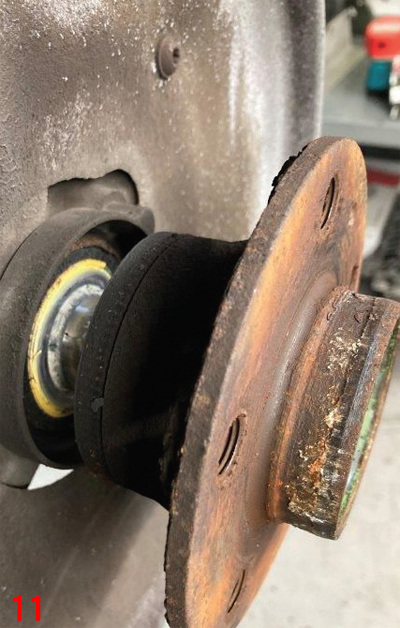
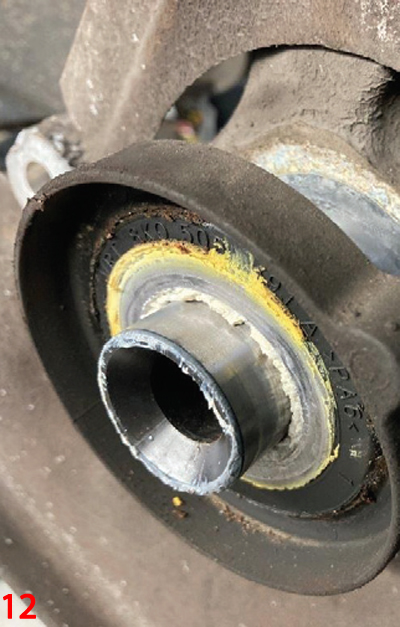
Remove the bearing cap from the hub (Fig 10) and then undo the hub bolt, which will be very tight. With the hub bolt removed, the hub assembly simply slides off the stub axle (Fig 11) as does the ABS sensor cover (Fig 12). Before installing the new hub assembly, make sure the mounting area is clean.
Installation is in reverse order of removal, but torque all bolts to the manufacturer’s specification and clean the brake disc mounting faces.


