Febi’s technical team outlines a recent timing belt replacement on a Ford Kuga.
The vehicle
Make: Ford
Model: Kuga
Year: 2011
Engine: 2l Common Rail Diesel
The routine replacement of the timing belt is an essential procedure in order to avoid failure of the belt and serious engine damage. However, replacement intervals have been considerably extended over the years due to improvements in belt material and system design. As a result, this routine replacement should be considered as a complete service of the engine belt drive system, not just a replacement of the timing belt itself.
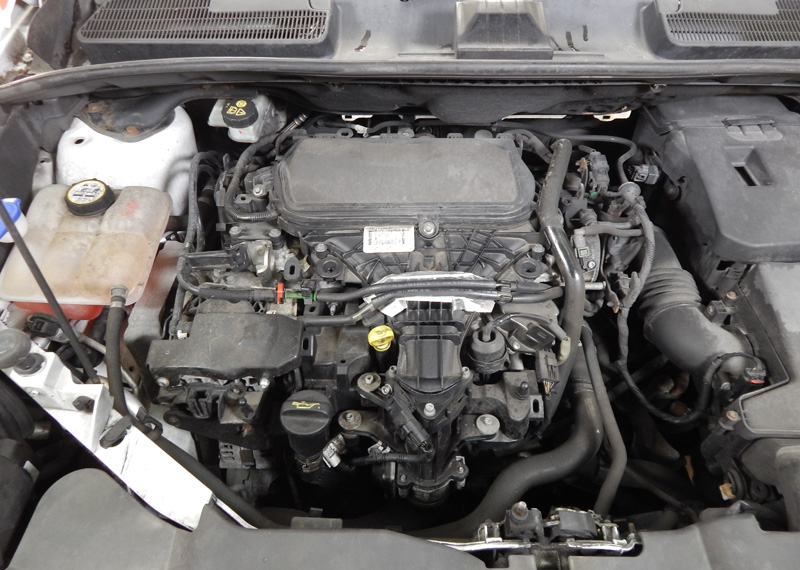
The featured vehicle in this article is a 2011 Ford Kuga, fitted with a 2-litre common rail diesel engine; a PSA group derived engine used in a variety of Ford, Peugeot and Citroen models (Fig.1). There is also a 2.2 litre variant of this engine that is used by many other vehicle manufacturers which shares several of the features as this example.
Subject to operating conditions, the interval for the timing belt replacement on this Ford Kuga model is every 200,000 km (125,500 miles) or 120 months depending on whichever occurs first. However, this interval should be considered as the maximum range and a key reason as to why the complete belt drive system requires inspecting and replacing as necessary. Before starting any timing belt replacement, it is essential that the vehicle manufacturer’s repair procedures are precisely followed. The engine should be at an ambient temperature and any special tools should be acquired in advance.
Replacement procedure
With the vehicle in the workshop, first note down the radio code. Next, open the bonnet and disconnect the battery. With the vehicle now raised, remove the lower engine cover and drain the coolant from the radiator.
Note: It is essential that the starter motor is removed in order to install the flywheel-locking tool and timing pin on this engine. This is particularly difficult on this model as there is little room to remove the starter motor.
First, remove the intercooler pipe that runs under the engine. Then, to make things easier, unbolt the main wiring harness from the alternator and note where the harness is routing for ease of reassembly later on. This will provide enough flexibility for the starter to be unbolted and then angled so that the harness can be unfastened from the starter motor and subsequently removed. Lower the vehicle and remove the coolant expansion tank to gain access to the engine mount and upper timing belt cover. Supporting the engine, remove the engine mount and upper timing belt cover. Remove the right front wheel and wheel arch liner in order to access and remove the auxiliary drive belt and tensioner.
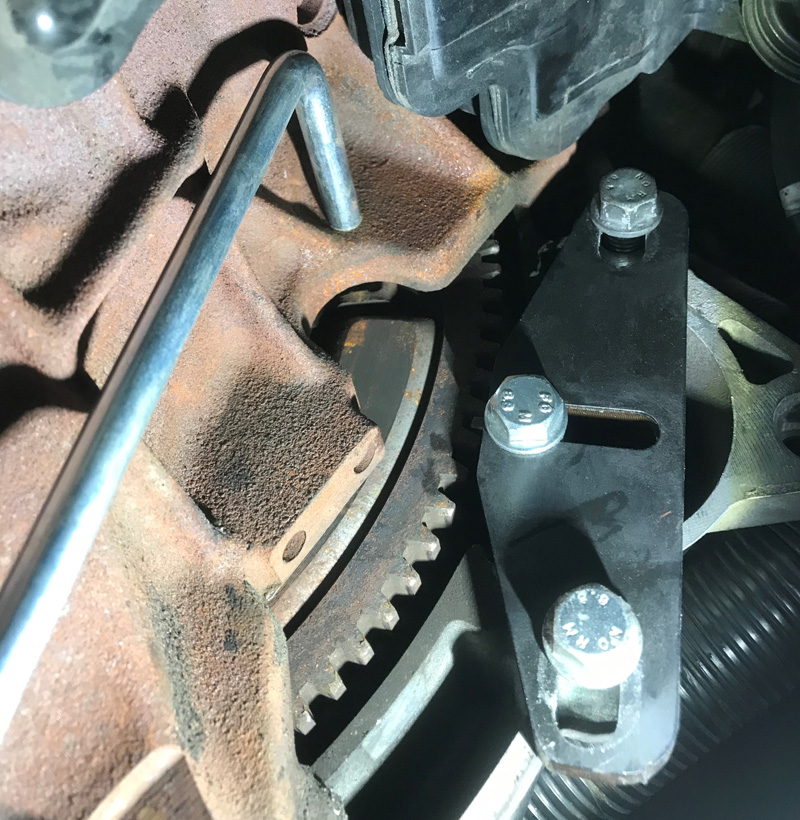
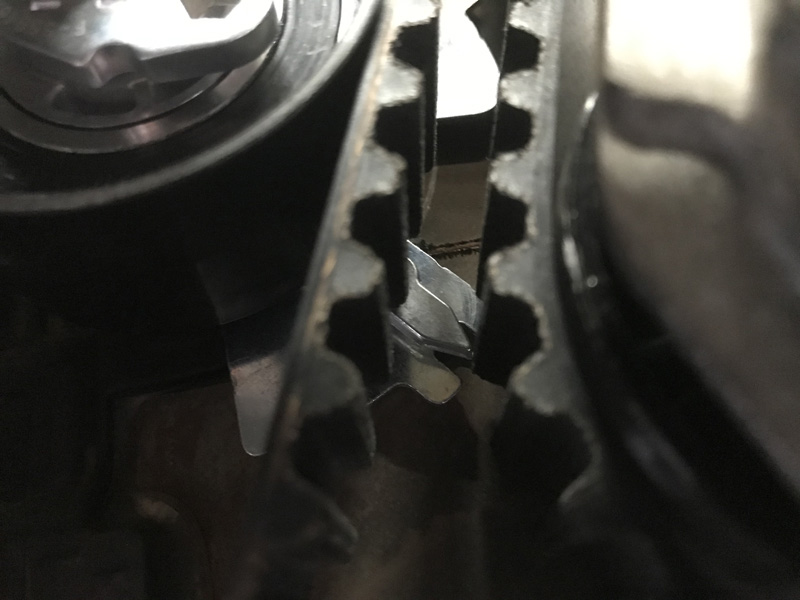
Rotate the crankshaft slowly in a clockwise direction until the camshaft sprocket is at the four o’clock position. Insert the timing alignment pin for the camshaft and crankshaft, followed by the flywheel-locking tool, making sure it is fully inserted into the flywheel (Fig.2).
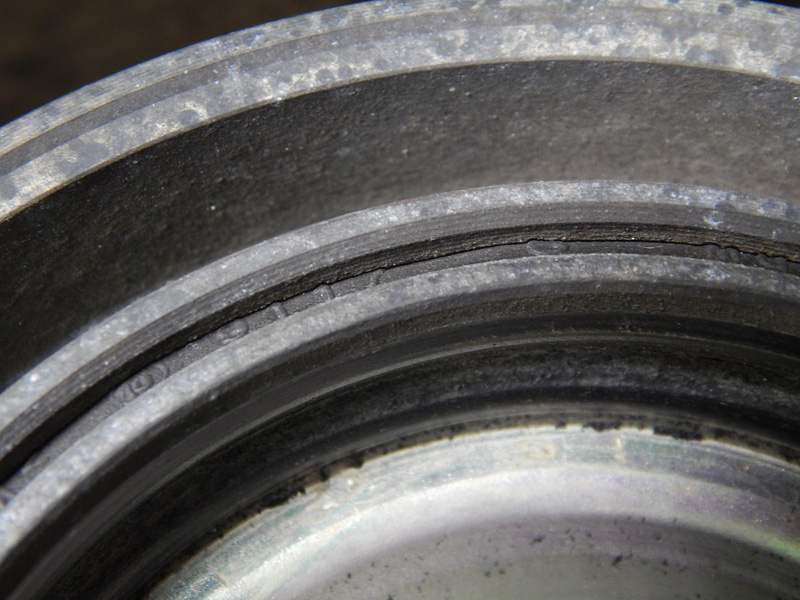
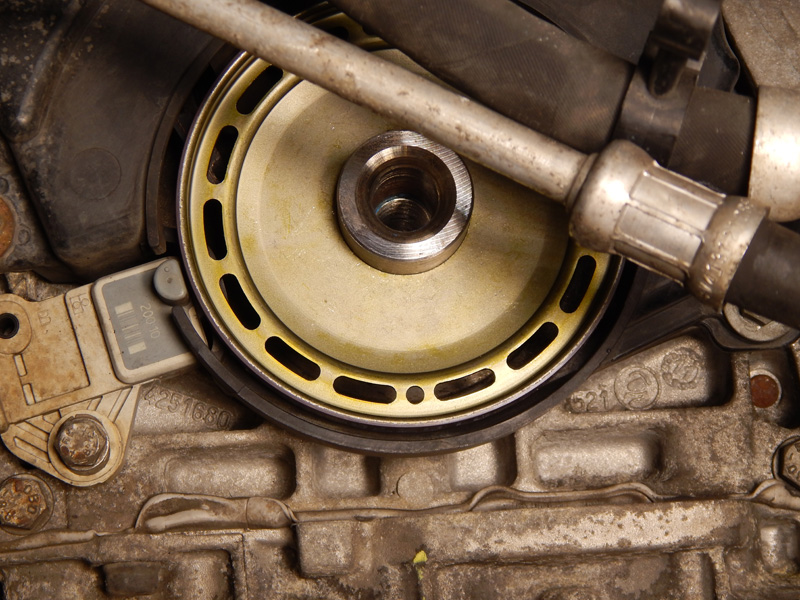
With the engine locked into position, unbolt the crankshaft pulley-retaining bolt. Remove the torsion vibration damper pulley (TVD) and inspect it for any hardening of the rubber surface due to ageing, which eventually results in the failure of the damper (Fig.3).
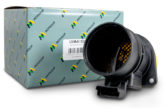
Following this, remove the magnetic reluctor ring for the crankshaft sensor (Fig.4).
Note: this part is extremely sensitive to any cleaning or handling and may become faulty, leading to an incorrect sensor signal. This results in an engine management malfunction with a crank sensor signal fault being logged as fault code P0336. It is advised that this component, which is part of the TVD pulley set, be changed every time it is removed to save time and possible issues.
Next, remove the crank sensor and the lower timing belt cover, then, slacken the belt tensioner and remove the belt. Following this, remove the tensioner, idler pulley and water pump.
With all engine belt drive system components removed, inspect the products for any underlying faults that need to be rectified before reassembly. The following parts (during this repair) were required: 37460 timing belt kit; 38898 water pump; 40323 auxiliary belt; 39390 auxiliary belt tensioner; 106476 TVD pulley set and coolant. After ensuring all mating surfaces are clean, install the water pump – followed by the timing belt idler and tensioner pulleys. Lastly, fit the timing belt. To fit the timing belt – first, centre the key within the keyway of the crankshaft pulley then fit the belt in a clockwise direction starting with the camshaft pulley. Using an Allen key, adjust the tensioner anti-clockwise until the pointer is in position (Fig.5), then tighten the tensioner nut.
Temporarily refit the original TVD pulley then bolt and tighten. Remove the timing pins and flywheel-locking tool and rotate the crankshaft slowly clockwise four times. Reinsert the timing pins and locking tool before rechecking the tensioner. If all timing pins align and the tensioner is set correctly, remove the TVD pulley and refit the lower timing belt cover and crankshaft sensor. Fit the new reluctor ring and TVD pulley set and tighten the new bolt to the manufacturer’s required torque.
Remove the timing pins and flywheel-locking tool and then fit the new auxiliary belt and tensioner. Refit all other components in reverse order before refilling the engine with fresh coolant. Reconnect the battery; set the clock, radio and the one-touch window settings. Start the engine and ensure it is running correctly. In addition, check there are no fluid leaks and reset any fault codes logged in any of the electronic control units. Finally, road test the vehicle.