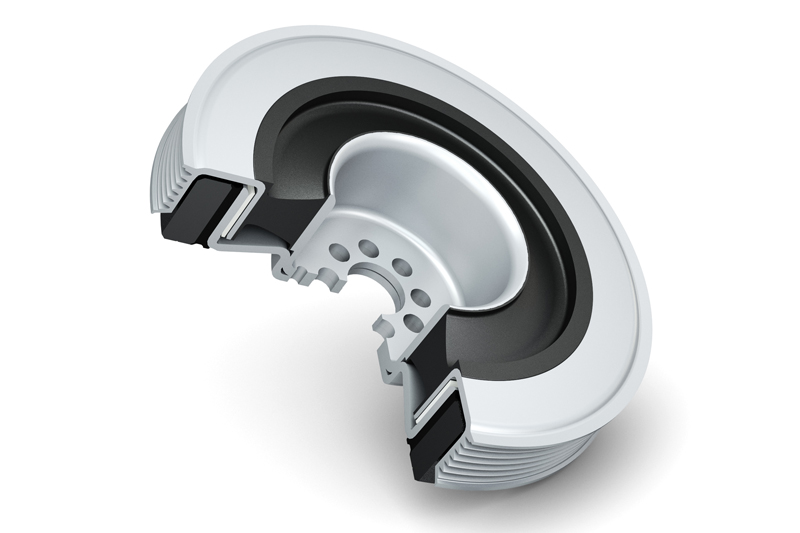
Like many other components, pulley failure is often condemned before the true cause of the failure is found. If the replaced component isn’t the cause of the failure, it is highly likely that the vehicle will return to the garage several times until the root cause is found. In this guide, Corteco takes us through the causes of premature pulley failure and tips on how to avoid failures in the future.
Vibrations often arise as a result of aging components or poor quality vibration dampers. These vibrations don’t just affect driving comfort. Unwanted vibrations can spread throughout the vehicle and cause damage to the engine and other components.
Installation damages: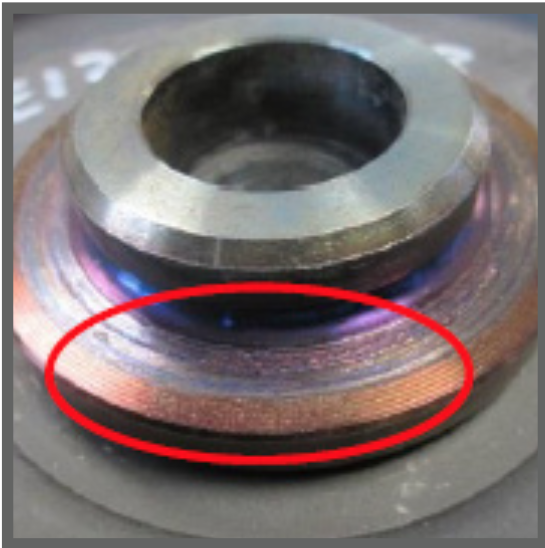
One of the biggest causes of failure occurs during the fitting stage. Below explains how to indentify the cause of installation damages.
If the pulley has been fitted with the incorrect tightening torque you will be able to see defective characteristics such as; discolouration or burning of the mounting sleeve, material abrasions in the installation area as well as the drill hole being deformed. All components come with a recommended torque which should be checked before the parts are tightened.
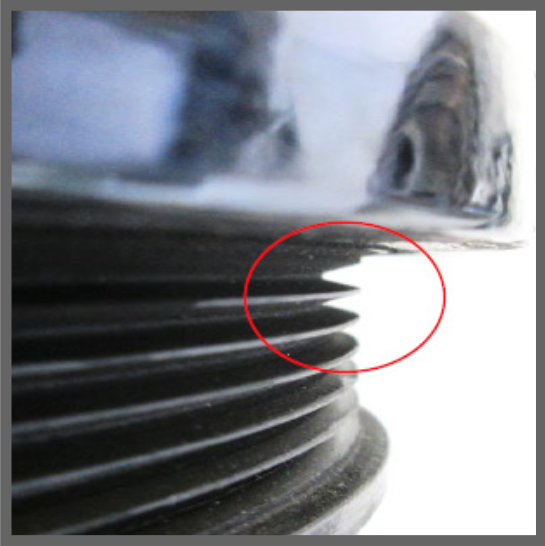 If the belt tension is too strong or the auxiliary equipment has failed, the pulley will also fail. The cause is linked to the coupling having made contact with the flywheel rim. When removing the pulley you will be able to see visible abrasions in the Poly-V and residue from the belt in the ribs.
When removing a pulley from a vehicle and the hub is visibly broken, then this has been caused by the use of the wrong assembly tool or the chamber support coming into contact with the bearing surface. Checking all aspects of the installation from start to finish can ensure the hub remains intact and protected from damage.
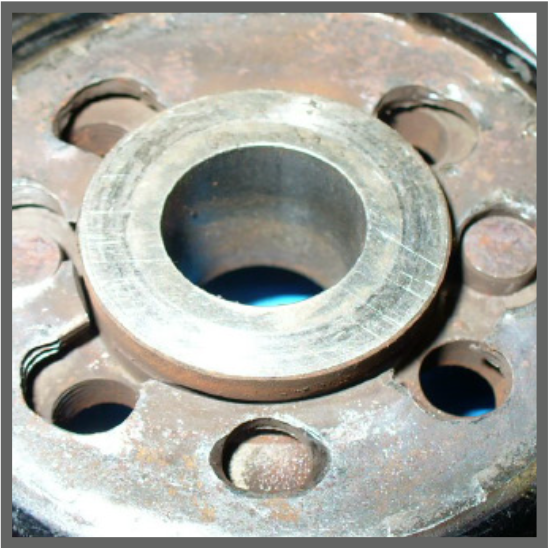 If the centring pin is worn out, the failure will stem from a relative movement between the coupling and pulley causing effloresce. This can also be due to a missing or wrong diamond wheel disc having been fitted.
Another way a pulley can fail is if during the fitting process there has been an interruption with the assembly press, or the friction bearing has been incorrectly pressed in. This can occur during the creation and installation of the part on the vehicle. To ensure the pulley is correct when delivered, visually check all areas before installing.
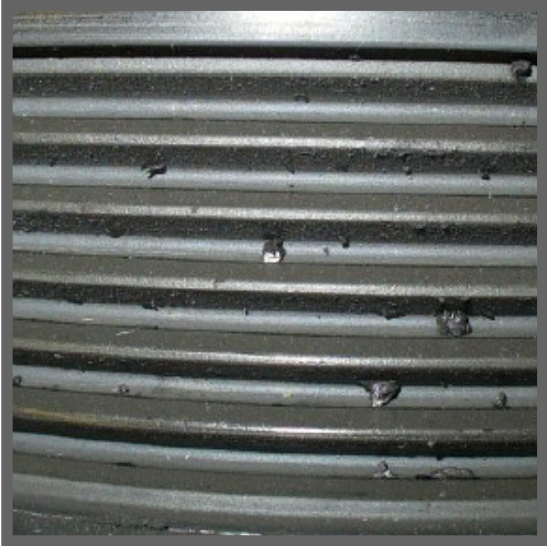 Identifying a damaged pulley visually
Similarly to other components, if the area is contaminated with oil it will stop the pulley from functioning correctly causing it to slip on the belt and cause additional vibrations in the engine and surrounding components.
As mentioned earlier, finding residue from the belt in the pulley ribs narrows down the cause of failure to excessive belt tension. Checking this before the vehicle is released can prevent it from returning to the garage for another repair.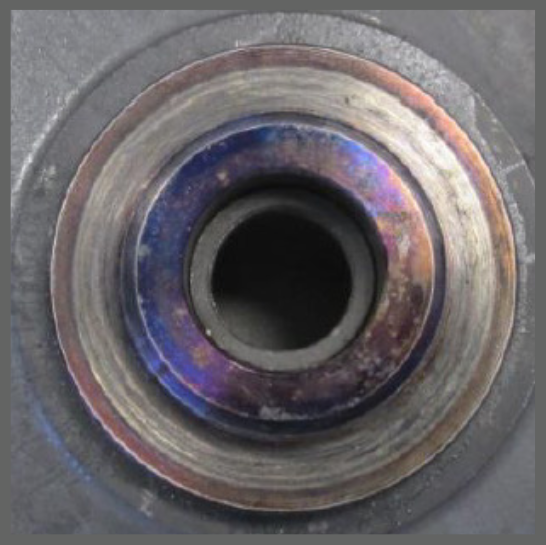
With relation to pulleys that are found to be damaged/discoloured when removed from a recently repaired vehicle, ensure you are working with the correct tools and all bolts are replaced at the same time as the pulley.
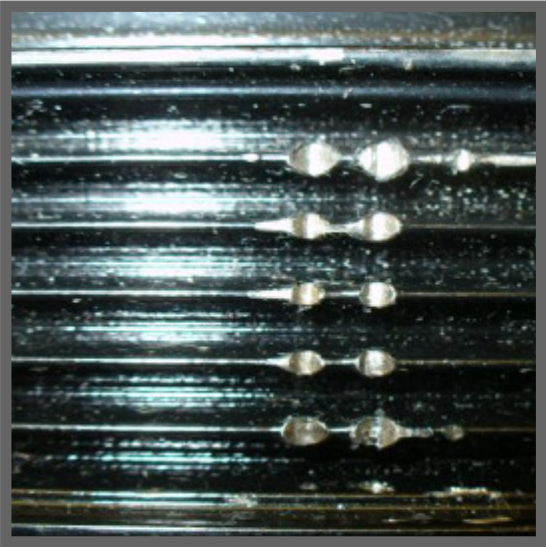
If the pulley is removed and there are chips and damages, they could have potentially been there when fitted. A pulley needs to be handled with care to avoid damage and chips to all ribs. Make sure to check this before installation.
 Following the guidance in this article can save all parties time and money. The extensive OE manufacturing experience of the Freudenberg Group enables Corteco to offer vibration control components and repair kits in OEM quality for more than 27,500 types of vehicles. All products are designed to meet the highest quality standards and are manufactured using the latest production methods. Corteco offer a lifetime warranty on these parts, confident they will not fail unless incorrect steps are taken during installation/handling.


