In this month’s timing belt focus, Schaeffler INA REPXPERT, Alistair Mason, is replacing the timing belt, water pump and FEAD (front end auxiliary drive) kit on a 2014 1.2 Fiat 500.
Manufacturer: Fiat
Model: 500
Year: 2014
Engine: 1.2 litre, petrol
The recommended replacement interval is every 37,000 miles or five years and although this vehicle was under this mileage, it was over on time, so the customer was advised of the situation and authorisation was given for the timing belt system to be replaced.
With a scheduled book time of 2.35 hours, minimal investment in workshop tools and all the fitting information readily available on the REPXPERT workshop information system, this is a great repair for any independent workshop. This is an engine used in many other Fiat models and in the Ford KA.
Schaeffler’s ‘4Ts’ Rule
Temperature – Always carry out timing belt replacement on an engine that is at ambient temperature, as this can affect the tension of the belt
Tools – Timing/locking tools are essential for the correct and accurate timing on today’s engines
Torque – Ensure all bolts are torqued to the manufacturer’s specifications
Tension – Always tension the belt correctly, ensure the tensioner is set in the correct rotation, that tension marks align and pulley movement is available where required
Timing belt removal
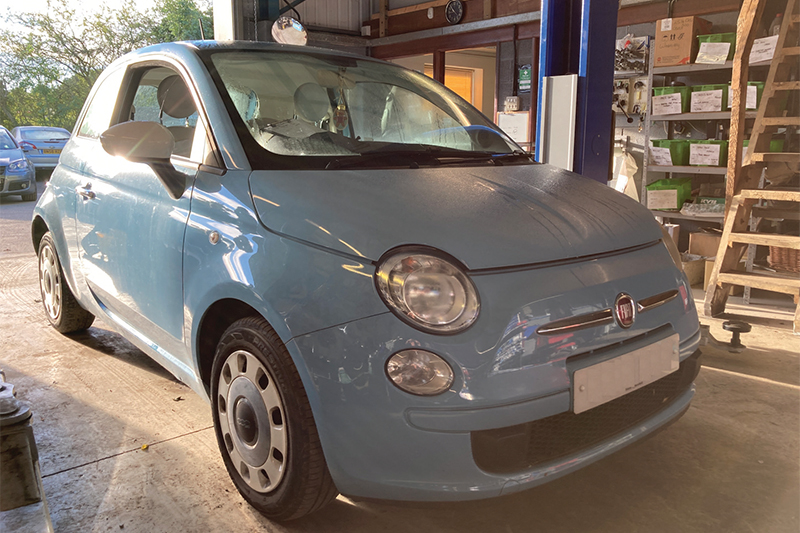
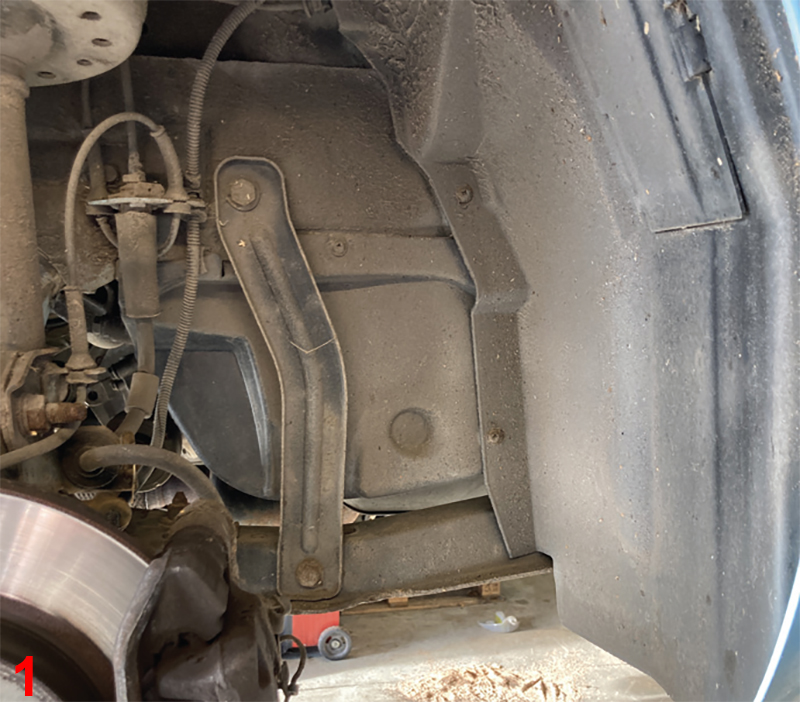
With the car placed on the lift, open the bonnet, raise the lift to waist height and remove the O/S/F wheel, supporting bar (Fig.1), engine splash cover and the wheel arch liner, as this gives good access to the bottom pulley and timing belt system (Fig.2). The auxiliary drive belt can then be removed, followed by the crankshaft pulley and engine speed and position sensor and the lower section of the timing belt cover.
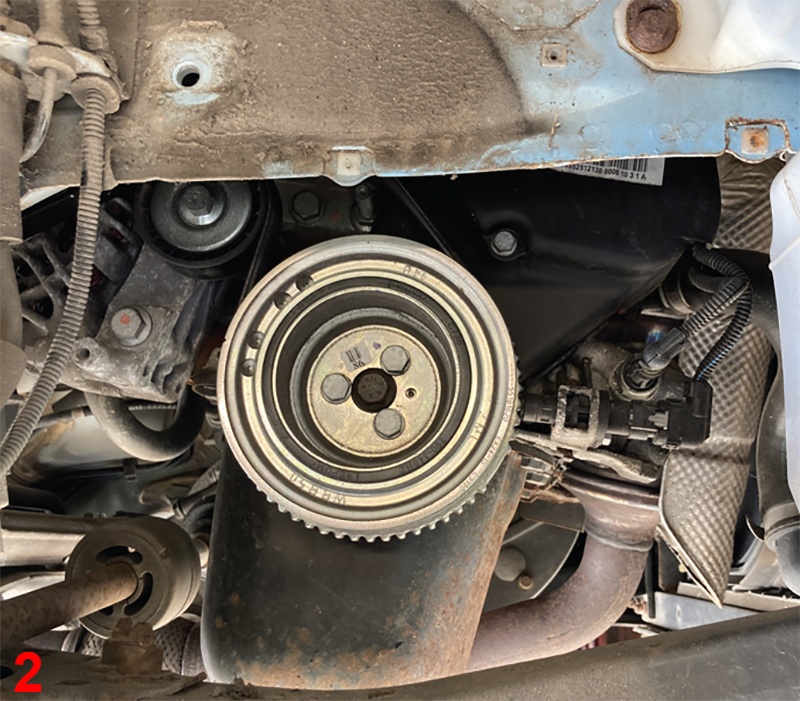
Lower the vehicle lift to ground level, remove the air filter assembly and the coil pack. Disconnect and unclip the wiring looms running over the cam cover and remove the upper timing belt cover. Note – one bolt may be covered by the engine sticker (Fig.3). Remove the camshaft position sensor, followed by the cam cover.
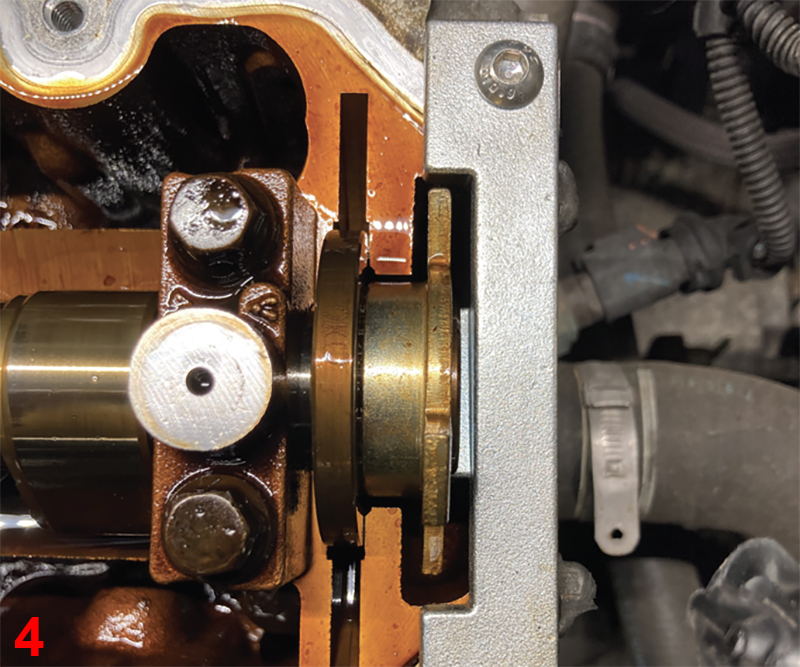
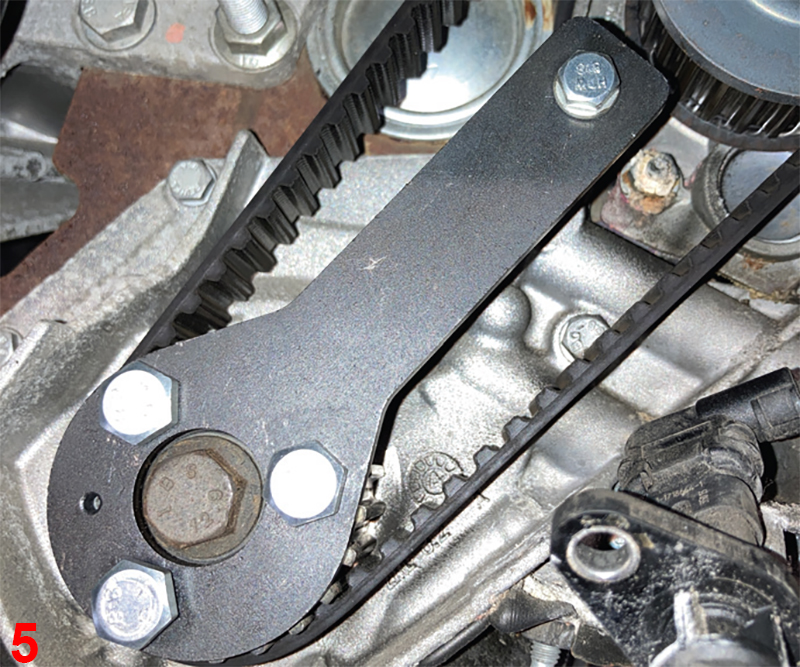
The engine mounting then needs to be removed, so support the engine with either an engine brace or subframe attached to the engine support and remove the engine mounting. Rotate the engine in a clockwise direction until the slot on the back of the camshaft aligns with the top of the cylinder head, then insert the camshaft locking tool and secure (Fig.4), and then the crankshaft locking tool to the crank pulley and secure (Fig.5). Slacken the timing belt tensioner nut, rotate the tensioner to remove the belt tension, ease the timing belt off the pulleys and remove the timing belt.
Water pump removal and replacement
With the timing belt removed, it is good practice to replace the water pump, so drain the coolant, remove the three bolts and one nut that retain the water pump and ease the water pump out of the engine. Clean the water pump mounting and sealing face with emery cloth where required. At this point it is always best practice to flush the cooling system to ensure there are no particles that could contaminate the new water pump seal.
This application has a water pump with a rubber seal, which needs to be lubricated with a smear of coolant, before carefully easing it into position and securing with the three bolts and one nut, torqued to the manufacturer’s specification.
Timing belt installation
Before installing the new timing belt, replace the timing belt tensioner, then fit the timing belt ensuring the slack of the belt is on the tensioner side and then turn the tensioner in an anti-clockwise direction until it goes against the stop and tighten the nut. Remove the crank and cam locking tools and then rotate the engine two complete revolutions in the direction of rotation and refit the locking tools to ensure the timing is correct.
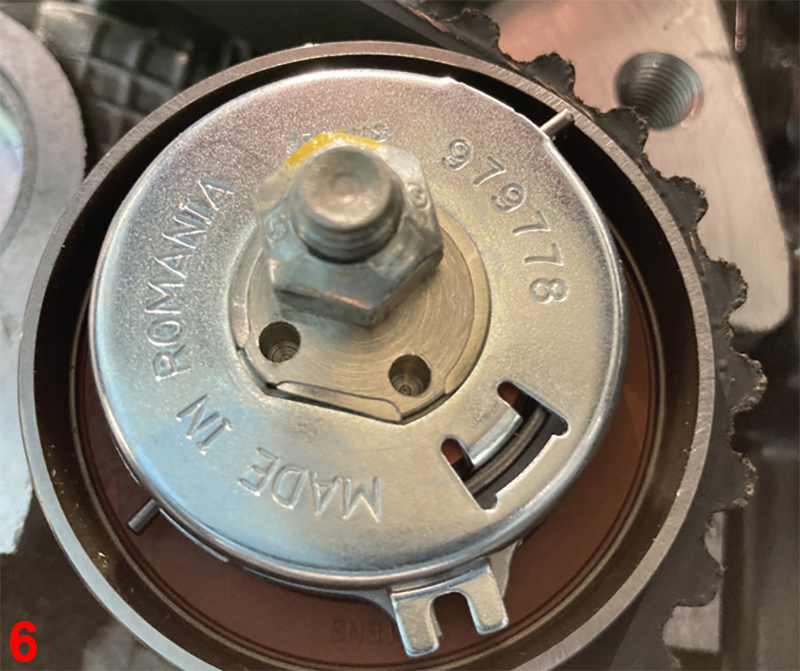
With the correct timing confirmed, remove the locking tools and slacken the tensioner. Reset the tensioner by rotating it in an anti- clockwise direction until the reference marks align (Fig.6), tighten the tensioner and torque to the manufacturer’s specification. Rotate the engine two more revolutions and check the belt tension and timing are still correct.
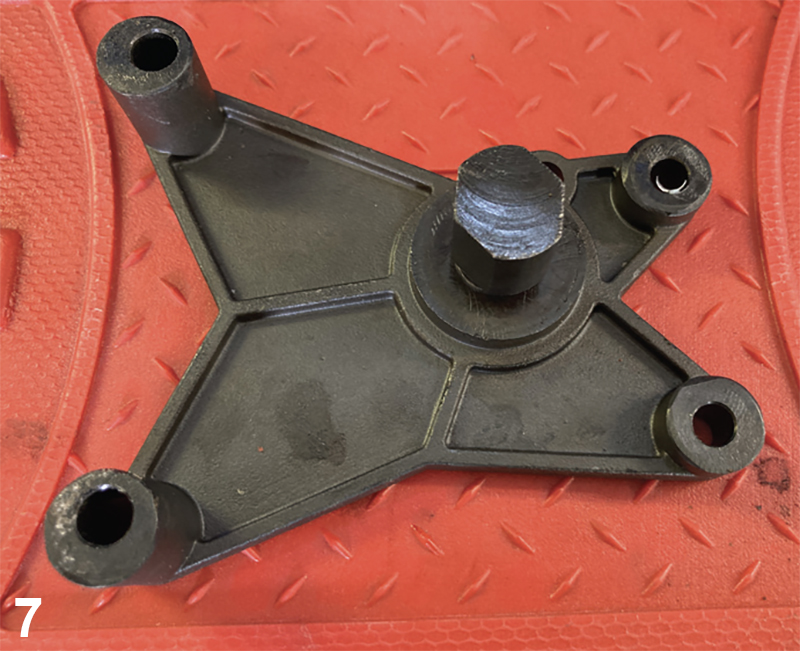
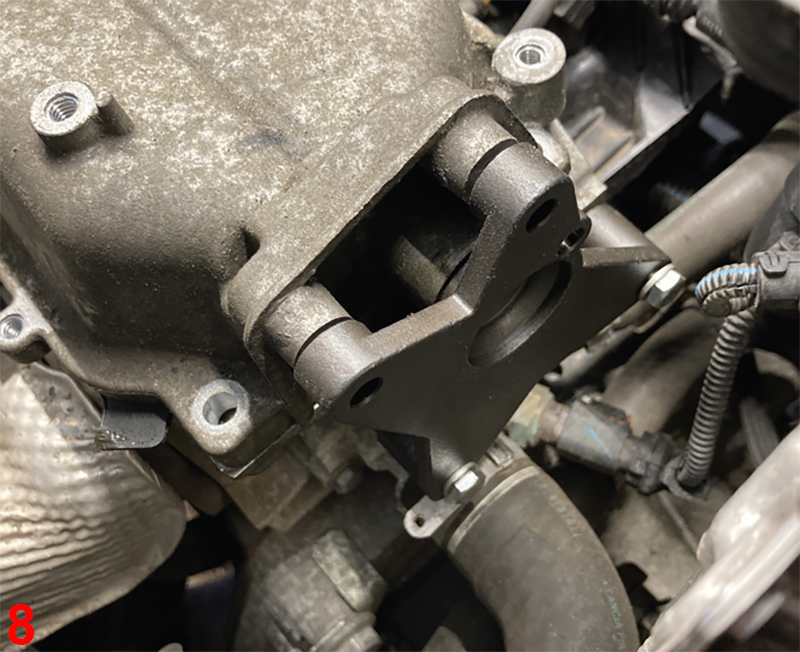
Position the cam cover and start the cam cover bolts, but do not tighten, because at this point the alignment tool should be attached to the cam cover and cylinder head (Fig.7&8), to ensure the cam sensor is correctly aligned to the camshaft. With the alignment tool fitted, tighten the cam cover bolts and then remove the alignment tool. Refit the parts in reverse order of their removal, but check the condition of the auxiliary drive belt and tensioner and replace where necessary, whilst the engine mounting is removed.
Fill the cooling system with a vacuum bleeder using new coolant, but ensure it is the correct grade for the vehicle. Run the vehicle up to its operating temperature and check the heater operation and also make sure the coolant level is correct.


