In this month’s Schaeffler INA Belt Focus, REPXPERT, Alistair Mason is replacing the timing belt on a 2015 Seat Mii, fitted with a 1.0 TSI, 3-cylinder petrol engine.
Vehicle Information
Make: Seat
Model: Mii
Year: 2015
Engine: 1.0 TSI 3-cylinder petrol
Mileage: 35,000
The 1.0 TSI engine is a very popular unit, used in all four of the Volkswagen Group’s brands, with the main advantages being that it is lightweight and compact. With a scheduled book time of 2.70 hours, little investment required for workshop tools, all the fitting information available on Schaeffler’s REPXPERT workshop information system and the fact that it is a very popular engine, makes this a great repair for any independent workshop. This particular vehicle has only covered 35,000 miles, but as it is seven years old the customer has been advised to replace the timing belt.
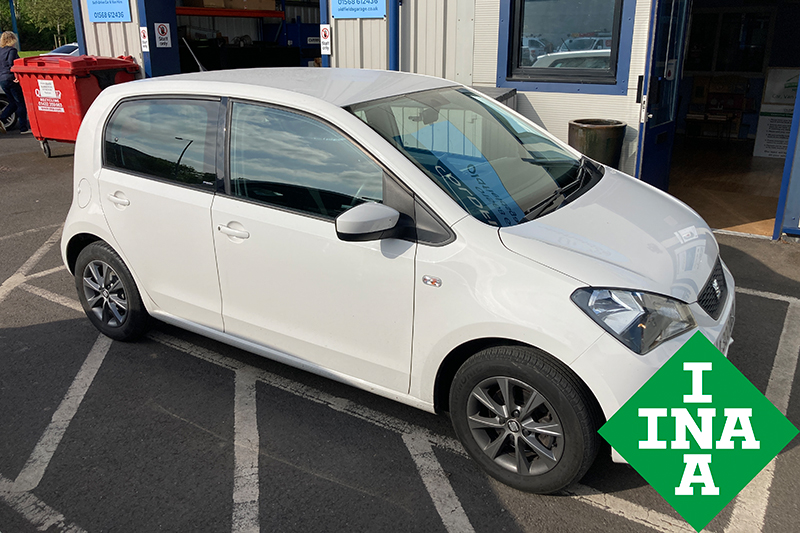
With the vehicle placed on the ramp, open the bonnet and remove the air filter assembly, upper timing belt cover, and, at the other end of the engine, the coolant pump belt cover and the inlet cam bung (Fig.1). Raise the ramp to gain access to the underside of the vehicle and remove the o/s/f splash guard, lower the ramp to waist height and remove the o/s/f wheel and then the wheel arch liner.
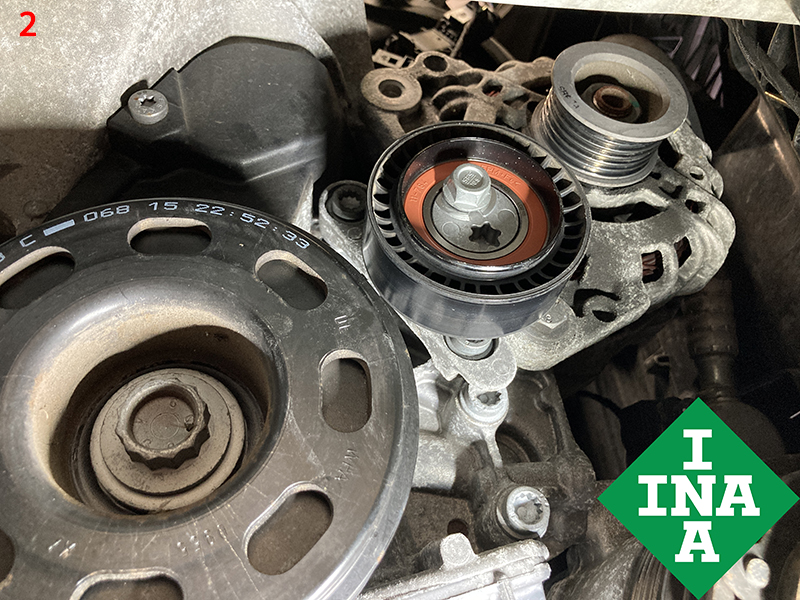
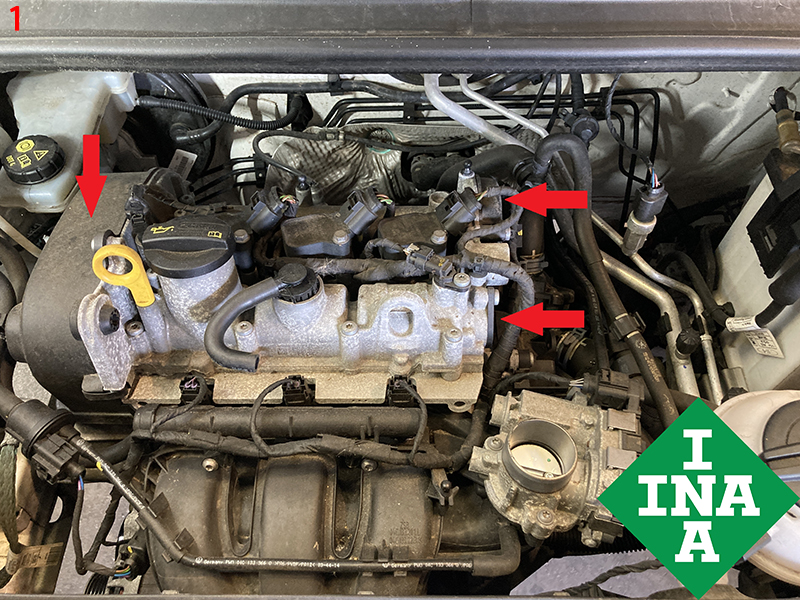
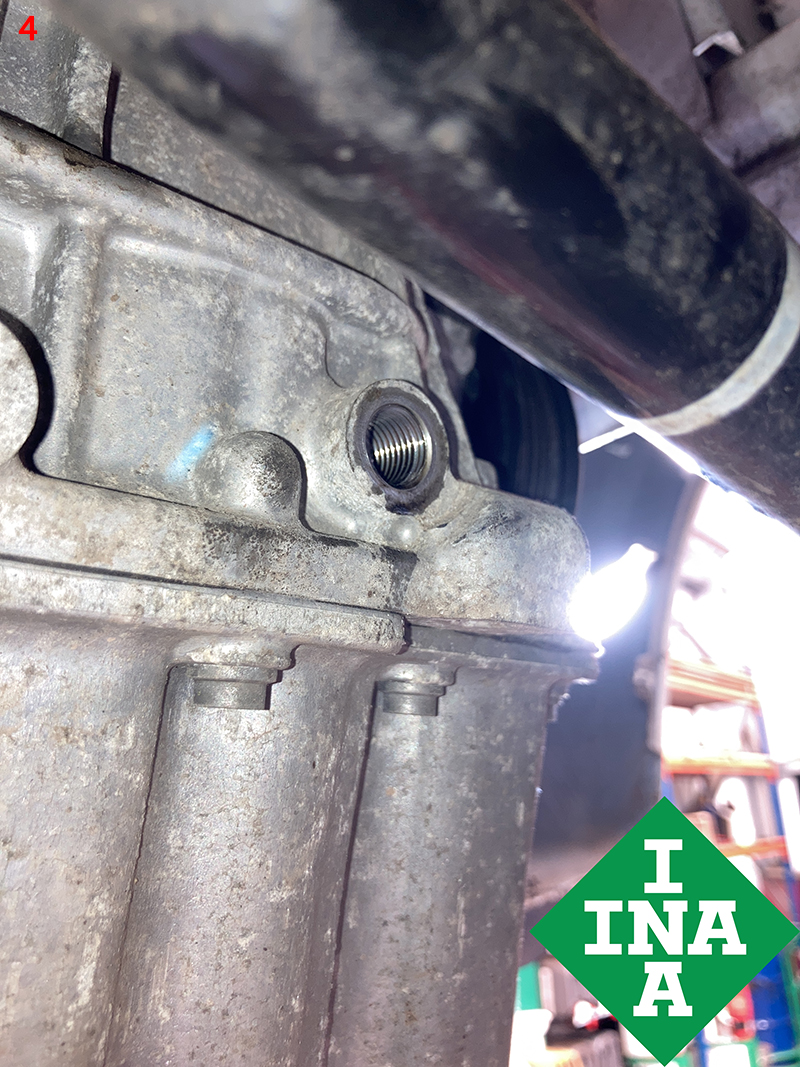
Remove the plastic cap from the tensioner pulley, slacken the pulley and remove the auxiliary drive belt (Fig.2), then the alternator retaining bolts, and lever the alternator forwards. Now remove the bottom pulley, followed by the black plastic timing belt cover (Fig.3), and slacken the main timing belt cover bolts. Finally, before lowering the vehicle lift, remove the crankshaft locking tool blanking bolt (Fig.4) and support the engine before removing the engine mount.

Lower the ramp to gain access to the engine bay, remove the engine earth lead, engine mount and then remove the timing belt cover, or at least move it out of the way!
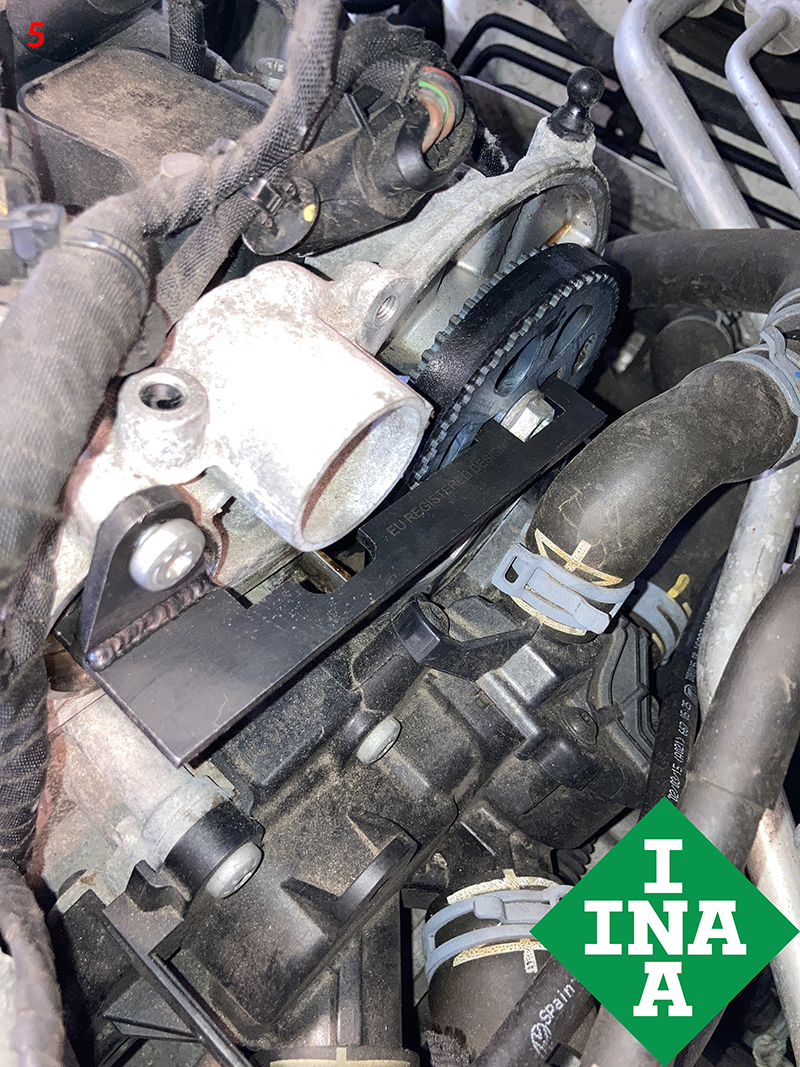
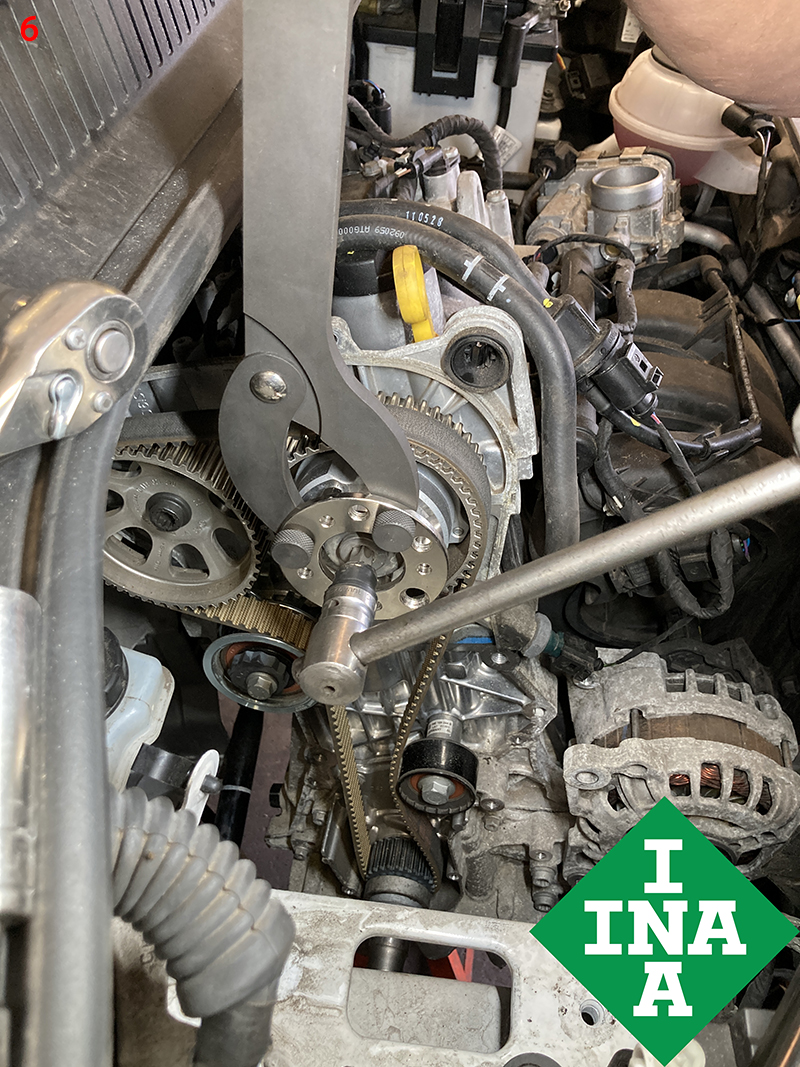
Refit the crank pulley bolt and rotate the engine in a clockwise direction until the two dots on the inlet cam pulley are in the 11 o’clock position, fit the crankshaft locking pin into the engine block and then rotate the engine until it locks. At this point the camshaft locking tool should locate into the back of the camshafts (Fig.5). Remove the camshaft locking tool and, using a counterhold tool (Fig.6), support the inlet cam pulley and remove the centre cap (note – collect leaking oil with a cloth).
With the cap removed, slacken the cam pulley centre bolt and the exhaust cam pulley centre bolt, also with the aid of a counter support tool. Refit the camshaft locking tool, slacken the timing belt tensioner bolt and remove the timing belt. Finally, remove the tensioner and idler, as these are supplied in the new INA timing belt kit and then check for any leaks in the timing belt area and rectify as required, to prevent the contamination of the new timing belt.
Timing belt installation
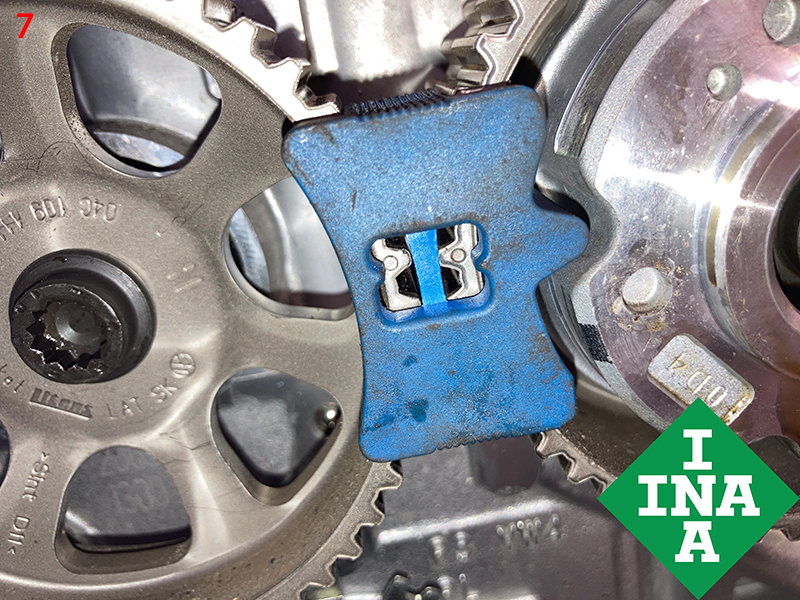
Install the new tensioner, ensuring that the lug is correctly located, and fit the new idler pulley, torquing it to the manufacturer’s specification. Ensure the crankshaft is locked against the crankshaft locking tool and that the camshaft locking tool is correctly located and the cam pulleys are free to rotate. Then, fit the cam pulley locking tool to make sure the cam pulleys are timed correctly, as these pulleys are “Smart Sprockets” and tri-oval, to help reduce belt fluctuations from the firing pulses of the engine (Fig.7).
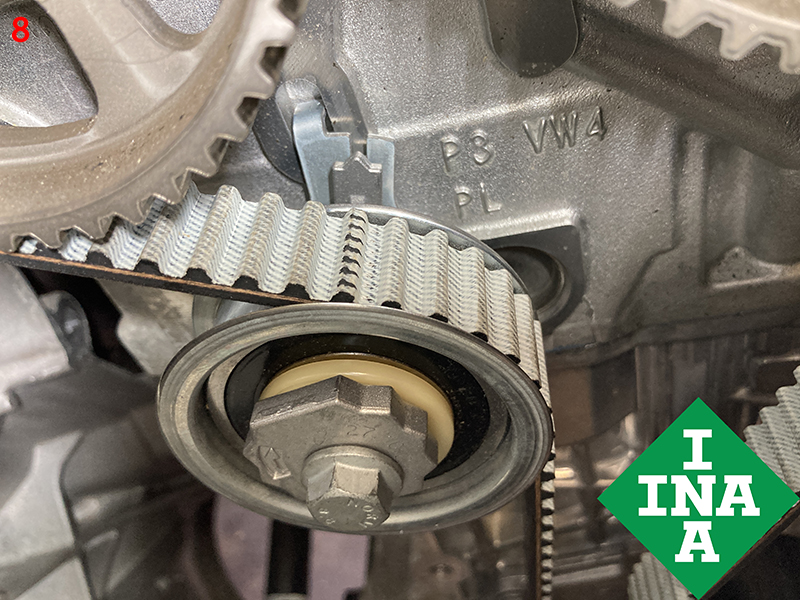
Install the timing belt starting at the crank pulley and work in a clockwise direction, finishing by sliding the belt onto the idler. Now tension the belt by rotating the large eccentric in a clockwise direction until the pointer has gone about 10mm past the alignment window, then bring the pointer back until it aligns in the alignment window and tighten and torque the centre bolt (Fig.8). Ensure that the crankshaft is still against the locking pin, remove the camshaft locking tools and, using a counter-hold tool, tighten and torque the camshaft pulleys. Then, reinsert the cam locking tool to ensure the timing is still correct.
Remove the camshaft and crankshaft locking tools and rotate the engine two complete revolutions, refit the engine locking tools and also check the timing belt tension is still correct. If it is not possible to insert the camshaft locking tool, the timing needs to be carried out again.
Refit the parts in reverse order of their removal, in this case, the auxiliary drive belt was also replaced as this is best practice. Finally, carry out a full road test to ensure the completion of a quality repair.


