
Ben Johnson tackles a tricky transmission replacement on a BMW i3 REX.
I had always assumed the transmission on the BMW i3 was bomb proof. That was, however, until an i3 94 REX was towed into our front car park just last week. I took it for a spin around the car park and the symptoms were undeniable: a failing transmission. It’s hard not to be concerned when you witness firsthand the gearbox producing unsettling clunks and erratic jumps as I cautiously rolled along at a mere 10 km/h. Worse, this specific car has covered just shy of 50,000 miles. Not a considerable distance at all.
If we approach this complex machine as we would any unconventional vehicle, that is to say – a non-ICE vehicle, the initial step was to ensure the car was in a safe working condition. This involved opening the high-voltage battery safety connector, responsible for linking the battery cells, providing the dangerously high voltage required to power the i3’s 170-horsepower electric motor, often referred to as “the electrical machine.”

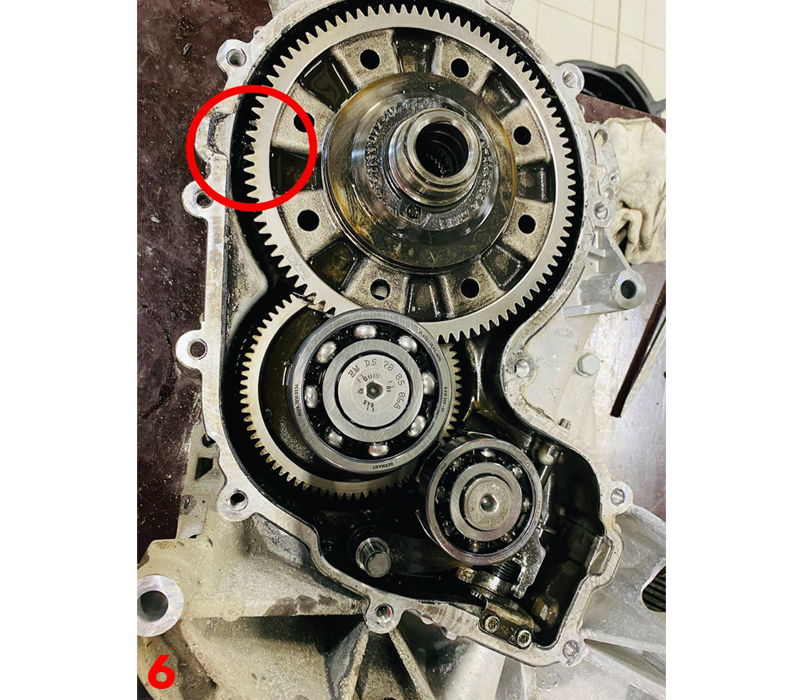
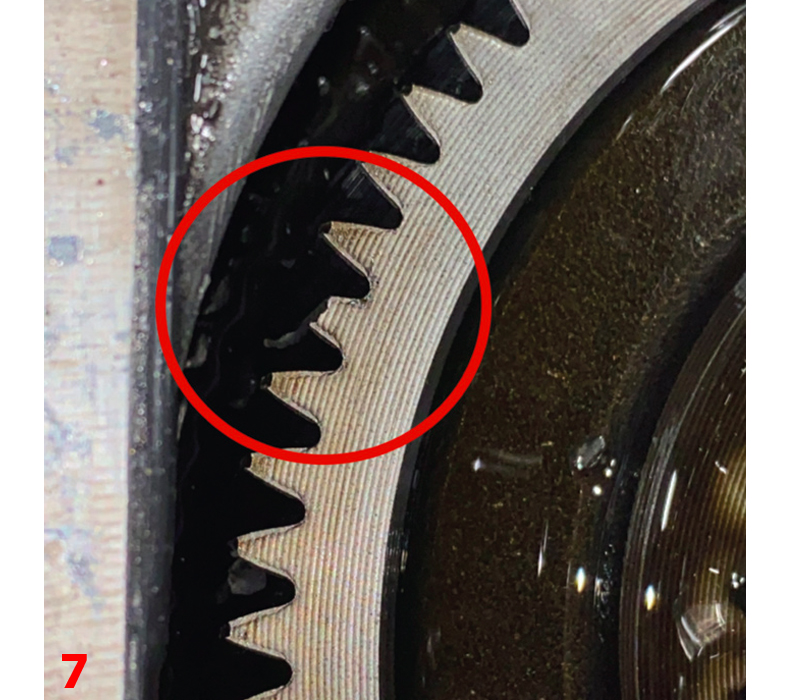
Once a safe working environment had been established, the car reverts to nothing more than a conventional vehicle with a conventional if slimmed down transmission. An oil sample revealed the presence of metal swarf, a telltale sign of trouble: a new transmission was in order.
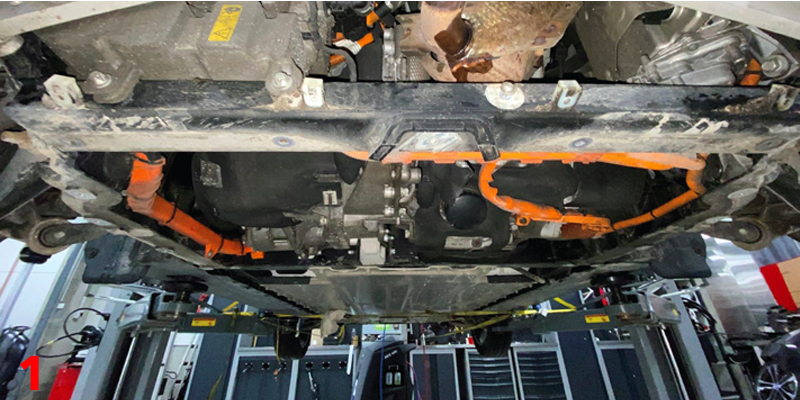
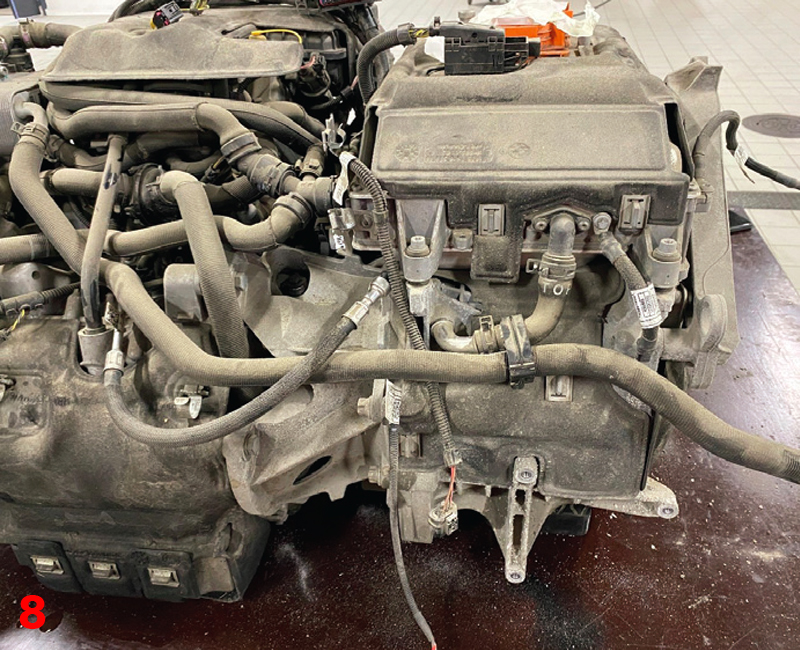
The REX variant of the i3 brings with it the weighty addition of a Rotax twin-cylinder engine, complete with its own high-voltage generator, aptly referred to as the “Range Extender Electrical Machine.” This additional engine introduces a layer of complexity, particularly when you’re working within the confines of the i3’s compact rear engine bay.
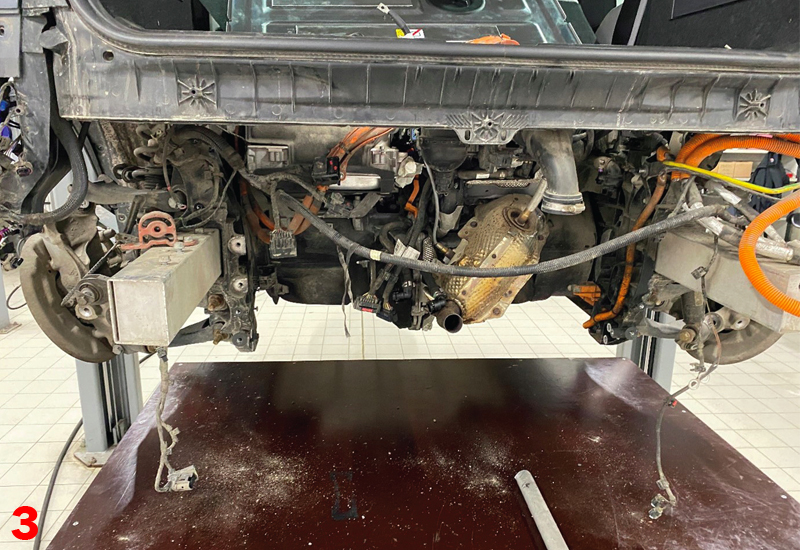
One of the challenges posed by the i3 REX is the labyrinth of components that must be painstakingly disassembled just to gain access to the inner workings of the drivetrain.
The paramount concern in the removal process is to maintain the pristine condition of all electrical contacts. To achieve this, meticulous care is taken, evident in the application of tape to shield all exposed contacts. It’s worth noting that the adhesive on the tape is delicately handled to ensure it never makes contact with the vital internal contact surfaces.
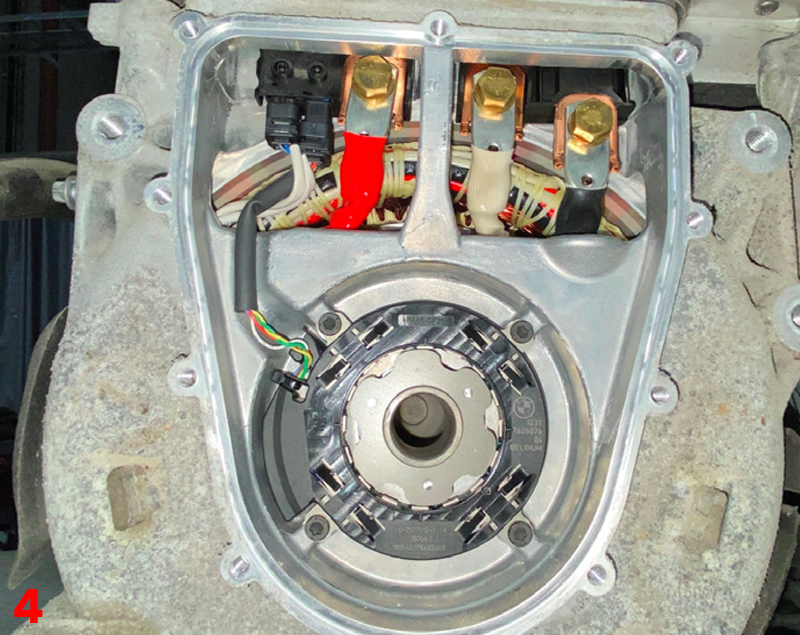
Unconventionally, when stripping down, the EME – Electrical Machine Electronics – must be removed first, then the engine must be detached from the gearbox, and only then can the electrical machine be separated from the gearbox on the workbench. This unique order of operations is essential to avoid damage since the bolts that hold the transmission to the electrical machine are aluminium. Besides – trying to remove a heavy electrical motor from the gearbox first is counterproductive since removing the lightest component from the heaviest is the logical thing to do.
Now, let’s address a concerning issue that has cropped up in some reports. There have been cases of transmission repairs on the i3 failing prematurely, sometimes within just a few thousand miles. The culprit? Incorrect application of a special grease, often referred to as “GE” grease, to the splines of the motor where it meshes with the gearbox input shaft. The root cause of this failure appears to be related to the brush-type seal located at the end of the motor bearing housing.
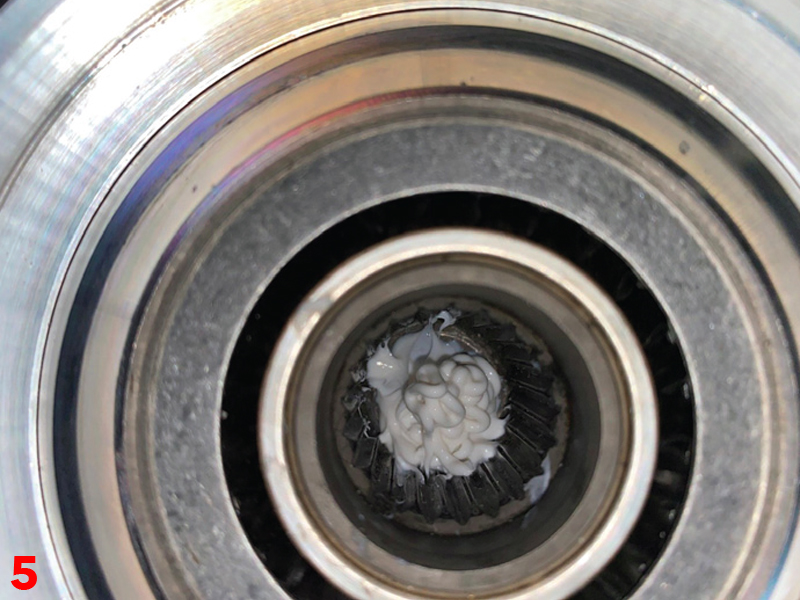
In these instances, too much grease or the wrong type of grease was used, leading to grease escaping from the splines. This escaping grease then found its way into the motor itself, resulting in catastrophic damage and premature failure. To illustrate the severity of this issue, I recently received images from someone who had seen evidence of a previous repairer liberally coat the motor splines with copper grease (which is highly conductive!). The consequences were dire, with the grease exiting at high velocity and infiltrating the motor casing and from there inside the motor itself. This unfortunate incident serves as a stark reminder of the importance of using the correct grease for specific applications.
The GE grease, as supplied by BMW, comes in a small package for a reason. It’s designed to apply precisely the right amount of grease to ensure that the hydraulic action during the mating of the gearbox to the electrical machine disperses the grease exclusively into the input shaft spline grooves and no further than that. This GE grease is, without a doubt, the stickiest and thickest substance I’ve ever encountered, resembling more of a glue than traditional grease. It serves as a compelling example of just how critical it is to select the appropriate grease for individual applications, underscoring the importance of attention to detail in our work.
Once the new gearbox arrived, I didn’t waste any time in putting everything back together. You see, when you work quickly, you’re less likely to forget where all the bits and pieces go. And with this car, there’s a lot to remember during reassembly.
The key here is precision. I had to make sure everything was put back exactly as it was when it rolled off the factory line. This isn’t just about making the car look good; it’s about safety too. If you don’t install those high-voltage cables just right, you could end up with some serious problems, like them rubbing against something they shouldn’t. So, it’s all about getting things back together perfectly to ensure safety on the road.
In my experience, tackling extensive jobs like this, particularly if it’s my first time, involves a tried-and-true strategy – capturing plenty of photos during the removal process and marking components with painted symbols. This systematic approach serves as a valuable memory aid when it comes to reassembly.
Moreover, during the installation phase, painting as each fastener is tightened is a practice I wholeheartedly endorse. It’s a simple yet effective way to prevent any unintentional oversight, ensuring that nothing is left loose by mistake. However, I must emphasize the need for caution when wielding that paint pen. It’s vital never to paint equipotential bonding cables; doing so could introduce unwelcome resistance into this critical safety circuit. Safety always remains paramount in our line of work.
Once all the parts were back where they belonged in the vehicle, the next steps were straightforward. I began by double-checking and securing all the high-voltage connections, ensuring everything was in place before reconnecting the high-voltage battery connection.
A critical safety note here – when dealing with high-voltage systems, whether disconnecting, reconnecting, or handling Electrical Machine Electronics tails, I made sure to wear high-voltage gloves rated at over 1,000 V and a full shield face mask. This gear acts as a safeguard against any potential electrical discharge. It’s crucial to test these safety gloves before each use by blowing them up and checking for air leaks – you only have one chance when dealing with high voltages. As the saying goes, it’s always better to be safe than sorry. Even when the electricity is disconnected, it’s essential to consider the possibility of residual capacitance or surface charges. When in doubt, wearing gloves is the wisest course of action. Safety remains our top priority in this line of work.

Checking the transmission oil on this car is a bit peculiar. Unlike newer gearboxes with both drain and fill plugs, this one had only a drain plug. To fill the oil, you have to go through the right output shaft opening; there’s no other way to do it.
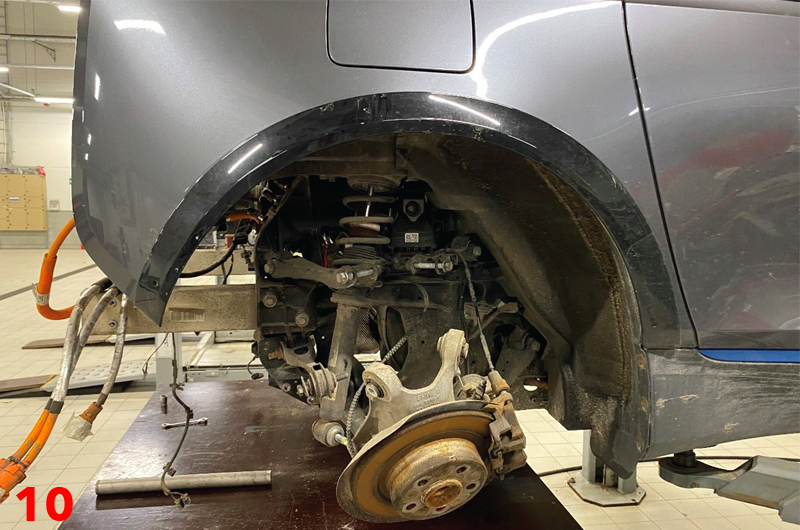
Once that was done, it was a matter of reassembling the suspension and giving the car a quick test in the workshop. With the i3 back in action, installation of the bumper parts was undertaken and the fault codes cleared and re-checked. Before handing it over to the customer, the wheel alignment will be checked and corrected if required. Starting the REX engine using the diagnostic tool ISTA was necessary, just to ensure everything was working as it should – everything was okay.
One critical final step was to charge the high-voltage battery and to check for any potential issues that can crop up after such an extensive repair. The charging was flawless and no issues arose during or after the charging procedure. I sincerely hope that gearbox failures like this won’t become a common occurrence. While this job was certainly interesting, it was a sizable one, and it’s not something I’m eager to tackle again anytime soon.


