
This month, after the customer reported that the clutch was worn out, Schaeffler REPXPERT Alistair Mason replaced the clutch on a 2013 Kia Sportage 1.7 CRDI diesel, which had covered 94,000 miles.
With a book time of two-and-a-half hours, little workshop equipment is required – a two-post vehicle lift, engine support, a transmission jack and a clutch alignment tool – and full repair instructions with torque settings are available on Schaeffler’s REPXPERT workshop information portal.
Step-by-step procedure
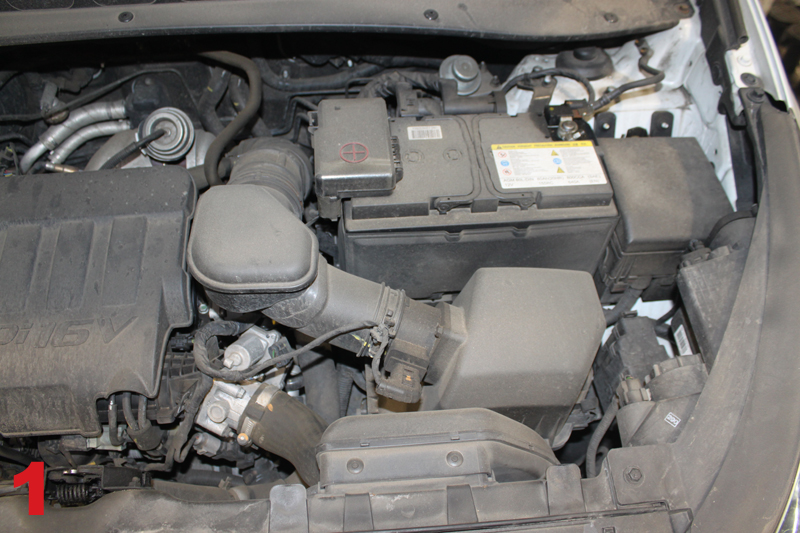
With the vehicle placed on the lift, open the bonnet (Fig 1), and remove the engine cover and the air filter assembly. Disconnect the battery terminals, remove the battery, as well as the engine control unit from its bracket, and then remove the battery carrier, unclipping the wiring looms as required. The top of the gearbox should now be easily accessible.
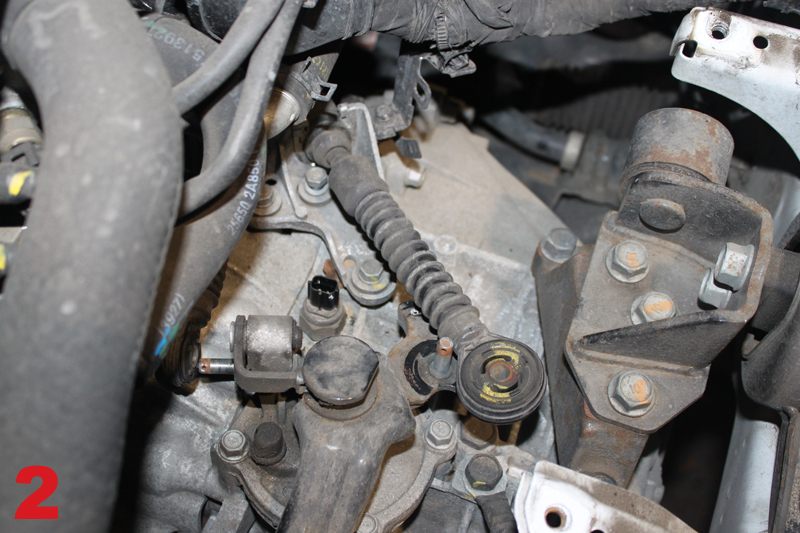
Next, disconnect the reverse light switch and gear cables (Fig 2), including the cable retaining bracket. Following this, detach the crank sensor and the gear recognition multiplug, which means that the upper bell-housing bolts can now be undone, along with the upper starter motor bolt and earth cable. The last thing to do in the engine bay is to slacken the gearbox mounting, ready for removal later on in the process.
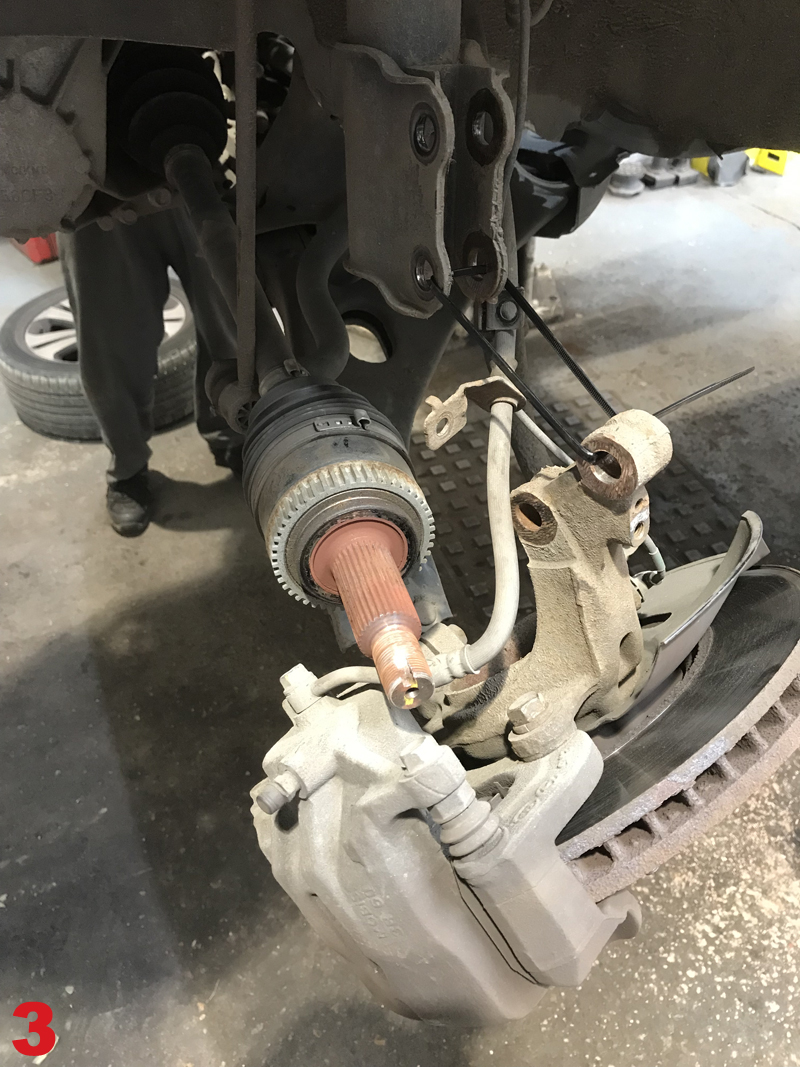
With the vehicle still on the ground, slacken both front hub nuts and wheel bolts, raise the vehicle to waist height, and remove both front wheels and front hub nuts. Then, disconnect the ABS sensor wiring looms, the flexible brake pipe retaining clips and the strut-to-hub assembly bolts, so that the outer driveshaft joints can be eased out of the hub assemblies (Fig 3).
Next, raise the vehicle lift to gain access to the underside, remove the engine undertray and then drain the gearbox oil. Whilst draining, remove the lower gearbox pendulum mounting, then, once the oil has drained, refit the drain plug and torque to the manufacturer’s specification.
Remove both driveshafts, the lower intercooler hose that runs under the bell housing/sump area (Fig 4) and the lower flywheel cover back plate.

On the front of the gearbox, detach the clutch pipe bracket and the slave cylinder assembly. The clutch pipe remains connected to the slave cylinder, which should be stowed away to allow for easy gearbox removal. Next, undo the lower starter motor bolt.
Disconnect the lower bell-housing bolts, leaving two easily-accessible to support the gearbox until it is ready to be removed. Using two transmission jacks, support the engine and gearbox, then remove the gearbox mounting that was slackened earlier. Once removed, lower the engine to aid gearbox removal; once lowered, undo the final bell housing bolts and ease the gearbox away from the engine. When the input shaft is clear from the clutch, lower the gearbox on the second transmission jack and move it to a safe area.
Clutch and gearbox inspection
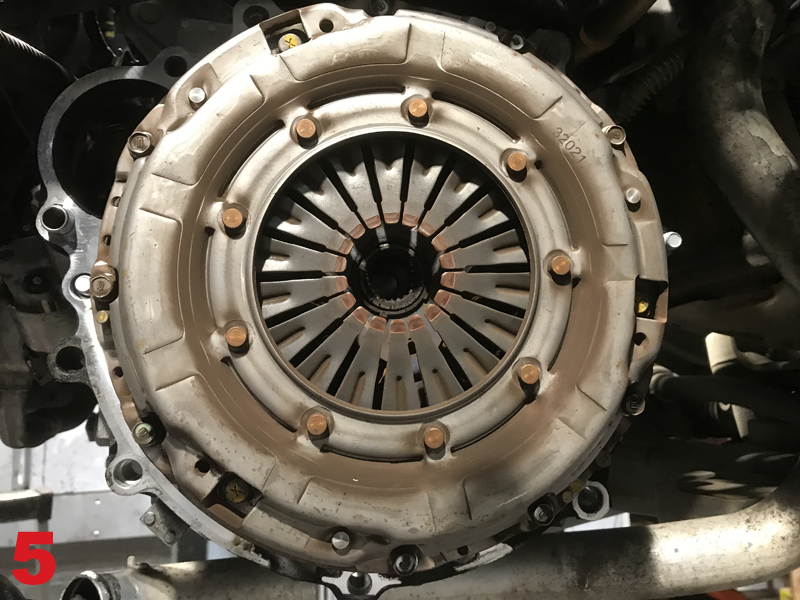
Disconnect the nine clutch retaining bolts and remove the clutch assembly from the flywheel (Fig 5); on inspection of the clutch plate, it was easy to see it had reached the end of its service life, as the clutch plate lining had worn close to the retaining rivets.
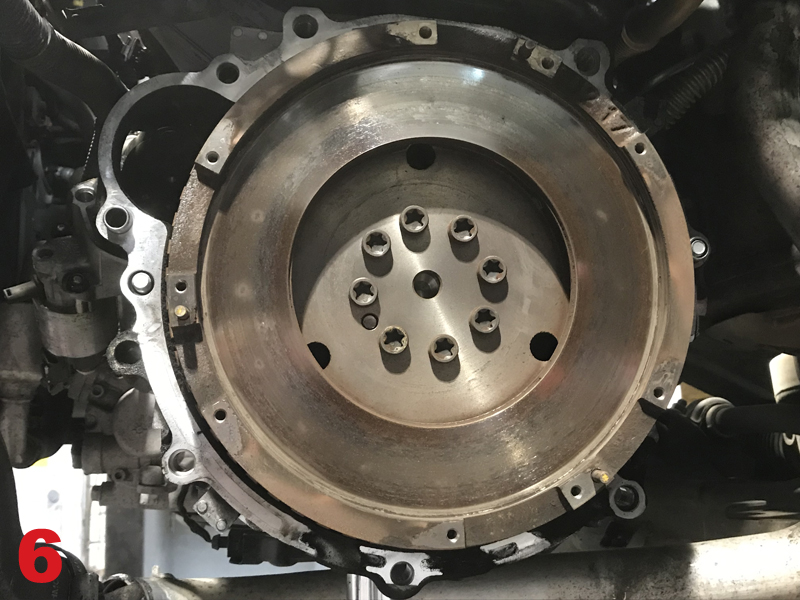
The next job is to remove the glaze from the flywheel using an Emory cloth, and the clutch dust using brake and clutch dust cleaner, before inspecting the flywheel for any cracks (Fig 6) and the back of the engine for any oil or coolant leaks, rectifying as required, so as not to contaminate the new clutch.
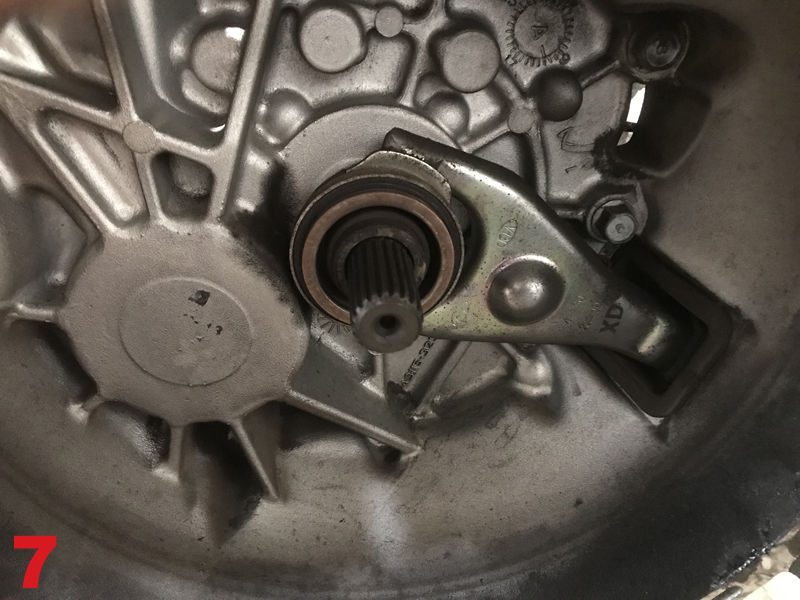
Attention now turns to the gearbox. First, remove the release bearing and fork (Fig 7), inspecting the latter closely for wear. If any wear is evident, it must be replaced.
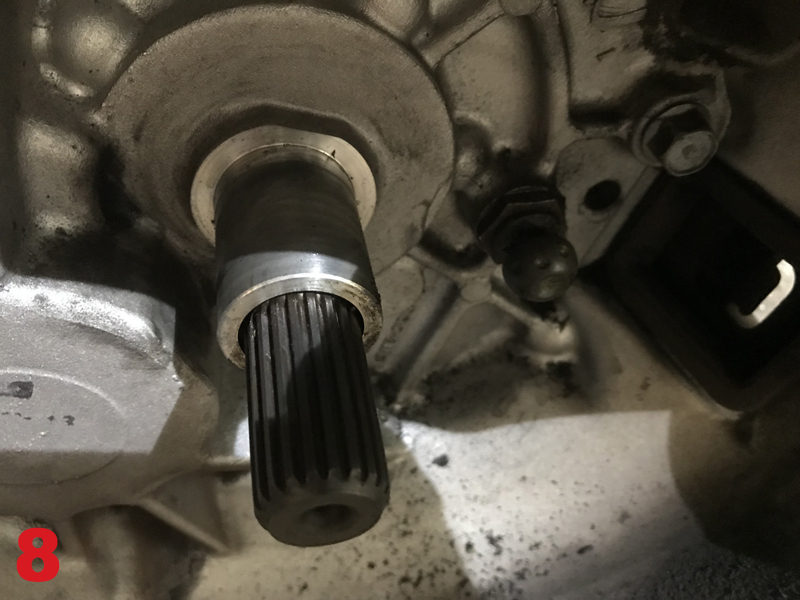
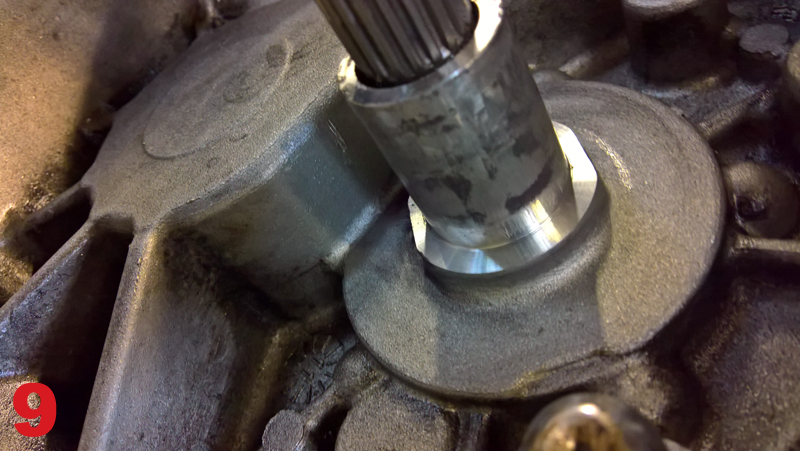
Clean the bell-housing area with brake and clutch dust cleaner, then inspect the release bearing guide tube for any wear (Fig 8). A new release bearing can catch on worn areas and not allow it to return fully (Fig 9); if this occurs, it can cause release problems and/or lead to ‘over-stroke’ problems, which will damage the new clutch and/or even the gearbox.
If wear is evident on the release bearing guide tube, the bell-housing casing will also need to be replaced. Also, check the pivot point for any wear and replace if required.
Once satisfied, lubricate the pivot points on the release bearing fork, fit it and the new release bearing and, by hand, check that the operation feels correct and smooth. Next, lightly smear some high-melting point grease onto the splines on the input shaft and mount the clutch plate onto the input shaft, achieving two things: it evenly distributes the grease, and it also confirms correct fitment of the clutch plate. Finally, remove the clutch plate and wipe off any excess grease.
The next part of the process is to mount the new clutch assembly onto the flywheel. Using a clutch alignment tool, mount the clutch plate, ensuring the clutch plate is facing the correct direction – ‘Gearbox Side’ – then mount the clutch cover/pressure plate, screw in the retaining bolts and tighten evenly and sequentially, torqueing to the manufacturer’s specification.
Gearbox installation
Before installing the gearbox, ensure that the alignment dowels are inserted into the back of the engine, and that all cables are clear of the gearbox area, so as to not get trapped or pinched.
Mount the gearbox onto the transmission jack, align the gearbox to the engine and ease it into position. Once the gearbox has located on the dowels, insert two easily accessible bolts and tighten. Reinstall the gearbox in reverse order of removal, and once the battery has been connected, reset all affected electrical consumers. Refill the gearbox with the correct quantity and grade of oil, before carrying out a road test to ensure a quality repair.


