Blue Print’s Charles Figgins guides readers through a clutch replacement on a BMW 1-Series.
Manufacturer: BMW
Model: 1-Series F20 116d
Year: 2011
Engine: 2.0 Diesel N47
Mileage: 116,000
The BMW 1-Series was introduced to the market in 2004, adding a new dimension to the established BMW 3, 5 and 7- Series models. This new range of vehicles offered an alternative to front-wheel drive competition such as the Volkswagen Golf, with the first and second generations using the traditional BMW powertrain set-up of rear-wheel drive. The third generation 1- Series is now based on a larger version of the primarily front-wheel drive MINI platform – marking a change in BMW’s philosophy.
The example featured in this article is a second-generation 1-Series F20 116d equipped with the N47 2.0 diesel engine, which had covered 116,000 miles (187,000 km) and was showing all the signs of requiring a new clutch.
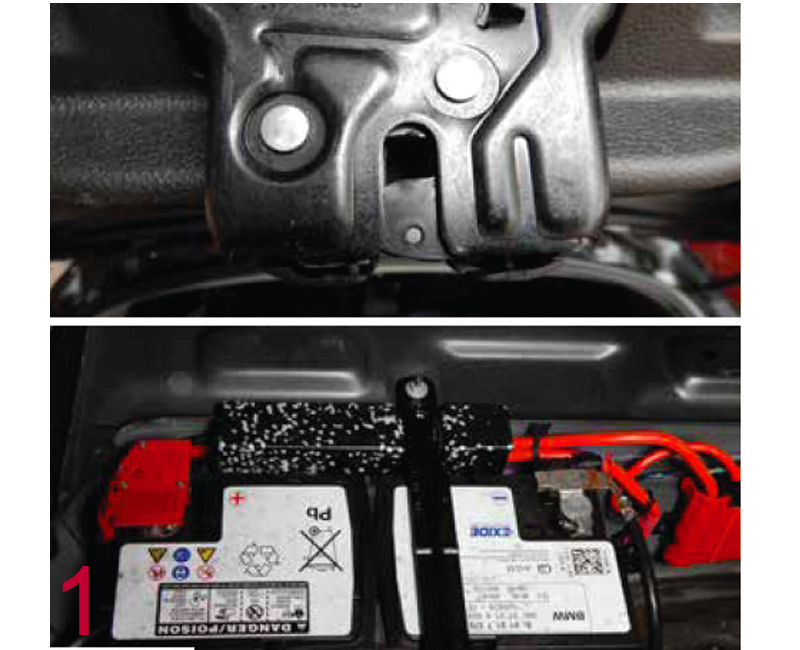
Before the clutch replacement process can begin, the vehicle must be raised onto the ramp in order to lift up the vehicle’s tailgate and locate the battery. Remove the negative terminal and set it to one side before lowering the tailgate and setting the latch into the ‘shut’ position to stop the tailgate from closing completely. This is because, with the battery disconnected, the tailgate latch would remain in the ‘shut’ position if closed, due to the latch requiring battery power to operate (Fig.1).
In this instance, the tailgate would not be able to open, making the battery difficult to access for reconnection. All other operations to remove the transmission to gain access to the clutch assembly are from underneath the vehicle.
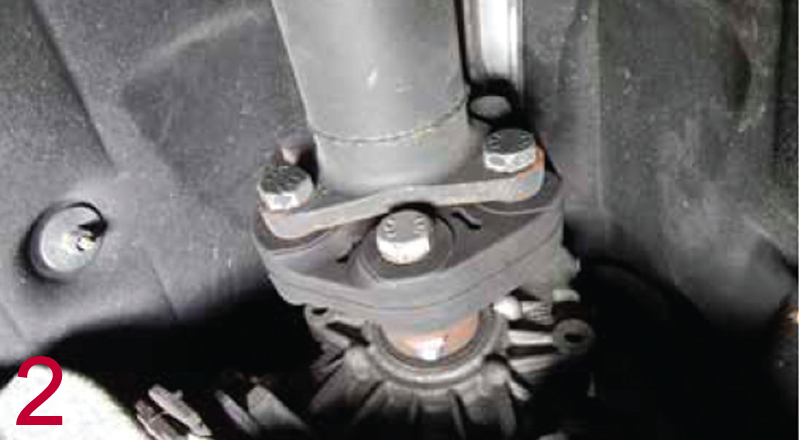
With the vehicle fully raised, the engine and transmission undertrays can be removed, followed by the right-rear exhaust silencer mounting, which allows for the exhaust system to be lowered. Once lowered, there is enough clearance to remove the exhaust heat shields to expose all the fixings to remove the propshaft (Fig.2).
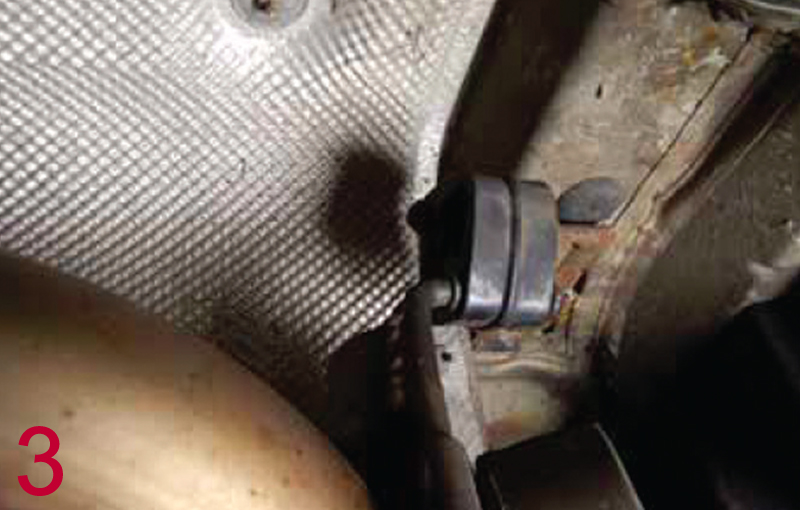
Unbolt the front and rear propshaft couplings (also known as flexible discs), along with the centre support, and remove the complete propshaft from the vehicle. This is a perfect opportunity to inspect the propshaft universal joint for any ‘stiffness’ or excess play, along with the centre bearing and condition of the propshaft rubber couplings, and to replace any worn parts – if necessary – before reassembly (Fig.3).
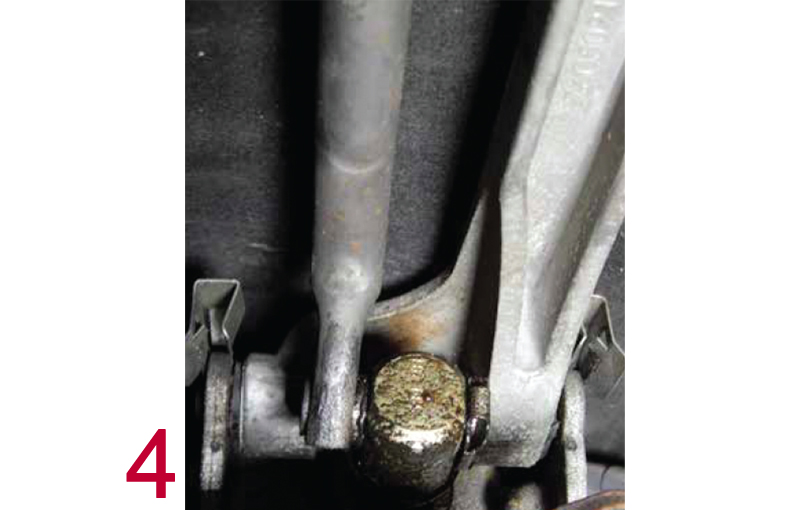
Next, detach the gear linkage. There are two pins fixing the linkage to the transmission and one to the gear selector; simply remove them and the linkage becomes separated from the transmission (Fig.4).
Other items requiring removal include the clutch-slave cylinder, located on the left-side of the transmission. This can be unbolted from the transmission with the hydraulic hose attached but – In the case of the vehicle featured in this article – the hose was clamped, then disconnected, before the slave cylinder was unbolted, because a new slave cylinder was going to be part of this repair anyway.
The starter motor wiring harness can now be removed – then, unbolt the starter from the engine, being aware of the hidden bolt that goes through the deep rubber grommet attaching it to the engine.
Other wiring harness components that require unclipping and removing are the reverse lamp switch on the left side, the neutral switch on the top of the transmission, and an earth cable on the right side.
Remove bell housing bolts
Next, put a transmission jack in place to take the weight from the transmission, then unbolt the rear transmission mounting from the vehicle’s body. Remove all the bell housing bolts and the bracket that was attached to the DPF – however, the transmission must be lowered to gain access to the bolts at the top of the transmission using a long extension and socket. Once all bolts are removed, the transmission can be guided away from the engine and lowered to the workshop floor for inspection.
With the transmission removed, the flywheel can be ‘locked’ in place to stop the engine from turning. Unbolt the original clutch and dual-mass flywheel and remove them for inspection. Check the flywheel – in the case of the vehicle featured here, some ‘blueing’ on the friction surface was discovered, this being due to the excess heat created by the worn clutch. A rock test should also be carried out on the flywheel – in this vehicle’s case, it failed the rock test, so the flywheel did require replacement.
We now turn our attention to the release mechanism: remove the release bearing from the clutch-release lever, which can become dry and noisy with usage and age.
Clean surfaces
Before fitting any new components, thoroughly clean all mating surfaces at the rear of the engine and the transmission bell housing so they are free of all grease, dirt and old friction fibres from the previous clutch. Then, the new dual-mass flywheel and retaining bolts can be fitted to the engine along with the new clutch kit ADB113017.
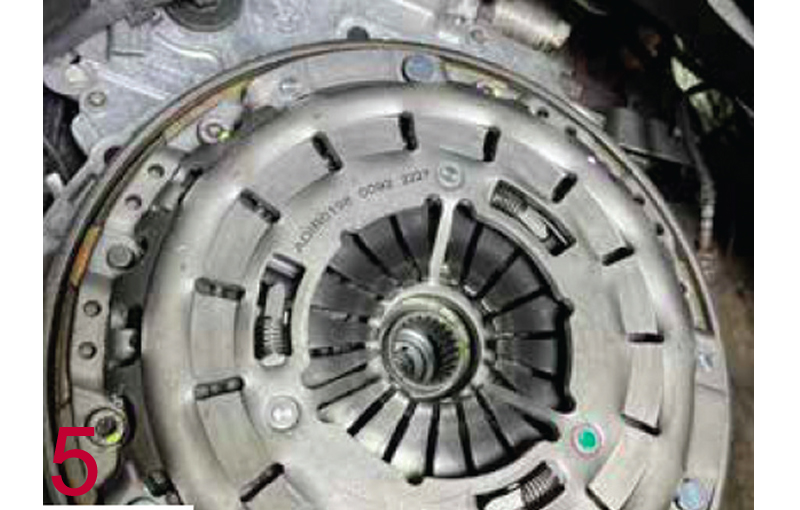
Tighten all bolts to the manufacturer’s recommended tightening figures, evenly and in sequence, before securing and correctly aligning the components (Fig.5).

Before refitting the transmission to the engine, assemble the new release bearing with the new release lever and then fit it to pre-greased pivot points to ease operation. Note: this clutch kit is provided with an information bulletin, because the release bearing can be fitted at two different points: in this case it is in the 28.5 mm position to provide the correct clearance between the pressure plate and the bearing (Fig.6).
With all clutch components replaced, use a transmission jack to support the transmission and lift it into position. Secure all the cables, pipes and the gear-selector linkage so as not to foul the transmission. The transmission can now be refitted to the engine.
Afterwards, refit all components to the transmission and bolt the rear mounting to the body before removing the jack. All other parts previously removed during the process should also be refitted, as well as tightening all bolts and fixings accordingly. The vehicle can now be lowered – once lowered, reconnect the battery and reset the tailgate latch. Top-up the brake/clutch fluid reservoir with fresh fluid, bleed the slave cylinder of any excess air and reset the clock.
Finally, carry out a road test to check the operation of the new clutch and to reset the tyre pressure warning system and steering wheel angle sensor.


