KYB offers readers of PMM advice for replacing shock absorbers.
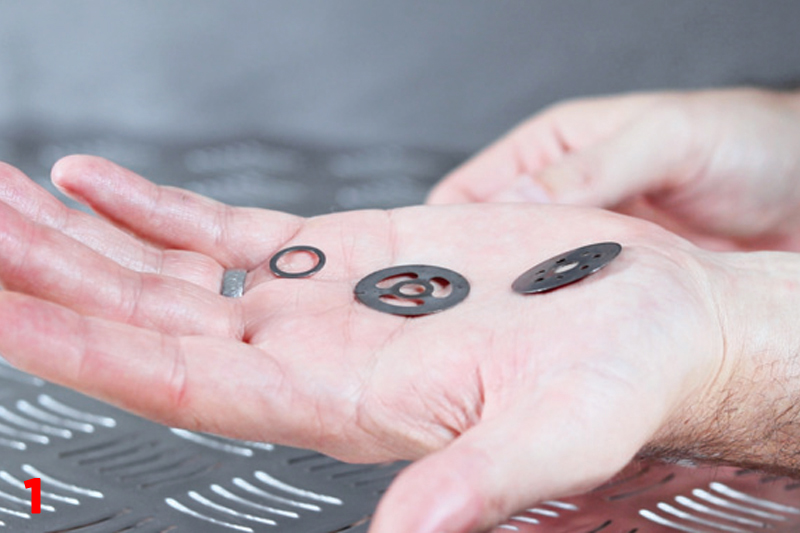
Checking for external failure during an MOT is obviously important, but this fails to consider that shock absorbers naturally wear over time – meaning there aren’t always obvious signs indicating wear or failure. The reason for this lies within the inside of a shock absorber cylinder, which houses a number of carefully calibrated valves. Each valve contains a stack of compression discs (Fig.1/Main image), each less than 1mm thick. When a piston rod is compressed, oil is forced through these valves, creating the resistance needed to absorb any bumps in the road. By the time a car reaches 50,000 miles, fluid has passed through these valves over 75 million times. Inevitably, this causes the discs to wear and deteriorate, meaning that fluid passes through more easily, decreasing the damping rate significantly and making the shock absorber much less effective.
To ensure problems don’t slip under the radar, KYB recommends asking your customer if they have noticed any of the following symptoms before checking for external signs:
- Car pulling to one side.
- Car unstable when cornering.
- Vibration in steering wheel.
- Excessive bouncing over bumps.
- Nose diving.
- Veering in side winds.
The importance of priming

Occasionally, a shock absorber will be misdiagnosed as faulty when removed from its packaging for installation. However, the fix is often very simple: priming. Shock absorbers are generally stored and transported horizontally, causing the gas and hydraulic fluid within to mix with one another. Pockets of air begin to form within the oil, affecting the damping force of the shock absorber. Whilst priming is not fundamental to the operation of shock absorbers, installation without priming can lead to customer complaints about unusual noise or ride harshness as the shock absorbers “break in”. To avoid this, pump the shock absorber 4-5 times in its vertical working position to ensure that the oil and gas move to the correct areas prior to fitting (Fig.2).
Using the right tools
Using incorrect tools risks damaging the shock absorber and can prove costly, with unhappy customers returning for further repairs. There are plenty of tools on the market specifically designed to help – these include:
- Torque wrenches. It is often considered easier to use an impact wrench to install and remove mounting kits quickly. However, KYB strongly advises against this practice, as using impact wrenches can:
-
Spin the piston rod, causing damage to the valving within the shock absorber. The holes within these valves are lined up in a specific way to allow for fluid movement – if these are misaligned, it can reduce effectiveness of the shock absorber.
-
Cause the bottom nut holding the valving together inside the shock absorber to come loose. Tightened between 7-12Nm in the factory, this nut is prone to loosening when the incorrect tool is used.
-
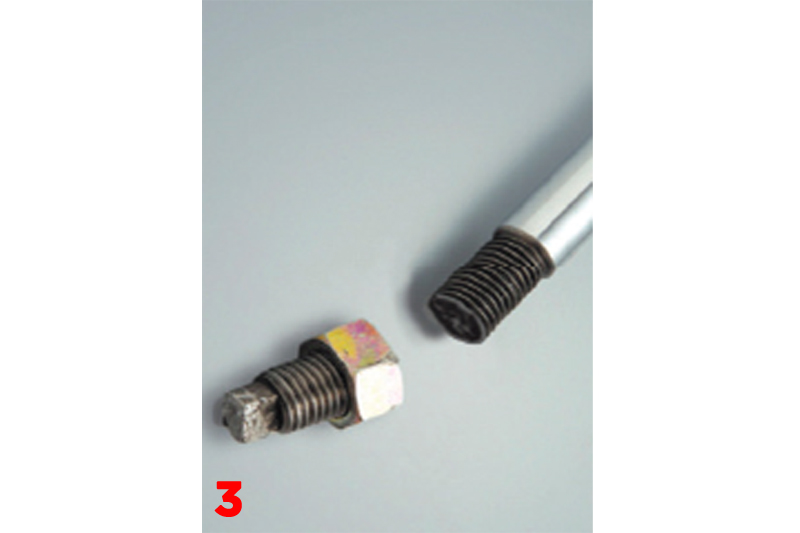
Sever the thread, leading to complete failure of the shock absorber (Fig.3).
Instead, use a torque wrench and tighten to the manufacturer’s torque recommendation after the full weight of the car has been applied.


- Strut Nut Kit: When completing the above, don’t place gripping pliers on the piston rod when tightening the upper nut. This can score the highly polished chrome shaft, increasing wear on the upper seal, in turn causing a hydraulic fluid leak. Instead, using a strut nut kit will allow you to hold the piston rod securely without damaging the shock absorber (Fig.4&4a).
If you don’t have a kit, most shock absorbers have an area where it is safe to hold onto the piston rod using a spanner, located near the top of the shaft, just above where the thread starts. Or for some, there’s an indent for a hex key at the top.


