Questions arising from the replacement of Air Mass Meters are the most common answered by the Lucas Electrical technical support team and its mobile TechAssist service. Air Mass Meters have been installed in our vehicles for more than a decade and have quickly grown to become one of the most important components in engine management systems. If it fails, frequently nothing else will work.
The Air Mass Meter plays a key role in the vehicle’s air supply system and helps to control exhaust gases, which in turn helps VMs to meet environmental targets and regulations. By nature, Air Mass Meters are extremely sensitive and are easily damaged by contamination from water or engine oil and even dirt and dust particles in the air supply system.
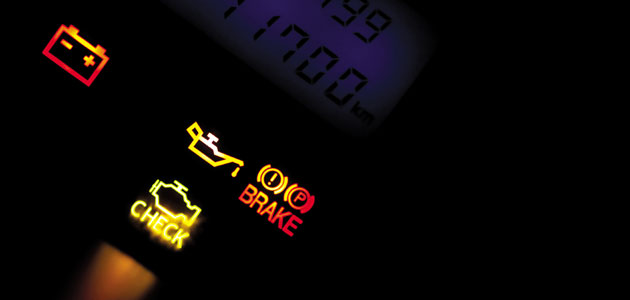
Common symptoms of a faulty Air Mass Meter include erratic engine operation, reduced performance, increased fuel consumption, stalling, hesitation, and rough idle. Often the car will fall into ‘limp’ mode and the OBD light will switch on.
“Fitting aftermarket sensors is similar to plugging a device into a PC or laptop – the PC will recognise the new device, then find and install the drivers it needs to operate correctly. The vehicle’s ECU is very similar, it simply needs to calculate how best to use the newly fitted component.”
Ian Dance, Lucas TechAssist Consultant
There are a number of key points to consider when replacing an Air Mass Meter, including the all-important resetting of parameters procedure:
Before fitting: change the filter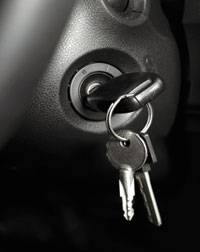 It is highly recommended to change the air filter before replacing the Air Mass Meter. Dirty, sub-standard or worn out air filters can contaminate the element of the sensor and cause it to fail. The air filter should be changed every 15,000 miles to ensure efficiency and durability of the Air Mass Meter.
When fitting: ensure the correct mounting direction
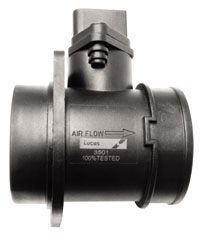
Most Air Mass Meters have an arrow on the outer case to indicate the correct direction of airflow through the Air Mass Meter to the engine. Ensure the arrow points in the correct direction when mounting the component in position.
After fitting: reset parameters
After replacing engine management components, many vehicles will require a reset of the parameters to tell the ECU that a new part has been fitted. Without this, the ECU will believe that the engine is still running with faulty sensors and will default back to data already received before the replacement. This causes the vehicle to run poorly, normally with the MIL on and the fault code still logged in memory.
Reset parameters as follows:
Firstly, reset the vehicle using diagnostic tools. If the fault code persists, perform a manual reset according to the manufacturer’s instructions, commonly as follows:
 Carry out 3 drive cycles:
1. Turn ignition on, turn ignition off;
2. Turn ignition on, turn ignition off;
3. Start the engine. An extended road test – normally around 20 miles – is then required to provide the ECU with enough data to allow the new sensor to function correctly.
OTHER POSSIBLE CAUSES OF AMM ERROR MESSAGES
A non-faulty AMM may still cause an error message due to problems elsewhere in the vehicle, including:
■ Faulty EGR Valves, which can cause inconsistent flow rate from the throttle body;
■ Faulty Lambda Sensors, which can cause unnecessary increases in airflow;
■ Blockages in air intake filters;
■ Leaking induction hoses;
■ Faulty tank ventilation valves.
A fault code reader and/or ECU diagnostic equipment is required to correctly diagnose and rectify Air Mass Meter related issues.
COMMON FAULT CODES
P0100
Mass or Volume Airflow
Circuit Malfunction
P0101
Mass or Volume Airflow
Circuit Range/Performance Problem
P0102 Mass or Volume Airflow
Circuit Low Input
P0103
Mass or Volume Airflow
Circuit High Input
P0104
Mass or Volume Airflow
Circuit Intermittent