In this month’s Clutch Clinic, Charles Figgins, Technical Marketing Manager at Blue Print, runs through the step-by-step procedure for replacing a clutch on a 2009 Peugeot 107.
The Toyota Aygo, Citroën C1 and Peugeot 107, manufactured from 2005-2014, were the result of a very successful joint project between the PSA group and Toyota. All three vehicles were assembled in the same factory in the Czech Republic and share many common components. However, this popular city car is well known to have suffered from a number of clutch issues, resulting in a variety of improvements during its production.
The common issues can be attributed to premature clutch disc wear or clutch noise (often recognised as release bearing ‘squeak’) caused by a worn clutch cover diaphragm spring and/or broken release bearing tab. This results in the clutch feeling heavy and, as a result, difficult to change gear.
The complete Blue Print clutch kit ADT330246 is required if the vehicle being repaired has symptoms relating to a worn clutch. In addition, if the vehicle demonstrates the symptoms highlighted above, then the clutch fork must also be checked and replaced if necessary. This is advised due to the increased effort required to change gear, which may result in stress fractures in the clutch release lever.
Step-by-step guidance
In this particular case, the focus is a 2009 Peugeot 107. The owner had noticed that the clutch pedal had become stiff in operation and the engagement point was at the upper part of the pedal travel. This indicated the clutch was nearing the end of its service life and was due for replacement.
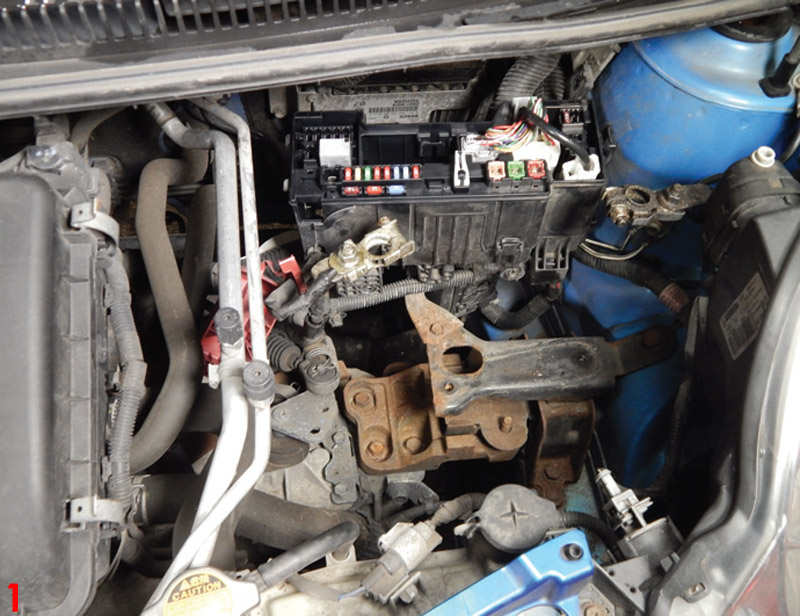
With the vehicle in the workshop, the bonnet was opened, and the battery was removed, followed by the battery tray. The tray is held in place by four bolts, however there are also several retaining clips connected to the fuse box which need detaching before it can be removed. Once removed, this revealed the gear selector linkage cables and clutch cable. The ‘R’ clips were removed (which retained the gear linkage cables) and the clutch cable was loosened. This was followed by the unbolting of the retaining bracket from the transmission. The cables were then retained out of the way, until they were required to be refitted (Fig 1).
Working from the top of the transmission, the lambda sensor and reverse lamp wiring harness were unplugged, along with the removal of the retaining bracket. The upper bell housing bolts and one of the starter motor fixing bolts were also removed.
The vehicle was raised, and the front wheels were removed, followed by the lower suspension arm ball joint ‘R’ clips and retaining nuts. The ball joints were then freed from the steering knuckle assembly. This was followed by the removal of the transmission oil drain plug, which is located below the left driveshaft. Once the oil was drained, a suitable lever bar was used to release the inner driveshaft joints from the differential.
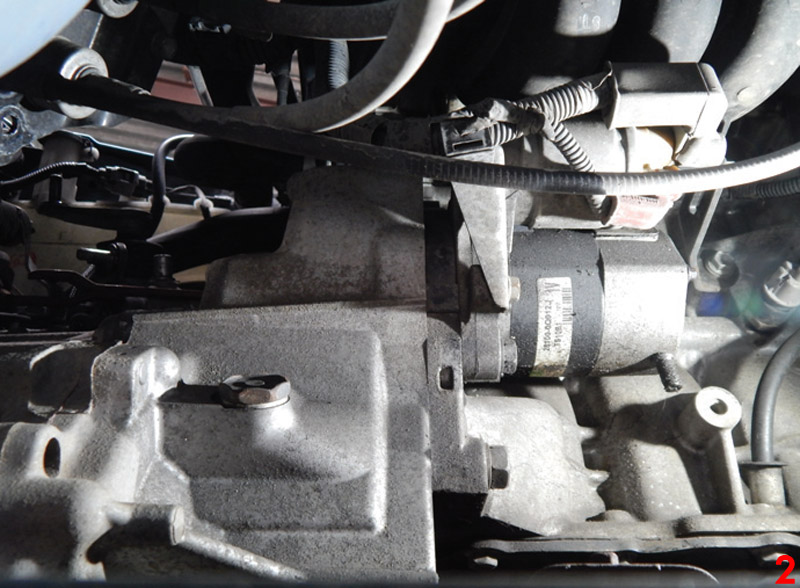
Working under the transmission, the earth cable was unbolted and the lambda sensor wiring harness was unclipped. The two exhaust retaining bolts were removed and the exhaust was positioned out of the way and supported to one side – this prevented the risk of damaging the lambda sensor when removing the transmission. Next to be detached was the steel plate covering the flywheel, followed by the removal of the rear transmission mounting and bracket. Whilst supporting the engine, all but two of the remaining bell housing bolts were removed, plus the one remaining starter motor bolt.
Note: The starter motor was left in place as it does not need to be removed completely for the removal of the transmission (Fig 2).
The four bolts retaining the top transmission mount were removed along with the last of the remaining bell housing bolts. The transmission was then separated from the engine and lowered from the vehicle for inspection.
The clutch pressure plate and friction disc were removed from the flywheel and inspected for any unusual wear issues. In this particular inspection, the flywheel was in good condition and only required cleaning before fitting the new clutch. However, the friction disc material was close to being worn out and there was significant wear on the pressure plate diaphragm springs.
The clutch kit for this vehicle had been updated in 2008, increasing the clutch friction disc diameter from 180mm to 190mm to improve its service life. As a result, Blue Print clutch kit ADT330246 was fitted to the flywheel, reflecting these updates and following the updated OE specification.
Turning attention to the release mechanism, the bell housing was thoroughly cleaned to free all grease, dirt and old friction fibres from the previous clutch. The release bearing was then removed from the clutch fork and the guide sleeve was inspected for wear.
The fork and release lever were removed and inspected for any fractures or damage. In this case, no parts were showing any signs of stress or damage. However, during the vehicle’s production, a strengthened release fork and lever were introduced in 2013. As a result, the updated clutch fork ADT33351 and release lever ADT33352 were fitted to the transmission, following the lubrication of the pivot points.
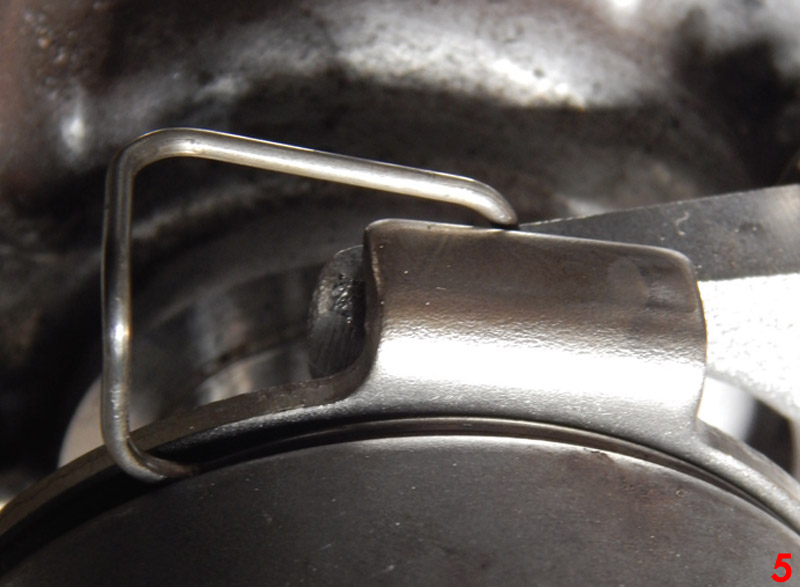
Next, the new release bearing was fitted. Note: It is important to correctly locate the retaining clips on the fork and the orientation of the release bearing – failure to do so can create operational issues with the clutch mechanism.
Fig 3 highlights the locating groove in the fork.
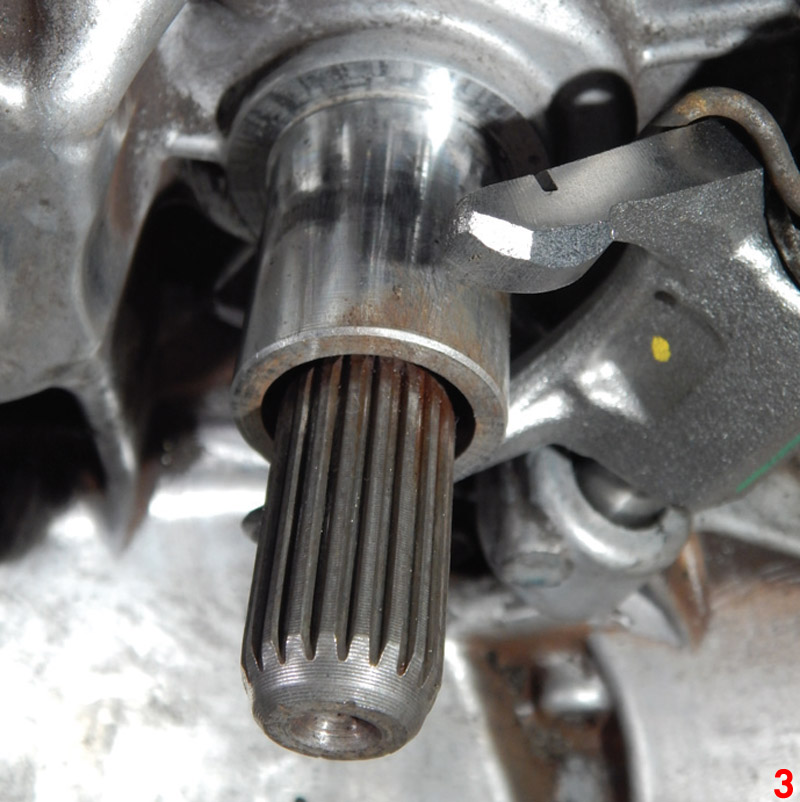
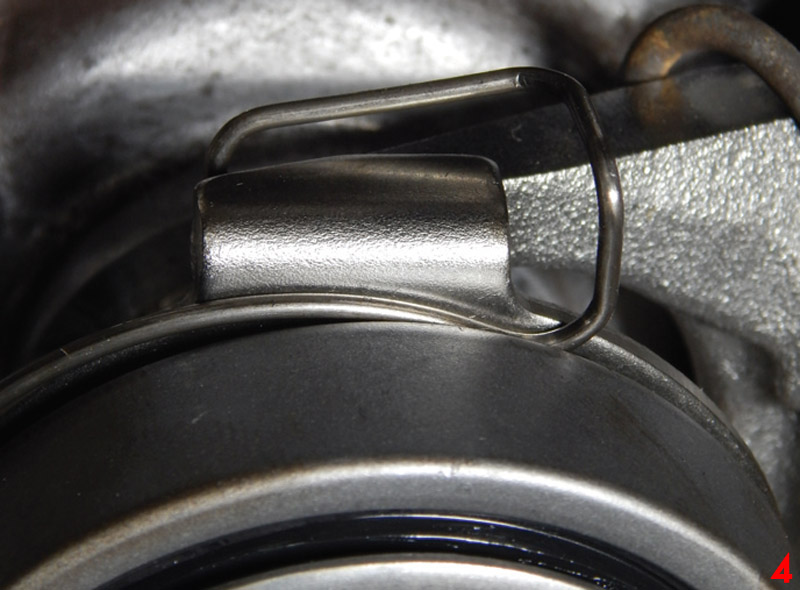
Fig 4 shows the incorrect orientation of the release bearing, whereas Fig 5 demonstrates the correct fitment of the bearing with the clip located in the groove.
Note: When fitting the release bearing, you should only apply grease to the input shaft splines. Do not apply on the release bearing or any other part of the shaft.
With the release bearing fitted correctly and the operation of the release mechanism tested for smoothness, the transmission was ready to be refitted to the engine.
Refitting the transmission
The transmission was aligned with the engine and all retaining bolts were attached. This was followed by the support mounting brackets and exhaust. Then, both driveshafts, the lower suspension ball joints and the wheels were all refitted.
The transmission oil level plug, located above the left driveshaft, was removed and the transmission was filled with fresh oil.
Working from the top of the transmission, all wiring harnesses were attached. Then, the clutch and gear control cables were refitted, including initial adjustment to take up the free play within the clutch cable.
With all of the parts now refitted, the battery tray, fuse box and battery were also installed. The clock and radio were then reset.
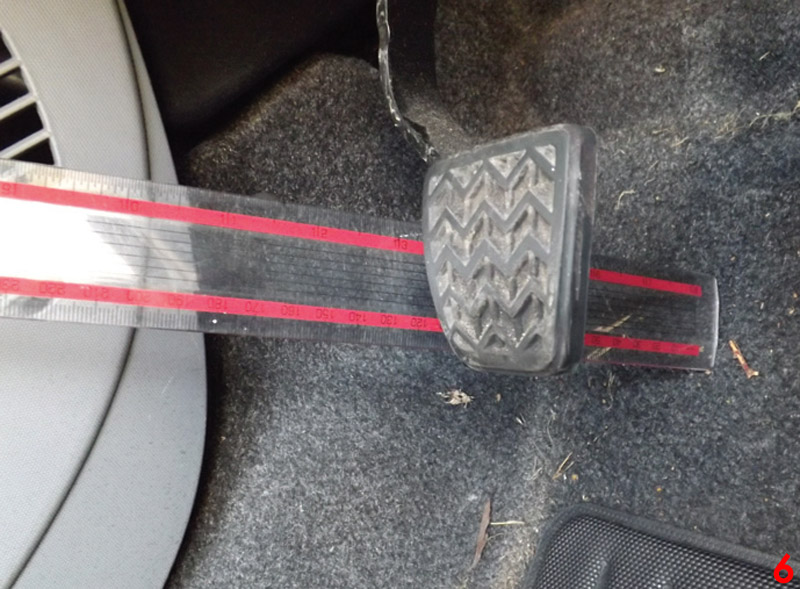
The clutch pedal was checked for smoothness of operation, followed by the checking of the pedal free play (by hand) and adjusted where necessary.
The distance travelled by the pedal was then measured with a ruler.
Note: The amount of free play in the clutch pedal is required to be 23mm, +/- 5mm (Fig 6). This check and adjustment should be carried out at every routine service.
The clutch cable was revised accordingly, until the tolerance was achieved. With the new clutch fitted and adjusted correctly, the car was road tested for perfect operation.


