A full clutch replacement guide for a 2.4 TDCI 2006 Ford Transit from the experts at Schaeffler Automotive Aftermarket.
LUK PART NUMBERS USED: DMF TOOL 400 0080 10, UNIVERSAL MOUNTING TOOL 400 0237 10
Ford released its first-generation Transit to the UK market in 1965 and the vehicle has received numerous facelifts along the way to becoming today’s current fourth generation model.
More than eight million Transits have been sold, making it the third best-selling van of all time. It has also been the best-selling light commercial vehicle in Europe for the last 40 years, so with this in mind, there is great opportunity to service and repair these vehicles.
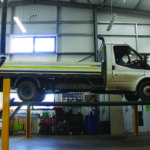
In this month’s article, we are replacing a clutch on a 2006 Ford Transit 2.4 TDCI, which has covered more than 150,000 miles, where the customer has reported clutch slip under load. For this repair, we used the following workshop equipment: a four-post ramp with a beam jack, transmission jack and a tall axle stand.
Battery disconnection is required for this repair and it is advised to obtain the radio security code from the customer before starting. A short road test confirmed a diagnosis of clutch slip under load, and with over 150,000 miles on the clock, a clutch replacement was recommended. The workshop repair instructions and times were obtained from the Schaeffler REPXPERT online workshop portal.
With the vehicle positioned on the ramp, slide the driver’s seat forward to access the battery and disconnect the negative battery lead (see below), then raise the ramp and disconnect the propshaft from the gearbox by removing the three bolts and unbolt the two support bearings. The propshaft can then be positioned on the ramp with the rear still connected to the differential.
![]()
Now remove the gearbox sub frame. Start by supporting the vehicle weight under the front cross member (see below), remove the pinch bolt from the steering column/rack connection and disconnect the steering column and secure to prevent rotation.
![]()
After that, remove the oil feed and return pipes from the steering rack body (see below) and cap to prevent the oil system draining.
![]()
Support the sub frame with a transmission jack and the gearbox with a tall axle stand. Remove the two large bolts that fix the rear gearbox mounting to the sub frame, and then remove the two bolts that go through the sub frame and bottom arm, as well as the rear mounts, and then remove the two nuts that hold the front of the sub frame to the chassis legs. Ease the sub frame down until it releases from the front locating studs. Once free, it can then be pushed forward and secured if required. We used a large strap to retain the forward position, ensuring good access to the gearbox.
Disconnect the two gear change cables by releasing from the ball joints and slide the outer cable sideways out of the mounting bracket. Disconnect the reverse light switch multiplug, clamp the flexible hydraulic clutch pipe and then release it from the slave cylinder connection (see below).
![]()
Remove the starter motor fixing bolts and earth strap and ease the starter motor away from the gearbox. It can then remain in this position. Support the gearbox with the transmission jack and place a thin support block inbetween the engine sump and cross member. Now disconnect the engine speed sensor at the top of the bell housing and remove the bell housing bolts. The gearbox can now be eased back from the engine and removed from the vehicle.
With the gearbox removed, a visual inspection of the clutch was carried out and wear was evident as the small adjuster ring springs were fully extended (see below) and contact marks were visible on the cover limit stop.
![]()
Remove the clutch assembly. At this point, the Dual Mass Flywheel (DMF) can be checked for wear using the LuK DMF Checkpoint App (see below) and a special DMF tool (400 0080 10), but as we were replacing the DMF on the customer’s request, the check was not required and no wear was evident.![]()
Check the rear main oil seal for any wear or leaks, and inspect the spigot bearing for excess play or wear and lightly lubricate. It is good practice to clean/de-grease the rear of the engine and the gearbox bell housing. Remove the release bearing, check for any wear on the input shaft sleeve, pivot points and release arm. Lightly smear the input shaft splines with high melting point grease and mount the new clutch plate on the splines to confirm correct fitment. Remove the clutch plate as well as any excess grease and fit the new release bearing in the correct location.
This is a good point to flush out the old contaminated clutch fluid by placing a drainer under the clutch pipe and flushing the system through. Fit the new flywheel. This will only fit in one position as it has a location dowel. Replace the flywheel bolts as per the REPXPERT repair instructions and follow the torque sequence, then mount the new Self-Adjusting Clutch assembly using the LuK universal mounting tool (400 0237 10) (see below).
![]()
Check that the clutch plate is positioned correctly with the wording ‘Getriebeseite’ or ‘Gearbox Side’ facing the gearbox, and check the torque aligns with the manufacturer’s specification.
Check the bell housing dowels are installed in the engine, install the gearbox and refit components in reverse order of removal and bleed the clutch. When bleeding the clutch hydraulic system, connect a bleed bottle to the bleed nipple via a hose and open the bleed nipple. This system is gravity bled, and ensures the clutch master cylinder does not run dry. Once the battery has been connected, enter the radio security code and set the clock, road test the vehicle and confirm a successful repair.


