The first question that most technicians ask is why injectors actually need coding. The answer is that due to tolerances when the injectors are manufactured the injected fuel quantity may deviate between the actual and calculated fuel quantity.
After manufacture these deviations are determined for every injector, a calibration value is determined and the value is converted to a code that is stamped on the injectors. This code is programmed in the engine control unit for each cylinder. Using these codes, the engine control unit corrects the calculated fuel quantity individually for each cylinder and thus improves engine operation and exhaust emissions. With this function, new calibration values can be entered in the engine control unit (ECU) when replacing injectors or the ECU.
Injector data is found on the injector – this consists of 16 characters (comprising numbers and letters).
INJECTOR CODING PROCESS – FORD MONDEO 2005
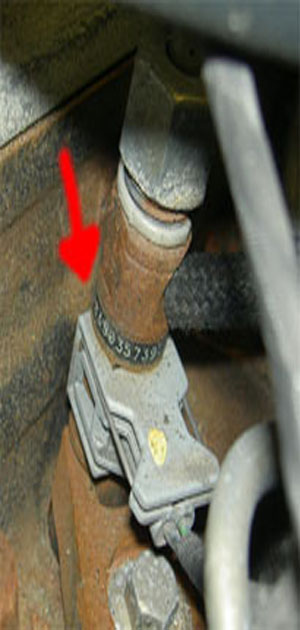
Each of the injectors has a 16 digit calibration code stamped on to the body; these can also be found on a label on the engine rocker top if it has not been removed. The safest way of getting the correct number is from the injector body itself. This is easy when they’re in a box, but a little more awkward when they are in-situ.

Injector data
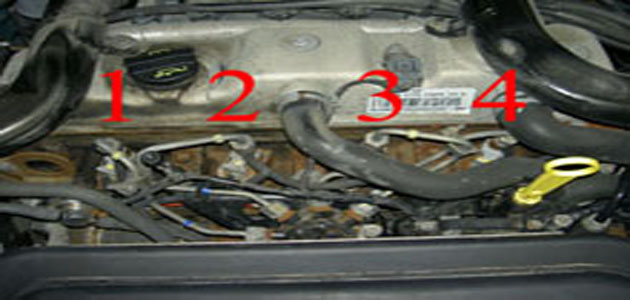
NOTE: On this particular vehicle the injectors are numbered in firing order and not according to cylinder order:
Injector 1 (cylinder 1)
Injector 2 (cylinder 3)
Injector 3 (cylinder 4)
Injector 4 (cylinder 2)

Cylinder numbers
Test conditions: Ignition on, engine off.
Procedure: The function was started and the instructions followed. If the function fails, check the test conditions and repair any faults.

STEP 1
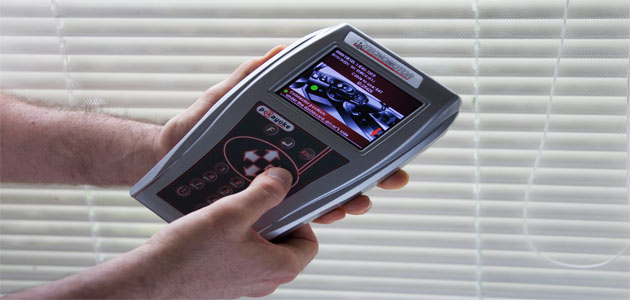
The technician connected the Socio diagnostic tool to the 16-pin EOBD diagnostic socket to interrogate the vehicle’s fault code history. The fault returned was: ‘P0263 Injector cylinder 1-Drift’ indicating an injector related fault.
STEP 2
The technician checked all of the injector’s back leakage using the Delphi Sealed rail kit (YDT278) in order to identify which injectors are not performing to specification, and to confirm correct levels of rail pressure.
In this case, it was a fault with one of the injectors, but if low rail pressure was an issue, the technician would have used Delphi’s False Actuator Kit (YDT410) to determine whether or not the pressure was generated mechanically by the pump or if there was a possible fault with the pump’s Inlet Metering Valve or Pressure Control Valve.
STEP 3
Once the technician concluded the fault was a worn injector, he removed all of the injectors from the vehicle. As all of the injectors had undertaken the same mileage, it was important to have the complete set diagnosed to rule out any other potential problems.
STEP 4
After the injectors had been tested, any which did not pass the authorised test were dismantled, repaired and reassembled in a filtered, clean environment. In this case the one repaired injector was, once again, put through a complete test procedure on an authorised test bench, and finally, recalibrated with a new C2i/C3i code, which was printed onto a label attached to the injector body.
The new calibration code is critical for the operation of the repaired injector. When fitted to the engine, it allows the software within the ECU to accurately control the injector’s fuel delivery and switching times, according to the specific parameters and performance of the vehicle.
STEP 5
Once the technician received the tested, repaired and recalibrated injectors, he was able to refit them to the engine, continuing to maintain a high standard of cleanliness at all times.
After the injectors were fitted to the engine, the technician utilised the Socio diagnostic tool to calibrate the vehicle with the new C2i/C3i code for the repaired injector and to re-check the other three. This is a straightforward process as the tool provides help files for the technician to guide them through the process.
Please note: Recalibrating the vehicle with the new codes is essential; if the new codes are not entered the vehicle will have poor running and idling issues, and fault codes are likely to be generated.
STEP 6
The final step for the technician was to reinterrogate with the Socio diagnostic tool and clear all the fault codes to confirm the fault was eliminated.


