Manufactured since 2007, the Hyundai i30 is a popular family car that shares its platform with the Kia Cee’d. With over 50,000 i30’s on the road, the clutch replacement is well into the independent workshop, so it’s another worthwhile subject for the ‘Clutch Clinic’.
No special tools are required to complete the repair; the only additional tools needed are a transmission jack, an engine support cradle and a long axle stand. A two-post ramp was used in this repair. If the vehicle has alloy wheels, it may be fitted with anti-theft wheel bolts, so make sure you have the key before you start.
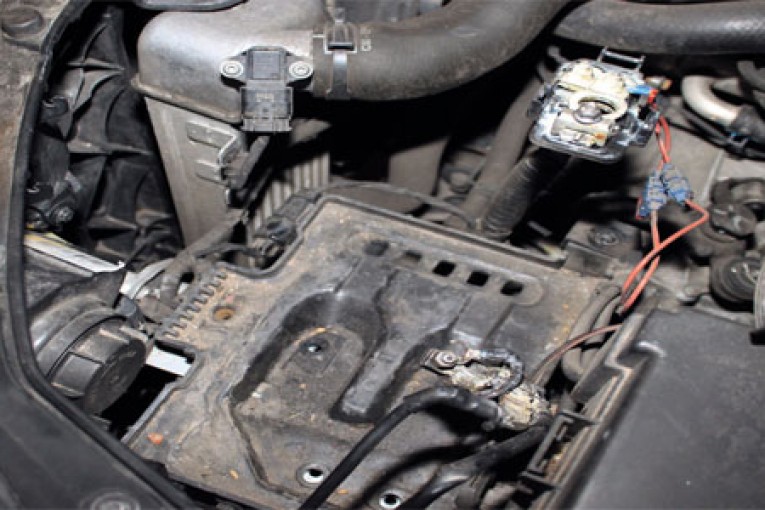
Open the bonnet and disconnect both battery terminals. Undo the battery clamp and remove the cold air intake, via the two bolts at the front, remove the battery and undo the bolts from the battery tray (Fig 1 below).
(Fig1)
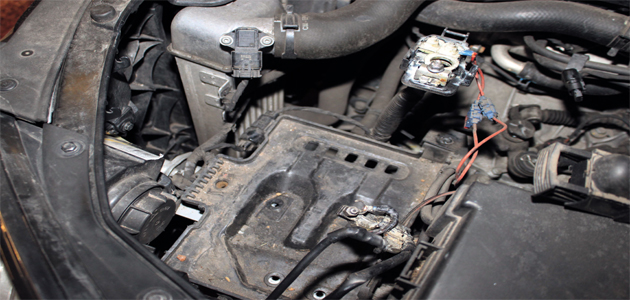
Undo the air filter bolts and disconnect the AFM Multiplug before unclipping the cable from the AFM. Disconnect the ECU and remove the air filter box and ECU together (Fig 2 below).
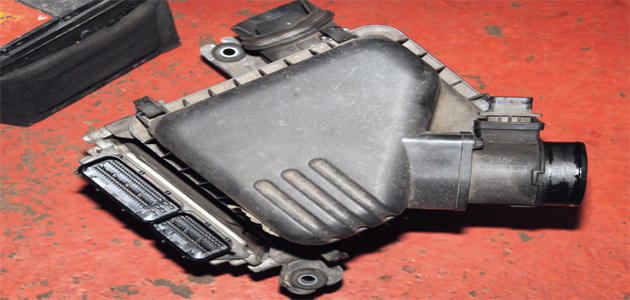
(Fig 2)
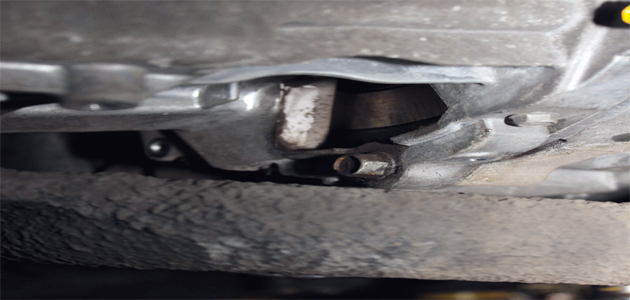
Unattach the remaining cables from the battery tray and remove. Unclip the gear linkage clips (Fig 3 below), unbolt the bracket and stow away to one side.
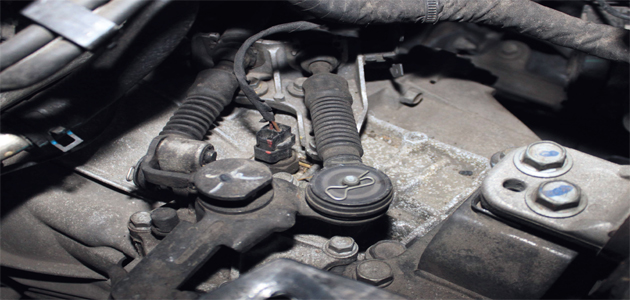
(Fig 3)
Be careful with the “C” clip retaining cable to bracket (Fig 4 below) if you need to remove it. Unbolt the slave cylinder and pipe support bracket and stow away safely.
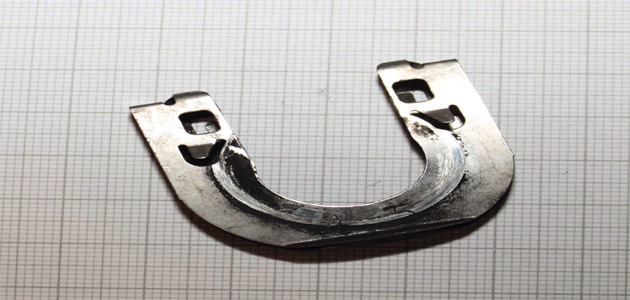
(Fig 4)
Fitting the engine support cradle
Unbolt the steering column universal joint from inside the car, then unbolt and remove the earth strap under the bonnet. Now you can fit the engine support cradle and unbolt the upper bell housing bolts. Unbolt the gearbox mount and bracket to the gearbox. Then disconnect the speedo multiplug before unbolting and removing the flywheel sensor.
Remove the N/S/F inner wheel arch panel. Raise the vehicle to a comfortable working height and remove the undertray. Remove both front wheels after this. Undo the N/S & O/S lower ball joints and track rod ends and release.
Remove the N/S and O/S driveshaft nuts, pull both hubs back (Fig 5 below) and release both driveshafts.
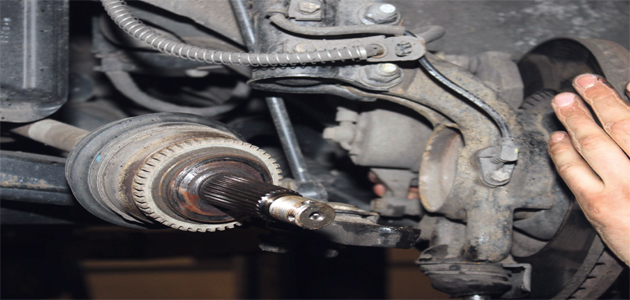
(Fig 5)
Undo the N/S and O/S antiroll bar link rods at the bottom and then remove the centre bolts from the front and rear torque reaction mounts (Fig 6 below).
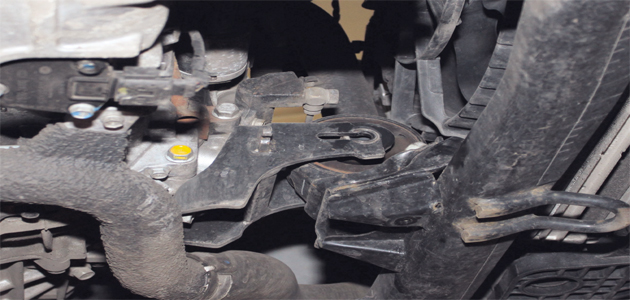
(Fig 6)
Remove the bumper steady brackets. Remove the exhaust rubber from the subframe and undo the subframe support brackets. While supporting the subframe, undo the four bolts and remove it. When lowering the subframe it will be necessary to tease the universal joint free of the steering rack (Fig 7 below).
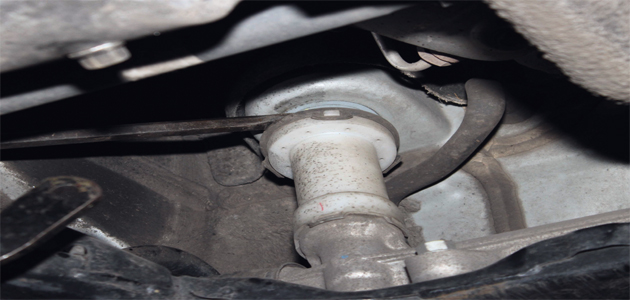
(Fig 7)
Drain the gearbox oil, remembering to replace the drain plug. Remove the driveshafts and then the starter motor, which is held in with the bell housing bolts, and support it. Unbolt the intercooler pipe from under the gearbox, disconnect the hose at the front and allow it to hang safely clear.
At the bottom of the bell housing is a cover with a bolt hidden beneath it, remove the cover and bolt (Fig 8 below).
(Fig 8)
Now, support the gearbox and remove the rest of the bell housing bolts before lowering to the ground carefully. With the gearbox removed check the bell housing for any debris, oil leaks or contamination.
Also with the clutch removed, check the flywheel for signs of heat stress and cracks. Rectify any problems you find.
Checking the driven plate
Clean the first motion shaft splines and check for wear. Put a small dab of high melting point grease – not a copper-based product – on the first motion shaft splines and make sure the new driven plate slides freely back and forth.
This not only spreads the grease evenly but also makes sure you have the correct kit. Wipe any excess grease off the shaft and driven plate hub. Using a universal alignment tool and checking the driven plate is the correct way round (note “Getriebe Seite” is German for”Gearbox Side”) the clutch can be bolted to the flywheel evenly and sequentially.
The release lever is a ball pivot type and should be checked for wear, cleaned and lubricated with a high melting point grease only, never a copper-based anti-seize compound. When installing the release bearing it is not necessary to lubricate the inner bore because it has a plastic housing running on a metal sleeve.
Before fitting the gearbox, make sure the locating dowels are in place and not damaged. Refit any that have become dislodged and refit the gearbox. Make sure the gearbox bell housing bolts are secured before lowering the jack. Refitting is the reverse of the removal, not forgetting to refill the gearbox oil with the correct manufacturer specifications.


