Gates traces the cause of a broken adjuster to a common fitting error and provides the ideal solution.
Engine: VAG 1.4, 1.6, 2.0L
Fuel: Diesel, common rail
Year: 2012 onward
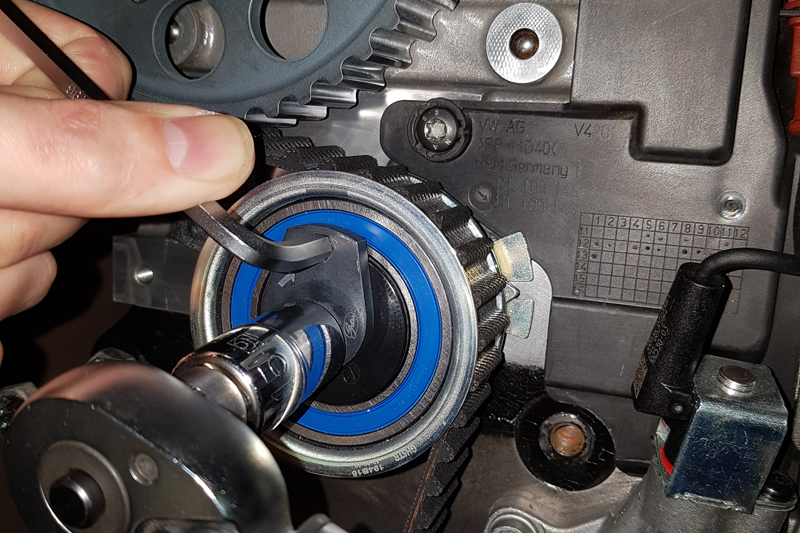
When the Gates Claim Handling Department reported that installers at several different garages were experiencing the same problem, the Gates Technical Training and Support Team started an investigation. Adjusters on the same tensioner (part number T43245) (Fig 1) had cracked and broken during installation.
A T43245 is an automatic tensioner designed by Gates, in association with VAG, for a wide number of models in the 1.4, 1.6 and 2.0L common rail TDi diesel engine range. Both the Gates tensioner and the matching Gates timing belt (part number 5678XS) are installed as OE parts in the Synchronous Belt Drive System (SBDS) on popular models such as VW Tiguan, Audi A5 and Skoda Octavia.
Fitting procedure
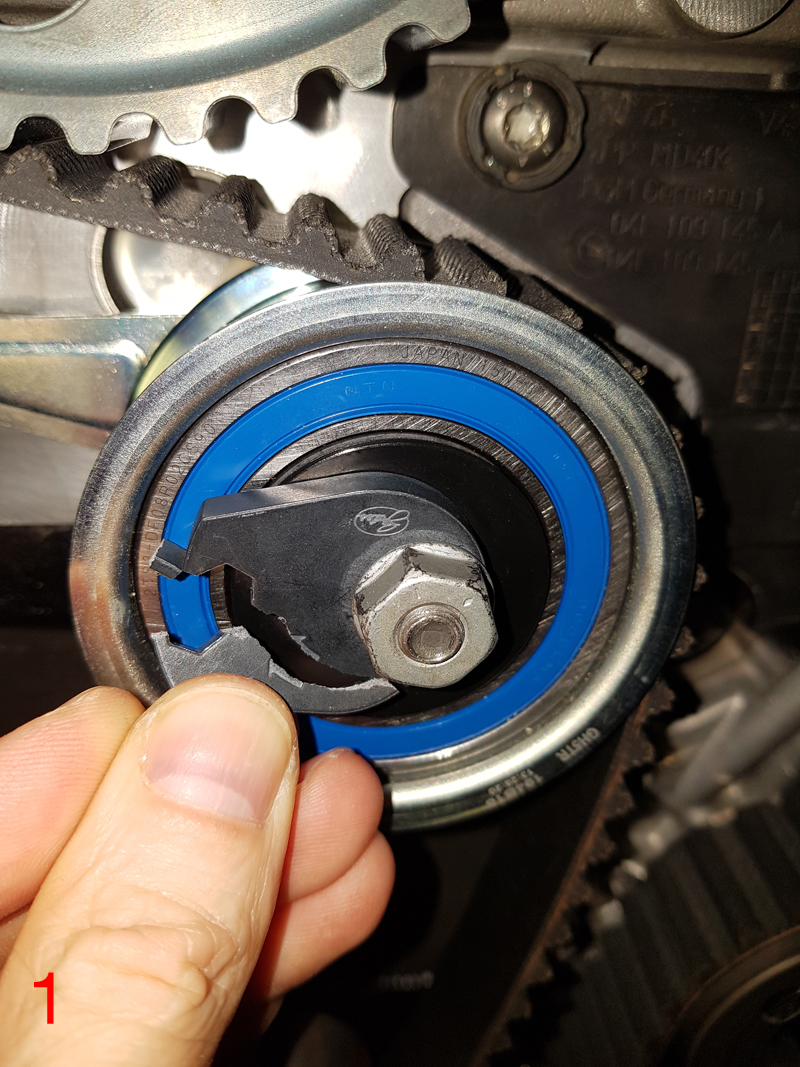
The T43245 is known as an eccentric automatic tensioner because the round ‘fitting’ hole is found in an off-centre position, rather than in the middle of the tensioner (Fig 2). During installation, the tensioner is adjusted by means of an Allen key that fits into the hexagonal or ‘hex’ hole.
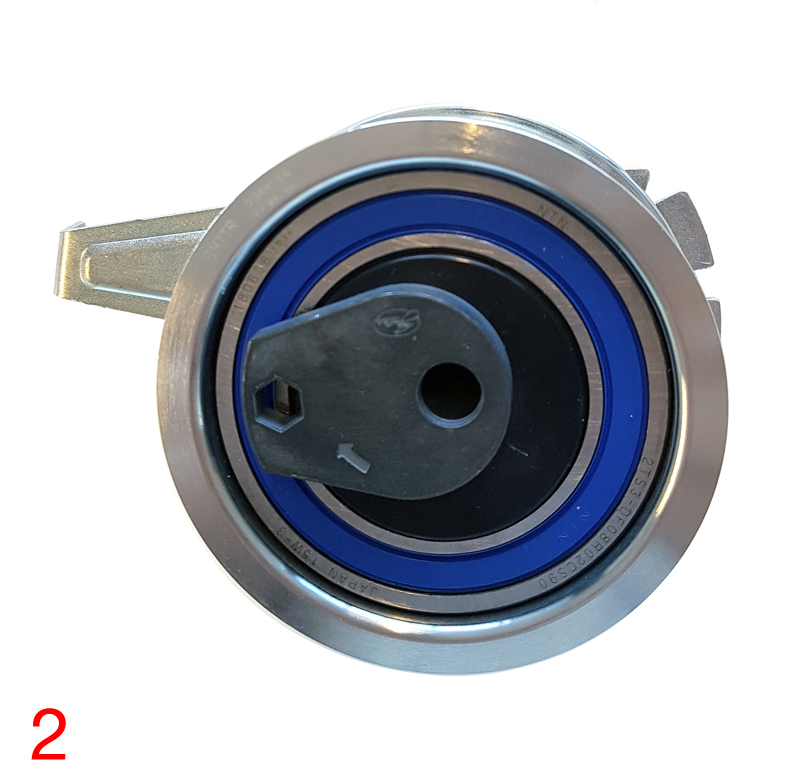
At the start of the installation procedure, the fitting hole is placed over the locating stud on the engine block. A locking nut holds the tensioner in the correct position. When adjusting the pointer, the locking nut (Fig 3) must not be too tight. It is vital that it is only ‘finger tight’ as prescribed in the fitting procedure. Once the Allen key has been inserted into the hex hole, it is turned in a clockwise direction. This moves the pointer towards the ideal position, which is in the centre of the window. Installers who have experienced the problem say that cracking of the adjuster occurs soon after the Allen key is turned, and they report the tensioner as faulty.
Investigation
Gates always takes a diagnostic approach to distinguish between a symptom and the root cause of the problem. In this case, the diagnostic approach identified both the source of the problem and a very simple solution.
Cause
In each case, the locking nut had been secured too firmly. Consequently, it rotated together with the adjuster, as the Allen key was turned. This puts a clamp on the adjuster, which means the resistance becomes too great and the adjuster cracks.
Solution
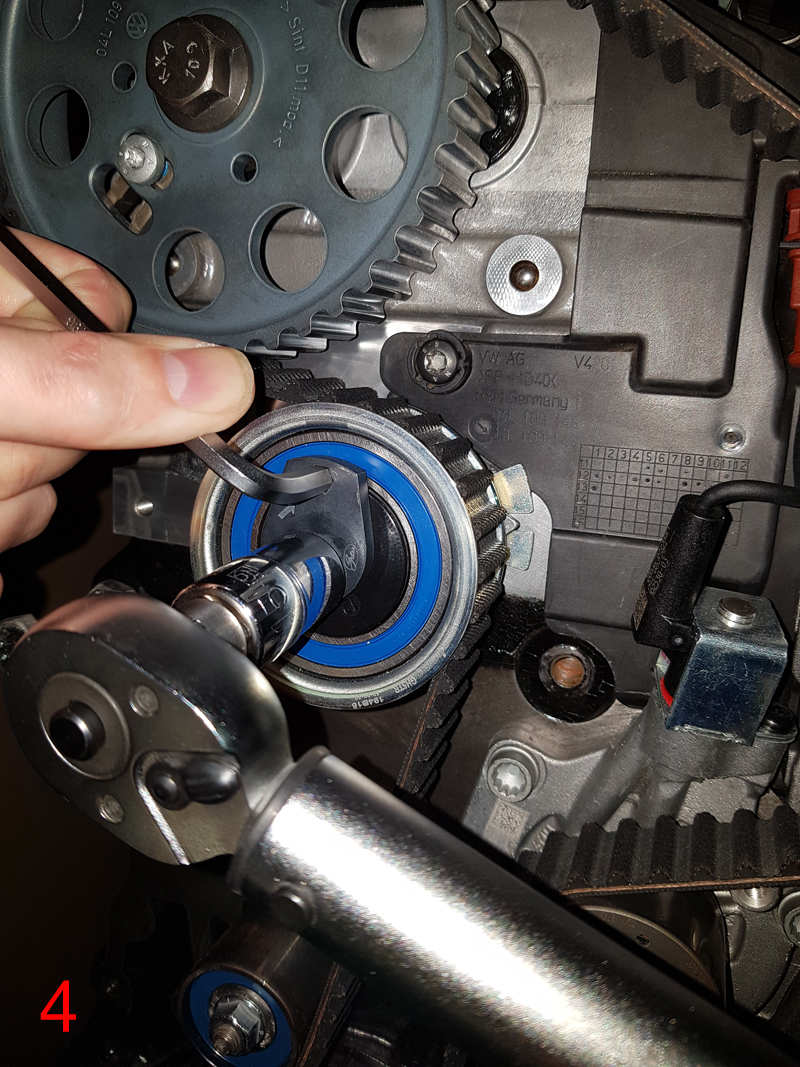
Turn the nut clockwise, until it is finger tight. Hold the nut in position with an appropriate tool to prevent movement (Fig 4). Finally, rotate the adjuster with the Allen key to set the correct tension. The correct tension has been set when the pointer is in the centre of the window (also Fig 4).
Conclusion
When a part from an OE supplier appears to fail at installation, a manufacturing fault is often assumed to be the problem. But, intensive testing and an extensive series of rigorous quality checks during the manufacturing process concludes that faulty parts are, in fact, rare. Installation errors, as shown here, are often the more likely cause, and, in the case of tensioner T43245, the solution may be a simple fix.


