
If the steps, outlined below by National Auto Parts, are not taken, then the replacement brakes will undoubtedly have to be replaced again after a short period.
The new discs will operate correctly for a period of time with no evidence of poor braking or judder apparent. But soon after, the disc rotors will wear unevenly, giving disc thickness variation (DVT). A common effect of DVT is brake judder/vibration under braking, something which is often wrongly diagnosed as the brake disc being ‘warped’.
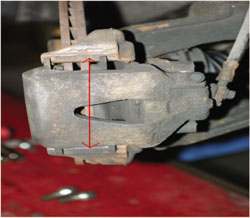
1. Corroded and pitted brake pad slider area. This will prevent the pads moving freely, causing uneven wear to the pads and disc. It can also lead to reduced braking effort.
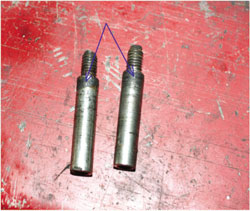
2. Floating calliper slide pin in place. If these are corroded it will prevent the calliper operating correctly and lead to uneven brake pad and disc wear.

3. Corroded and pitted calliper slide pins preventing correct calliper function. These must be fully cleaned and lubricated, or replaced if they’re in poor condition.
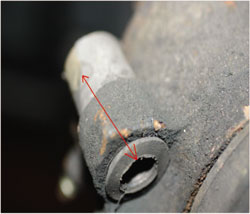
4. The slide pin seal shown here is worn. This allowed water into the inside of the seal, resulting in corrosion of the slide pin. This should be checked and replaced, if required, before re-fitting the slide pins.
5. Badly rusted brake disc mounting hub with high spots. This will prevent the disc seating flat against the vehicle hub and can lead to high run-out and ultimately uneven wear to the disc and pads, resulting in ‘judder’.
National Auto Parts recommends that fitters always fully clean the vehicle mounting hub, removing all rust, and lightly lubricate the surface before fitting a replacement disc.


