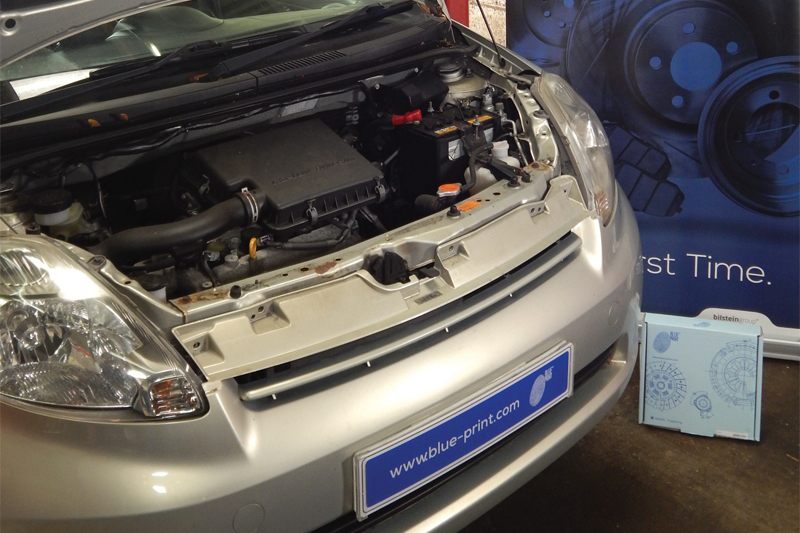
In this month’s Clutch Clinic, Charles Figgins, Technical Marketing Manager at Blue Print, works through the process of replacing a clutch on a Daihatsu Sirion M300 model.
In the last decade, many vehicle manufacturers have streamlined the range of vehicles they offer to the European market, or in some cases, withdrawn completely from the continent, in order to focus on other markets. Vehicle manufacturers such as (GM)
Chevrolet/Daewoo, Proton, and Daihatsu made the decision to concentrate on other markets and withdraw from Europe during this time. Today, there are currently three million vehicles from these brands still on European roads that require servicing and maintenance. Blue Print supports these vehicles by supplying a range of quality parts, including filtration, steering, suspension, braking and clutch parts, plus many more.
The vehicle in this clutch replacement article is a Daihatsu Sirion (M300) model, which was sold globally. It was also sold by other vehicle manufacturers in other countries as a Perodua Myvy, Subaru Justy, Suzuki Swift, and a Toyota Passo.
Step-by-step procedure
The vehicle was brought into the workshop as the clutch was showing signs of juddering on take up while manoeuvring and stiffness in operation. This was an early sign of wear and a clutch in need of replacing.
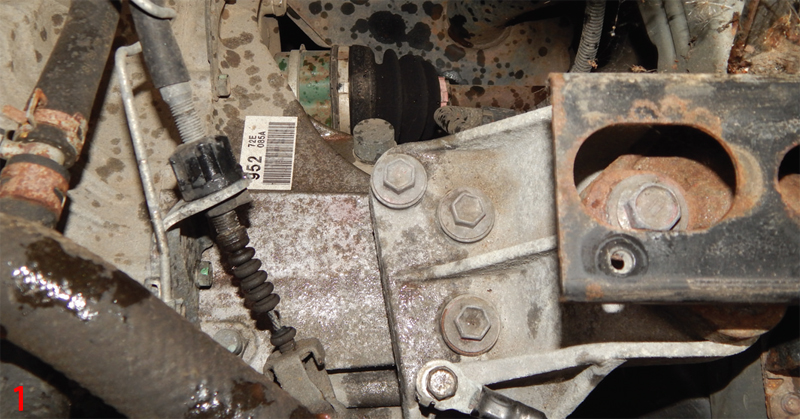
First, the battery and battery tray were removed; this was to give access to the clutch cable, which was slackened and retained out of the way, along with the cable-retaining clip (Fig 1). The earth cable attached to the top of the transmission mounting was also removed and put to one side.
Working from the top of the transmission, the upper bell housing bolts were removed, along with the starter motor fixing bolts. The starter motor can stay in place, as it does not need to be removed completely for the removal of the transmission.
The vehicle was raised and the front wheels were removed, followed by the removal of the hub retaining nuts. The lower suspension arm ball joints were freed from the steering knuckle, which was retained by a nut and an ‘R’ clip.
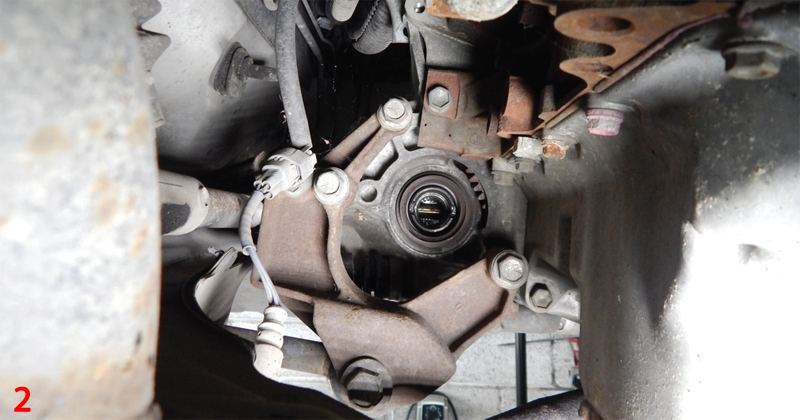
This was followed by the removal of the transmission oil drain plug, which is located below the left driveshaft. Once the oil was drained, both the driveshafts were removed from the hubs and a suitable lever bar was used to release the inner driveshaft joints from the differential (Fig 2).
The gear linkage was the next part to be removed; this is a traditional setup using a selector rod and stabiliser bar, which only required unbolting from the transmission.
Moving to the left of the car, the plastic transmission shield was taken off to reveal the reverse lamp switch wiring harness, which was unclipped. All that was left to do before the transmission could be removed, was to support the engine and take off the two transmission support mounting brackets.
It is important to be careful not to damage the lambda sensor while removing the right-hand mounting bracket. The last of the lower bell housing bolts was removed, and then the transmission was separated from the engine and lowered from the vehicle.
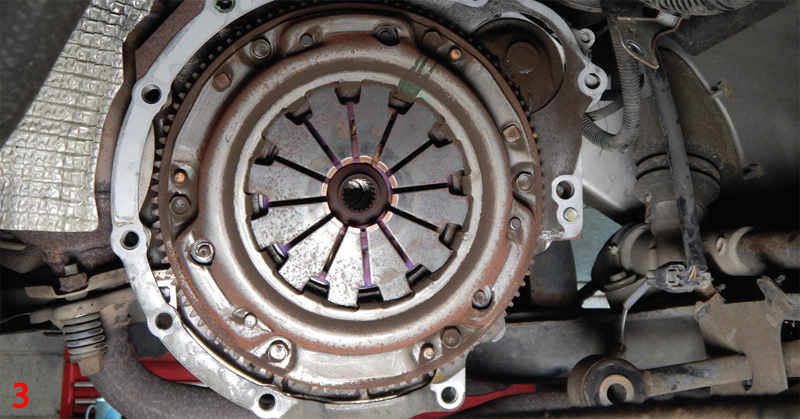
The clutch pressure plate and friction disc were removed from the flywheel and inspected for any unusual wear issues (Fig 3). The flywheel was in good condition and only required cleaning before fitting the new clutch.
Next, we turn our attention to the release mechanism; the bell housing was thoroughly cleaned to free all grease, dirt and old friction fibres from the previous clutch. The release bearing was removed from the clutch fork; it appeared that the bearing had become dry and noisy with use and age.
Before fitting the new release bearing, inspect the fork and release lever for any fractures or damage. Lubricate the contact points of the new bearing and locate the retaining clips in the grooves of the fork correctly before fixing the fork in place with the retaining bolt. It is important to correctly locate the retaining clips on the fork and the orientation of the release bearing, failure to do so will create operational issues with the clutch mechanism.
Fig 4 shows the release bearing fitted with the clip locked correctly in place on the release fork. It is also worth bearing in mind that there is also a lower retaining clip, which is not shown in the image.

With the release bearing fitted correctly and the operation of the release mechanism tested for smoothness, the transmission was ready to be refitted to the engine.
The transmission was aligned with the engine, and all retaining bolts were refitted followed by the support mounting brackets. This was followed by refitting both driveshafts, lower suspension ball joints, and the gear linkage.
The vehicle was lowered; the hub nuts were tightened to the correct torque and staked, before the wheels were refitted.
Working from the top of the transmission, the earth cable was attached, and the clutch cable was refitted, including initial adjustment to take up the free play within the cable.
The transmission oil level plug is located above the left driveshaft; this was removed and the transmission was filled with fresh oil.
With all the parts refitted, the battery tray and battery were also installed, and the clock and radio were reset.
The clutch pedal was checked for smoothness of operation, followed by checking the pedal free play by hand – this should be between 10-25mm. The clutch cable was adjusted accordingly until this tolerance was achieved. With the new clutch fitted and adjusted correctly, the car was road tested for perfect operation.


