In this month’s Belt Clinic, the experts at ContiTech provide a step-by-step explanation of how to change the timing belt correctly in a 1.4l Citroën Saxo VTS, with engine code KFX, KFX (TU3JP).
Kit Needed:
Fitters need the following special tools for the procedure:
- Locking tool for flywheel OE (4507-T.A.), Tool Box V04/2
- Locking pin for camshaft OE (4507-T.B.), Tool Box V04/7
- Square key wrench
- ContiTech BTT Hz belt tension tester
The manufacturer recommends changing the timing belt every 120,000km or every 10 years, and the labour time is just over one and a half hours.
Preparatory work
Identify the vehicle using the engine code, and then disconnect the vehicle battery. Do not turn the crankshaft and camshaft once the timing belt has been removed. Turn the engine in the normal direction of rotation (clockwise) unless otherwise specified.
Turn the engine only at the crankshaft sprocket and not at the other sprockets. Only carry out checks and adjustments when the engine is cold. Avoid contact between the belt and harmful substances, such as engine oil or coolant. Comply with all the tightening torques specified by the vehicle manufacturer.
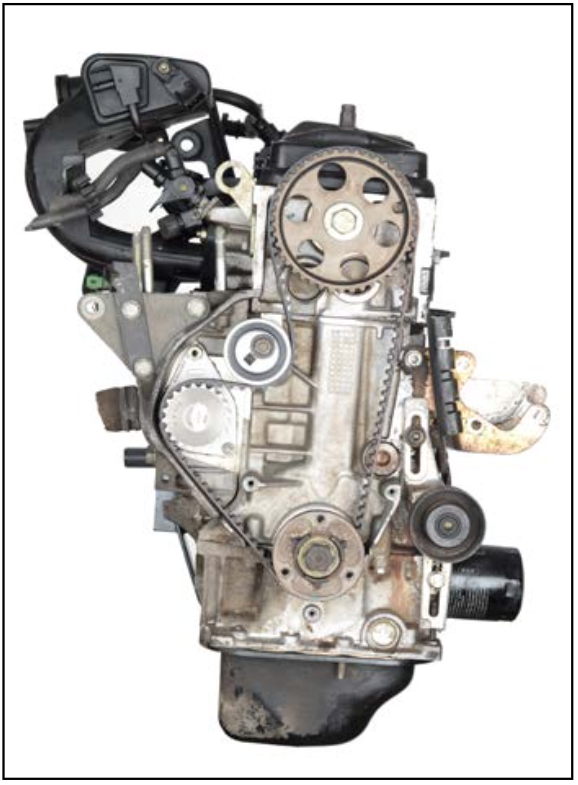
Removal: Ancillary unit belt, upper and lower timing belt guards, crankshaft belt pulley (Fig 1).
Removal – camshaft belt
1. Set valve timings to TDC mark of cylinder 1.
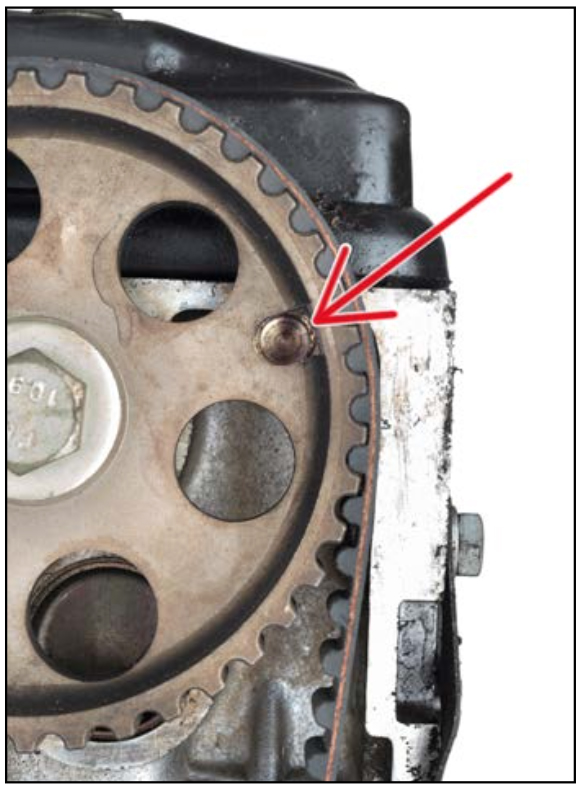
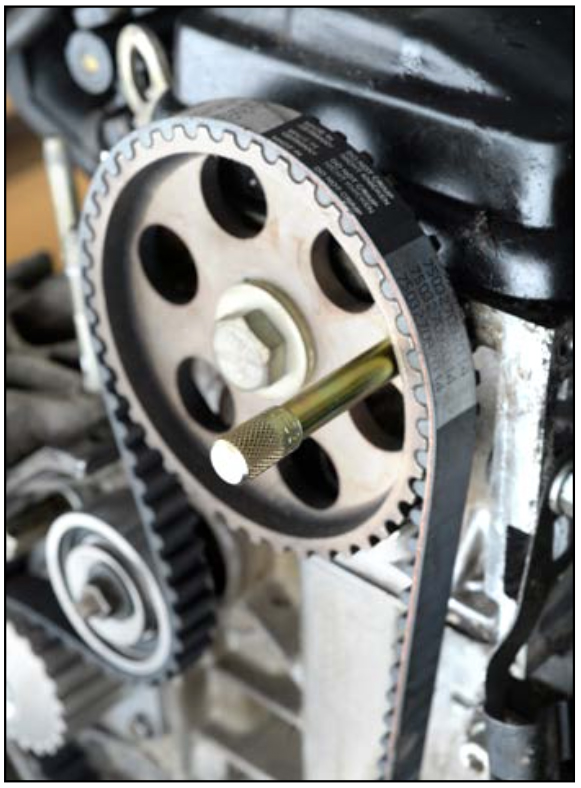
2. Camshaft sprocket bore (at approx. two o’clock position) must be aligned with bore in cylinder head (Fig 2) so that locking tool OE (4507-T.B) can be inserted into bore (Fig 3).
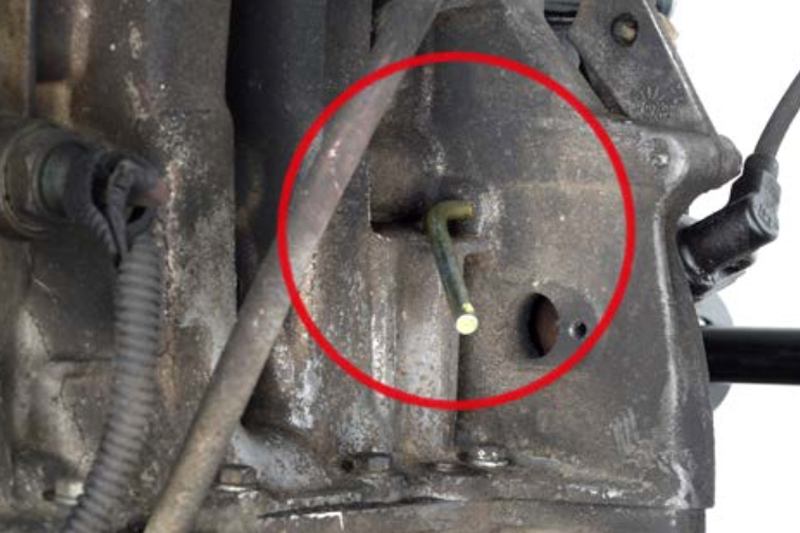
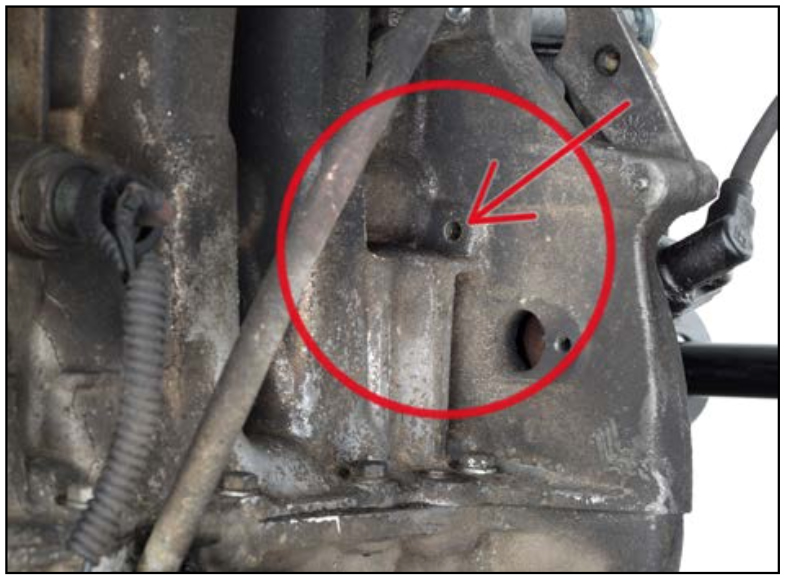
3. Check position of crankshaft. To do so, lock flywheel through bore above the oil filter at the gearbox flange connection (Figs 4 and 5) using locking tool for flywheel OE (4507-T.A). Insert locking tool into flywheel bore.

4. Loosen tensioning pulley nut and release tension on timing belt.
5. Timing belt can now be removed.
Installation – camshaft belt
1. Fit new components from timing belt kit. Check remaining components such as camshaft sprocket and crankshaft sprocket for damage.
2. Fit timing belt, starting at crankshaft sprocket and then place belt over camshaft sprocket, coolant pump and tensioning pulley (Figs 6 and 7). Note arrow indicating running direction. Take care to ensure that the timing belt is not kinked during fitting. Timing belt must be tight between sprocket.
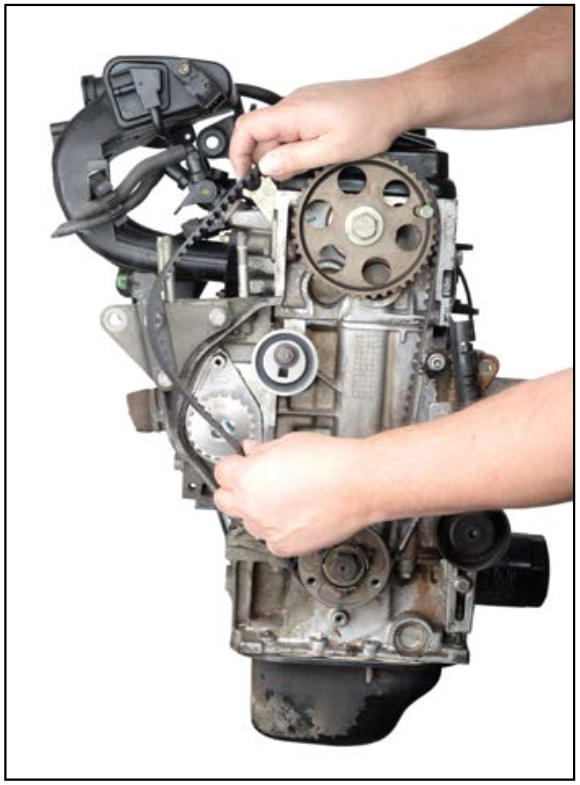
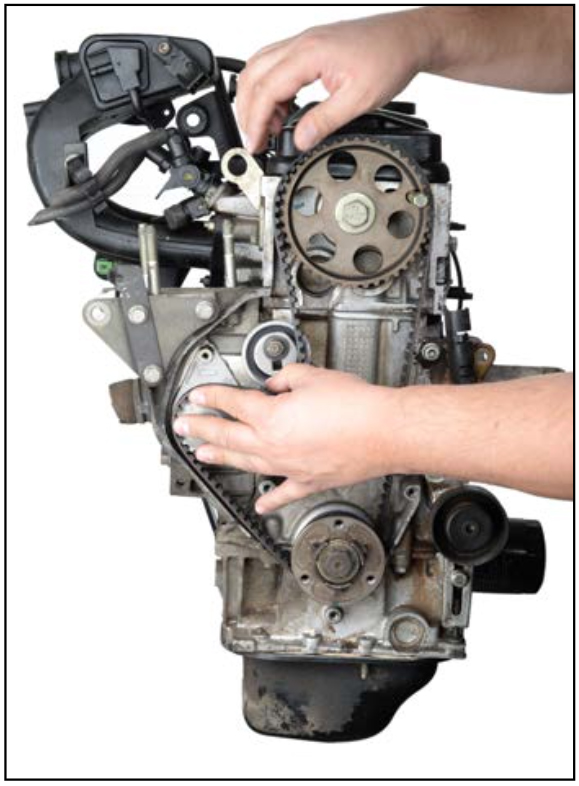
3. Pretension timing belt slightly via tensioning pulley. To do so, insert square key wrench into tensioning pulley and turn tensioning pulley counter-clockwise. Tighten tensioning pulley nut.
4. Remove locking tools from flywheel and camshaft.
5. Use BTT Hz tension tester as an aid when tensioning the timing belt. Determine appropriate setting and correct set position using BTT Hz data booklet (Fig 8).
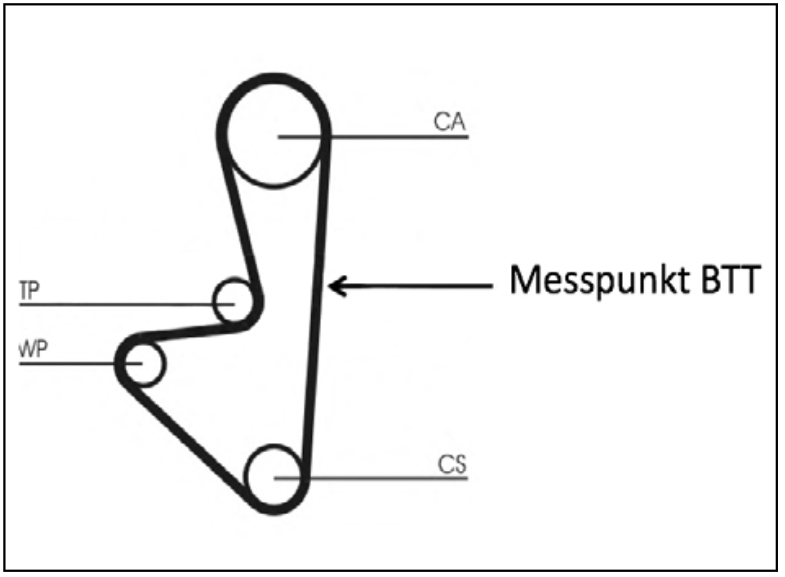
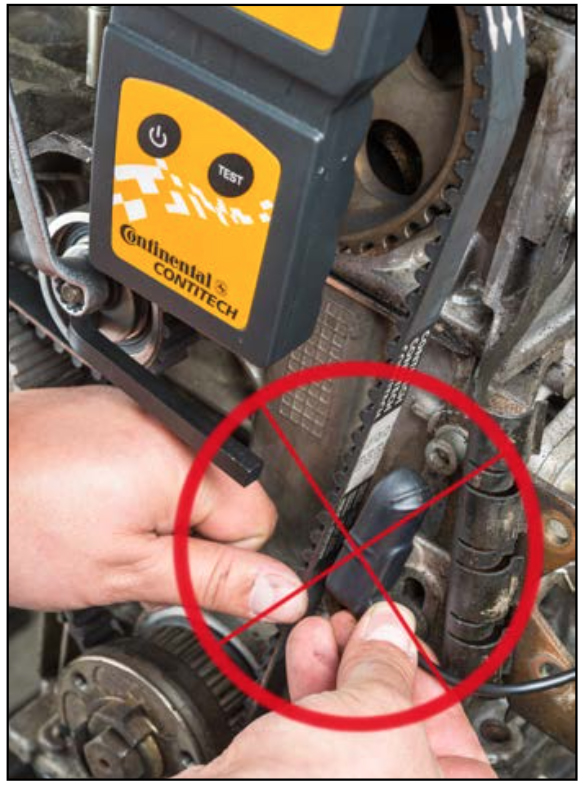
Loosen tensioning pulley nut, insert square key wrench into tensioning pulley, and position measurement head of BTT Hz at correct position approx. 1 to 2cm above timing belt on tight side. Measure above timing belt using just one of measurement head’s microphones – not both, otherwise no reading will be achieved (Fig 10).
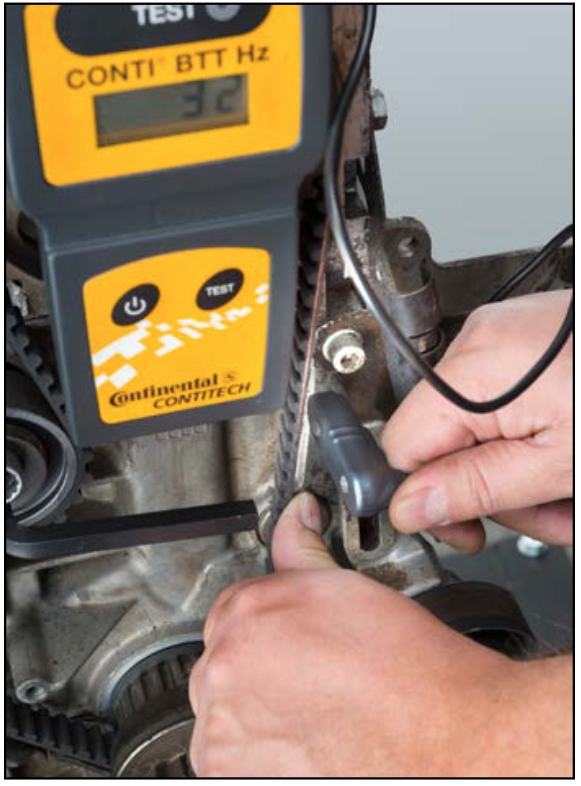
Make timing belt oscillate near measurement head by plucking or flicking it and check hertz reading on BTT Hz display (Fig 11).
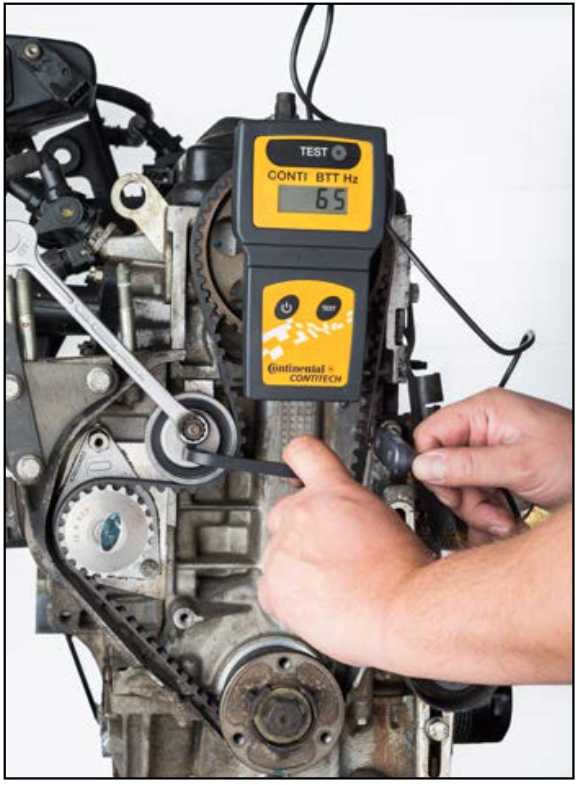
A reading of 61 to 66Hz must be set for this model (Fig 12). If reading is incorrect, turn tensioning pulley counter-clockwise until reading is set on display.
6. Once correct tension reading is set, tighten tensioning pulley nut and turn engine through four revolutions in direction of engine rotation.
7. Set valve timings to TDC mark of cylinder 1. Setting as per points two and three of the removal procedure above. Camshaft sprocket bore (at approx. two o’clock position) must be aligned with bore in cylinder head (Fig 2) such that locking tool OE (4507-T.B), Tool Box V03/7, can be inserted into bore (Fig 3). Check position of crankshaft. To do so, lock flywheel though bore above oil filter at gearbox flange connection (Figs 4 and 5) using locking tool for flywheel OE (4507- T.A), Tool Box V03/2. Insert locking tool into flywheel bore.
8. Check timing belt tension reading again. A reading of 61 to 66Hz must be set (Fig 12). Please refer to setting procedure in point five.
9. Tighten tensioning pulley nut.
10. Assembly and finalisation is the reverse order to removal.
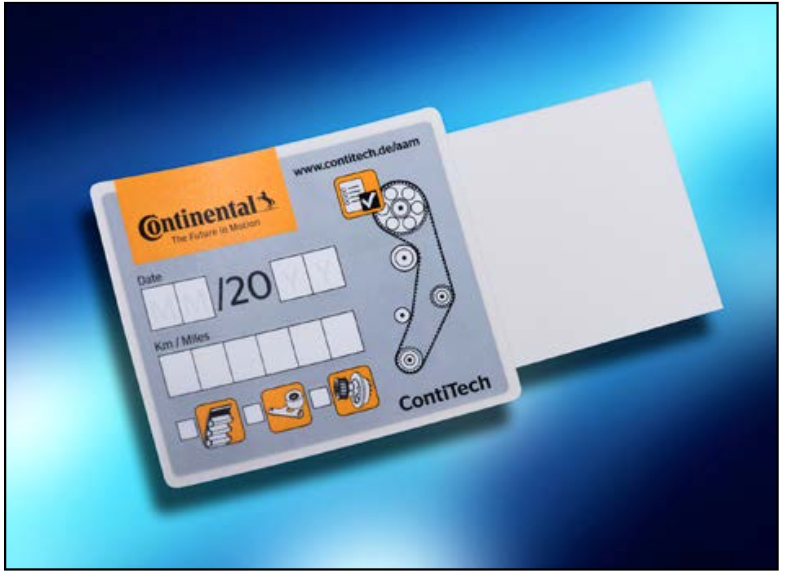
11. Record changing of original ContiTech timing belt on the sticker supplied and stick this in engine compartment (Fig 13).
Finally, carry out a test run or test drive.


