In this INA timing belt article, REPXPERT Alistair Mason replaces the timing chain kit on a Vauxhall Corsa with a 1.2L petrol engine.
The vehicle had a noticeable rattle emanating from the timing chain area, which was especially bad at cold start. The engine management light was on, and the fault store indicated indifference between the camshaft and crankshaft – all the factors indicated that the timing chain was stretched and needed replacing.
Step-by-step guide
With the vehicle positioned on the ramp, open the bonnet and disconnect the battery. Next, remove the air filter assembly by disconnecting the air mass meter and the intake pipe from the throttle body, releasing the air filter assembly from its mountings and stow in a safe area.
Raise the vehicle to gain access to the underside, remove the plastic undershield on the O/S and place a coolant collection tray under the radiator. Next, release the coolant drain screw located at the bottom radiator outlet (see below) and drain the coolant system.
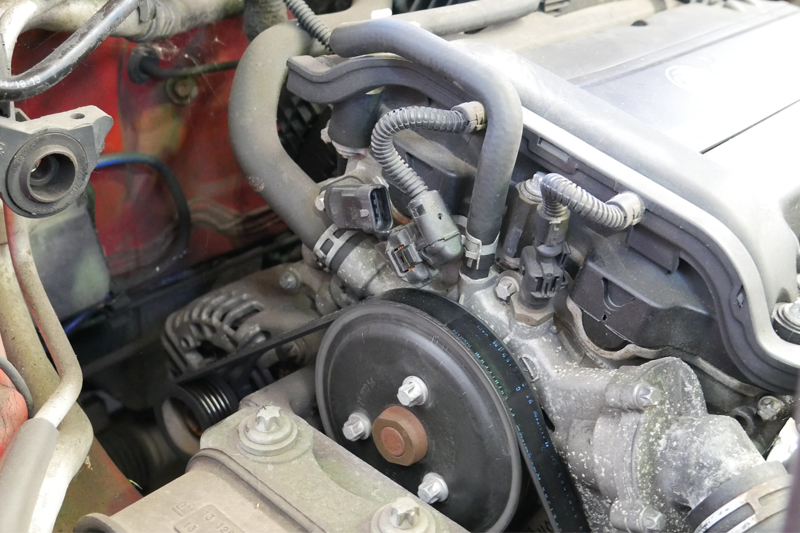
Lower the vehicle lift back to ground level, before disconnecting the electrical multiplugs, coolant hoses and the cable ducting located on the O/S of the engine (see below). At this point, slacken the three bolts that retain the coolant pump pulley. Raise the vehicle lift to gain access to the underside and tighten the coolant drain screw. Next, position the steering to full right-hand lock and remove the O/S engine splash guard, before slackening the main crankshaft bottom pulley bolt by using a counter-hold tool located in the bottom pulley.
Slacken the six bottom pulley retaining bolts and then remove the auxiliary drive belt by rotating the tensioner in an anti-clockwise direction and locking in position with a retaining pin. With the belt moved away, detach the belt tensioner assembly and the alternator fixing bolts, before positioning the alternator clear of the timing chain cover. Now remove the six bottom pulley retaining bolts, bottom pulley, main crankshaft pulley bolt and bottom pulley boss.
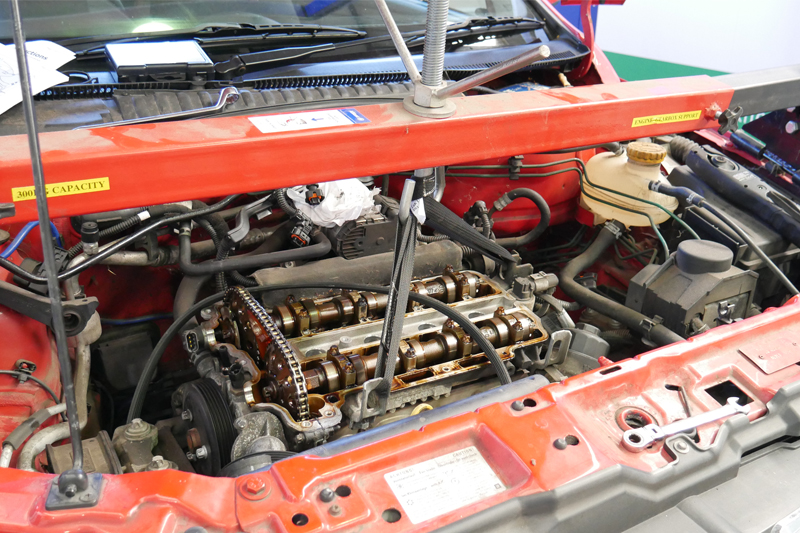
Lower the vehicle back to ground level, remove the ignition coil pack by sliding the cover to release, and then disconnect the electrical multiplug, unscrew the retaining bolts, remove the coil pack assembly and the cam cover assembly. Fit the engine brace to support the engine (see below), then take away the O/S engine mounting assembly and coolant pump pulley. If the vehicle is fitted with air conditioning, the air conditioning compressor must be taken off from the front of the engine.
It is worth noting that the workshop instructions for this repair state that the sump should be removed. In this instance, the repair was carried out without removing the sump. By being careful when removing and installing the timing chain cover, this proved successful and saved time.
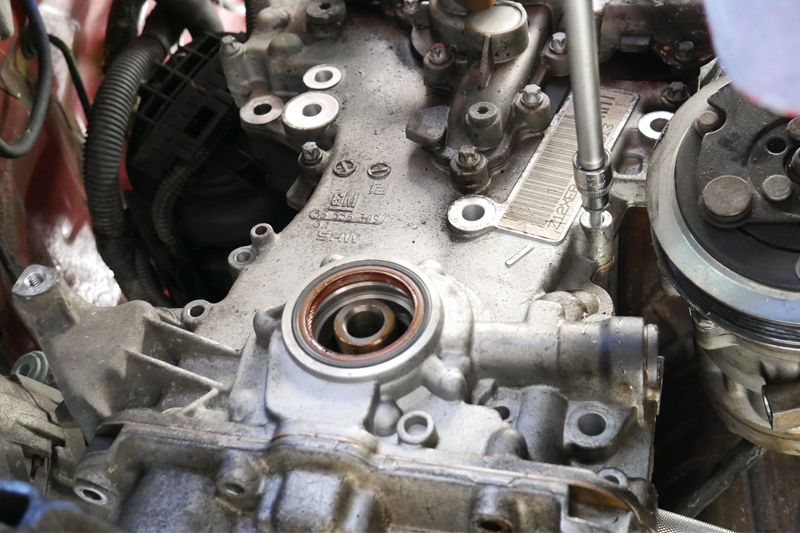
Separate the coolant pump assembly from the timing chain cover, noting the position of the bolts (as these are two different lengths), then remove the timing chain cover bolts. These can be accessed from the engine bay and the underside of the vehicle (see below). With all the bolts unscrewed, carefully ease the timing chain cover off its alignment dowels and remove from the engine bay.
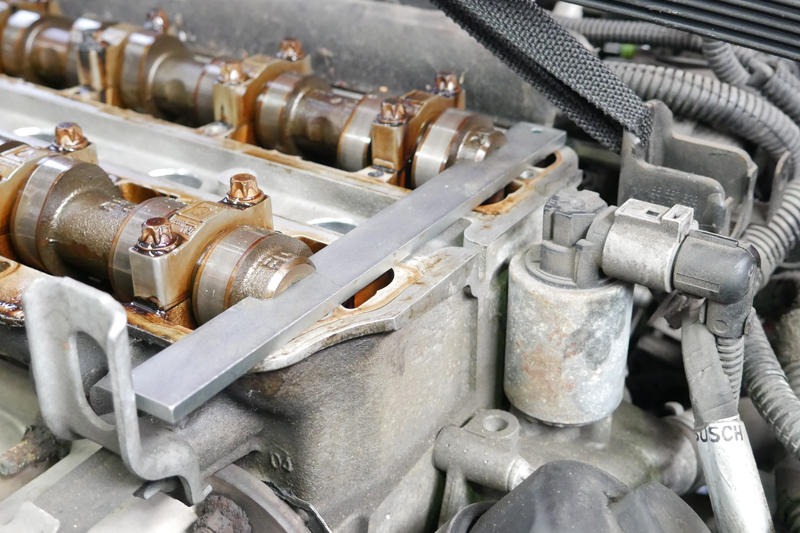
The engine now requires locking in the timing position: refit the bottom pulley boss and bolt, then by using the crankshaft bolt, rotate the engine in a clockwise direction until the camshaft slots on the back of the engine and then fit the locking plate (see below).
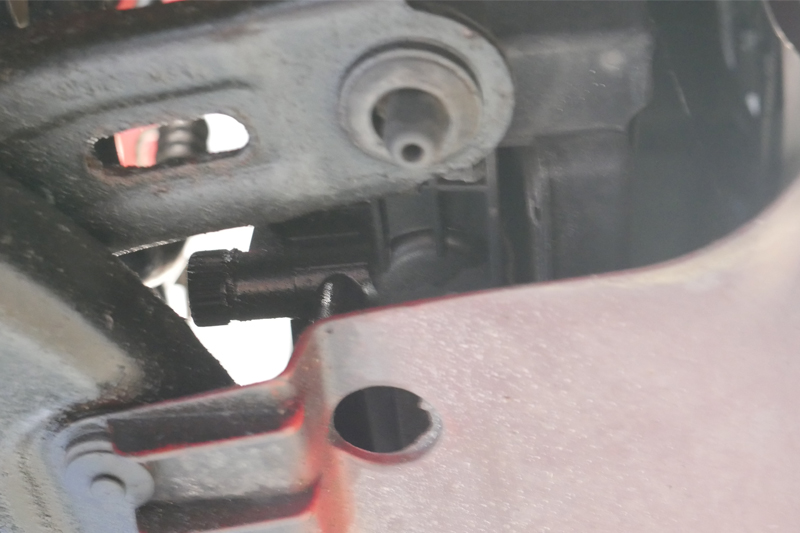
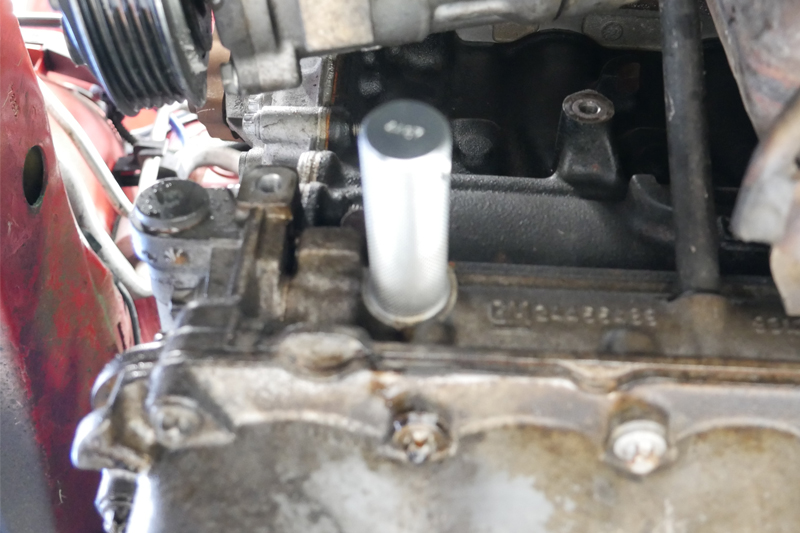
Remove the blanking plug from the front of the engine block and insert the crankshaft timing pin (see below). It is worth noting that a little rotational movement may be required on the crankshaft for the locking pin to insert correctly. Slacken the camshaft sprockets by disconnecting the camshaft locking plate, counter-hold the camshafts with a large spanner on the flats and slacken the two camshaft sprocket bolts. Once slackened, refit the locking plate.
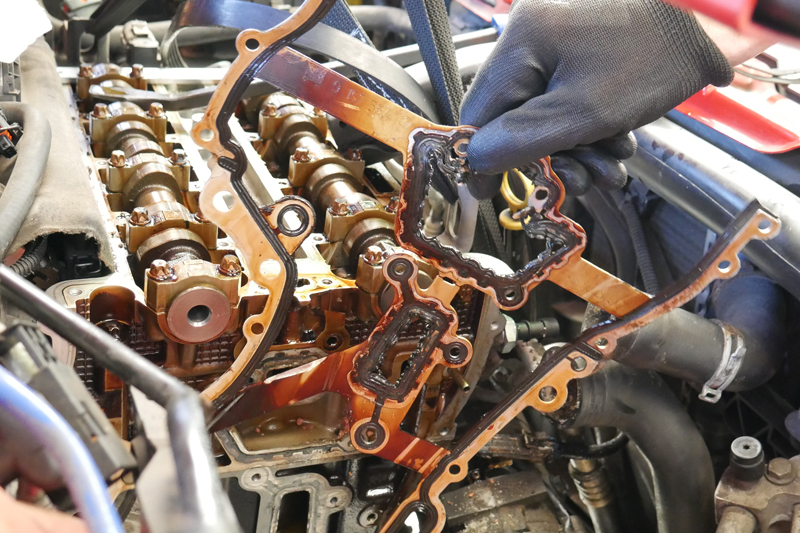
Next, remove the following: crankshaft bolt and boss, the two camshaft sprocket bolts, chain and three sprockets, three timing chain slide rails, timing chain tensioner and, finally, the timing chain cover gasket (see below).
Clean all the sealing faces and ensure they are free from oil and grease. Once clean, check for any worn or damaged components and replace if required. Locate the new timing chain cover gasket onto the engine block dowels, fit the new crankshaft sprocket onto the crank, attach the new chain to the crankshaft sprocket and then bring the chain slack to the top of the engine.
Next, position the chain onto the camshaft sprockets and place the camshaft sprockets onto the camshafts. Ensure the camshaft position sensor plate is attached to the inlet camshaft sprocket, hold the camshaft sprockets in place with the new camshaft sprocket bolts, and tighten to ‘finger tight’, so the camshaft sprockets can rotate on the camshafts.
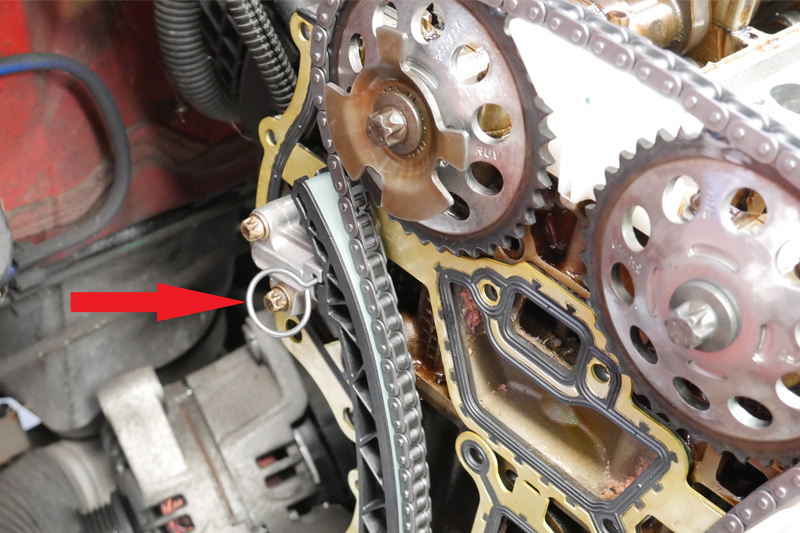
Fit the three new chain guide rails, chain tensioner and then torque the bolts to the manufacturer’s specification. Next, take away the tensioner locking pin (see below) and allow the chain to tension.
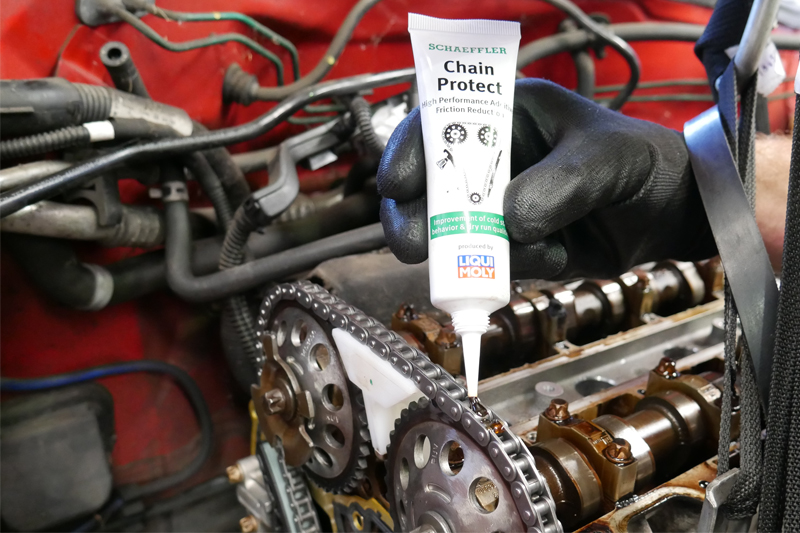
Lubricate the new timing chain with the grease that is supplied in the INA timing chain kit (see below), which will provide additional protection against wear during the bedding-in period.
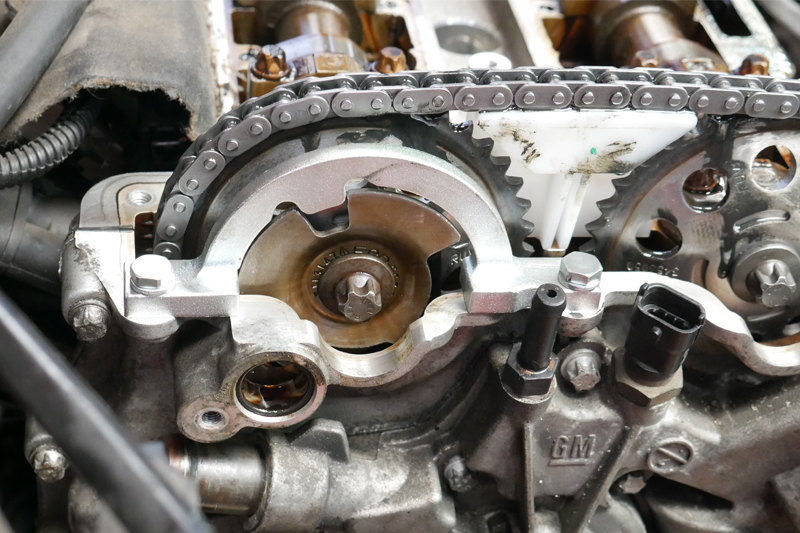
Install the timing chain cover, ensuring it locates correctly on the dowels, then install, tighten and torque the bolts to the manufacturer’s specification. After that, mount the locking tool for the camshaft position sensor plate and lock the sensor plate in the correct position (see below), carefully tightening the two camshaft bolts.
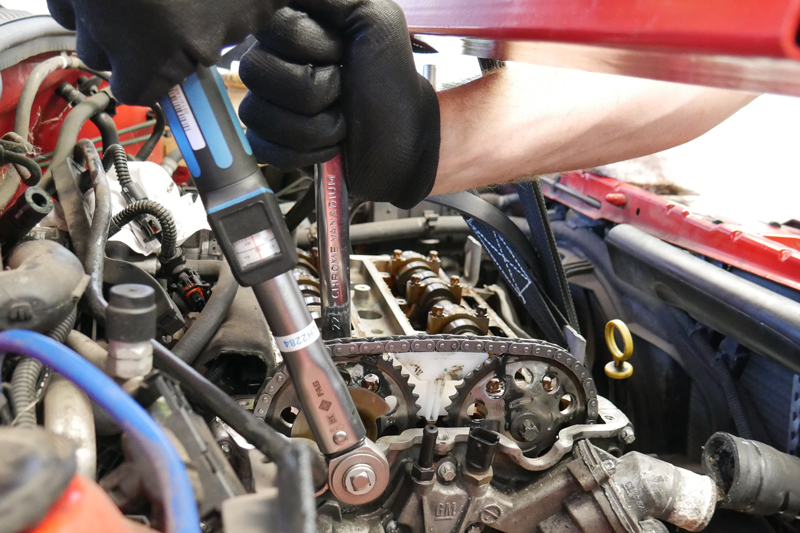
Once tightened, remove the camshaft locking tools and torque the bolts to the manufacturer’s specification whist holding the camshafts with a counter-hold tool (see below).
Once torqued, remove all engine timing locking tools, rotate the engine two complete revolutions and refit all locking tools to confirm the engine timing is correct.
Once confirmed, assemble in reverse order of removal. It is always ‘best practice’ to replace the coolant pump as part of the repair, flush the cooling system and refill with new coolant. Once the repair is complete, run the vehicle, carry out a road test and check control unit fault memories, resetting if required to ensure a successful repair.


