
With the high replacement cost of plastic bodypanels and headlight units, car drivers are increasingly attracted by the option of these components being repaired rather than replacements being sourced by the garage.
The benefits of repairing these plastic body components with a hot staple system are well known; traditional gluing and plastic repair methods can result in a weak and inflexible repair and usually with material build up. A quality hot stapler system therefore offers robust and flexible repairs that can be carried out in seconds with no material build up.
Power-TEC has now introduced a powerful cordless version (part no: 92373) that offers maximum versatility and ease of use. Ideal for mobile repairers, the stapler is powered by chargeable lithium batteries and has an angled head for ease of access. It also features an LED for illuminated working.
One or two small staples and a few seconds work can save a bumper panel or headlight unit worth hundreds of pounds. The set is supplied with a charger that includes plug socket adaptors, and 300 stainless steel staples of the most used sizes, all packed into a handy storage case. When needed, a range of suitable staples is additionally available.
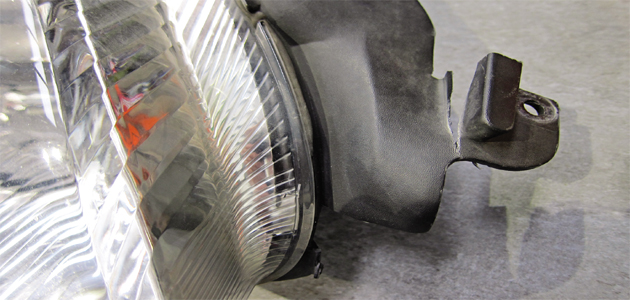
An example: Headlamp unit repair
There is no need to throw away a perfectly good headlamp unit just because a mounting lug has been broken off. This is an ideal repair to demonstrate the capabilities of the Cordless Hot Stapler.

Choose a stainless steel staple of the correct profile to suit the repair and fit to the hot stapler (Fig 1 below).
(Fig 1)
This staple can be bent and reshaped to suit the part to be replaced (Fig 2 below).
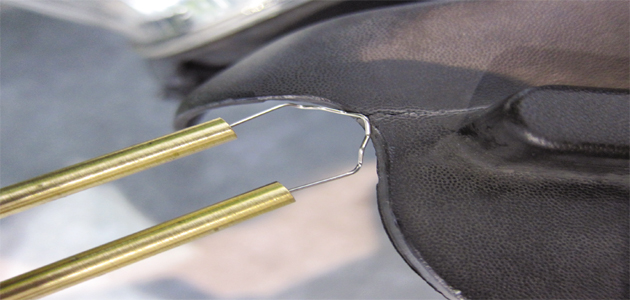
(Fig 2)
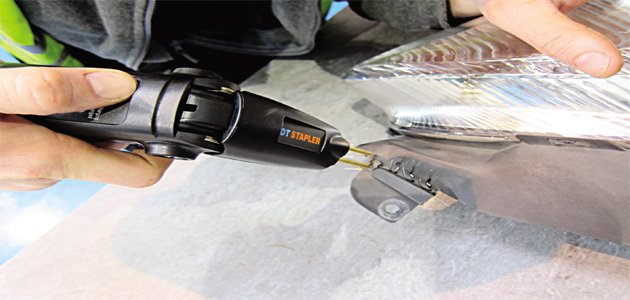
Just press the power button to heat up the staple; the bright LED illuminates the area to be repaired. Once the staple is hot, it is steadily pressed into the material; release the power button, let the staple cool for a second or two and withdraw the hot stapler (Fig 3 below).
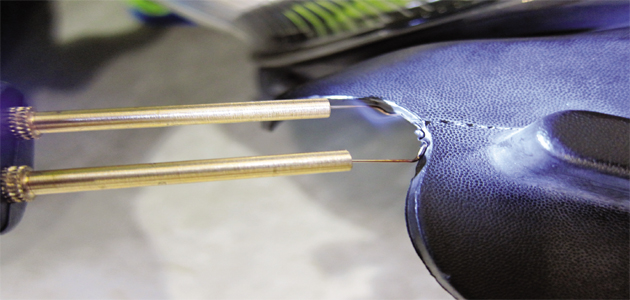
(Fig 3)
Use additional staples to reinforce the repair (Fig 4 below).
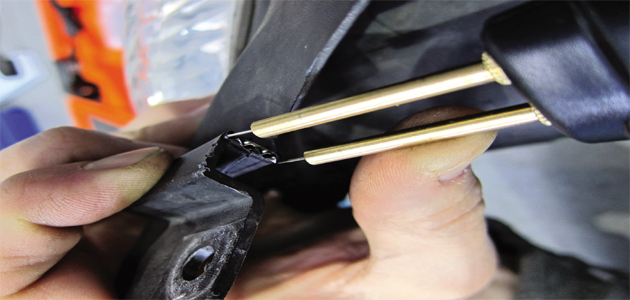
(Fig 4)
Add as many staples as necessary to make a strong repair (Fig 5 below).
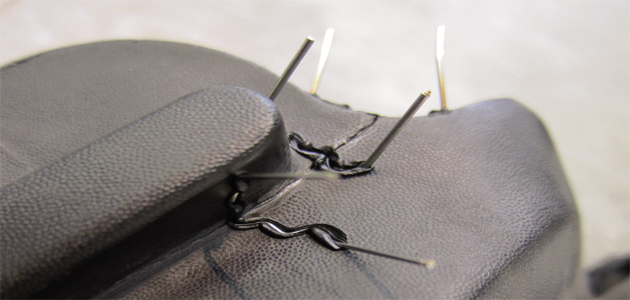
(Fig 5)
Different shaped staples are included to make the job easy and straightforward (Fig 6 below).
(Fig 6)
Then snip off the legs of the staples with a pair of side cutters (Fig 7 below).
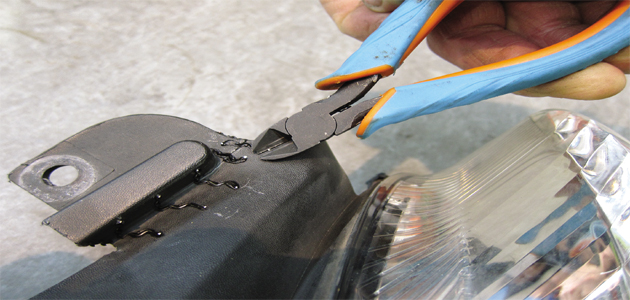
(Fig 7)
Give the repaired mounting lug a good tug, and it will be strong but also flexible, which will help when refitting to the vehiclwe. The repaired area can now be smoothed off and refinished as necessary (Fig 8 below).
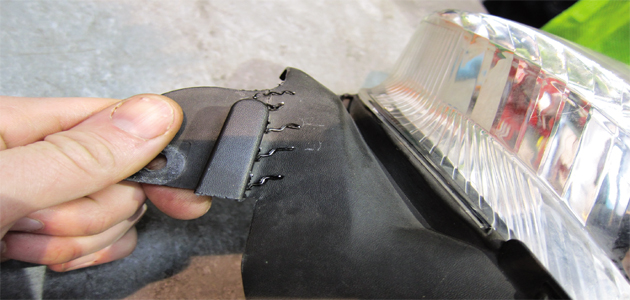
(Fig 8)


