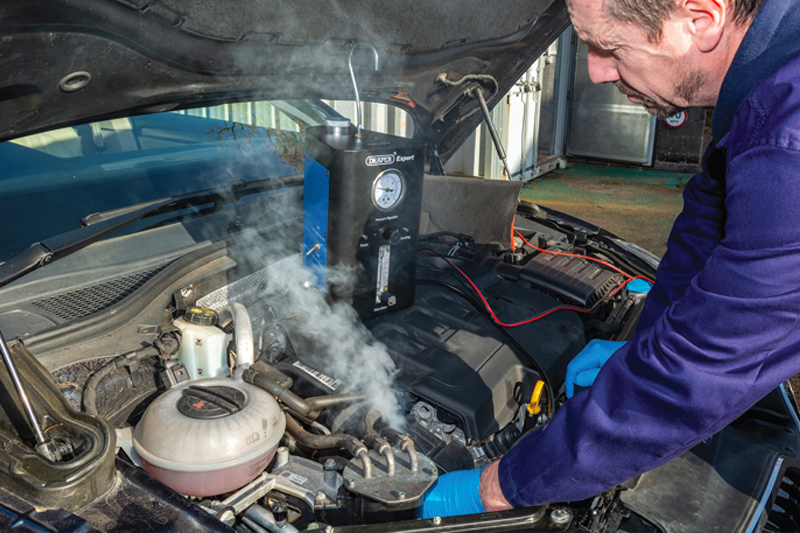
Draper guides PMM readers on how to use smoke diagnostic machines to your advantage in the workshop, highlighting the advantages of its offering.
One of the primary uses for a smoke diagnostic machine is to find splits and leaks on plastic or rubber intake pipes that can cause erratic fuel/air mix into the engine. You can also use a smoke machine such as the Draper expert model on turbo pipes on the exhaust side of the engine and with EVAP pipes on the fuel systems (a special low-pressure setting is required for this).
Another important application of smoke diagnostics is to find water leaks. If a faulty door or window seal is causing a leak into a vehicle, using smoke will quickly locate this saving so much time on the diagnosis. Smoke diagnostic machines can also assist you in locating leaks in vacuum lines as well as manifolds, EGR valves, oil seals, gaskets, solenoids, ducting, throttle shafts, diaphragms, canisters and more.
How to: Smoke induction systems with an air intake adaptor
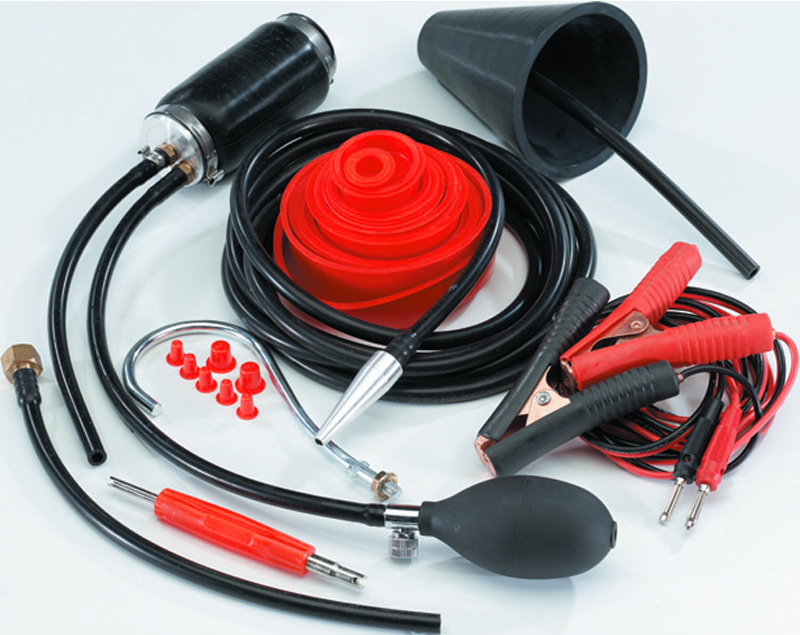
Ensure that your smoke diagnostics kit has an ‘air intake adaptor’ as these adapter kits will feature a block off bladder, which you simply inflate, to seal the induction system. The air intake adapter will fit any vehicle intake.
It’s important to ensure the bladder is fully inside the tubing before you inflate it and, be sure there are no obstructions or sharp edges that might puncture the bladder when inflated. To inflate the bladder, use the hand pump, until the intake is tightly sealed.
With the system sealed by the inflated bladder, it is then a case of adding smoke by plugging the smoke nozzle into the tube opening. Your smoke diagnostic machine should quickly produce smoke and once this enters the intake system, any leaks will soon become obvious and easy to pinpoint for repair. This simple process can quickly highlight even the smallest of leaks before they go on to become a bigger problem.
How to: Carry out EVAP low pressure testing & turbo high pressure testing
When it comes to EVAP testing and identifying leaks in this, you need a system capable of putting out very low pressure. Putting anything more than around 1 PSI of pressure into an EVAP system could damage it. With the Draper Expert 94079 model, the low-pressure mode system is 0.75 PSI, making it ideal for the job.
Most EVAP systems are open or vented, so you will need to prepare the system by closing possible openings such as the purge solenoid, the vent solenoid, the fuel cap and filler neck before you use your smoke machine to test it. It is also important to refer to the vehicle manufacturer for the correct test procedures and pressures for the model you are working on.
With all prep done, you can turn the flow control knob on the Draper expert model anti-clockwise to release air pressure and the flow meter will indicate the flow and measure the leak size.
Tips for safe working:
- Always read and familiarise yourself with your smoke diagnostic machine’s instruction manual.
- Always wear proper safety protection.
- Refer to the vehicle manufacturer for the correct test procedures and pressures.
- Remember that all smoke diagnostic work should be performed with the engine off.
- Ensure that the vehicle is secure and stable and that you do not leave it unattended while smoke diagnostic equipment is connected or operating.
- You should never perform tests near a source of spark of ignition.
- When working with a vehicle’s fuel system, be sure to work in a well-ventilated area.