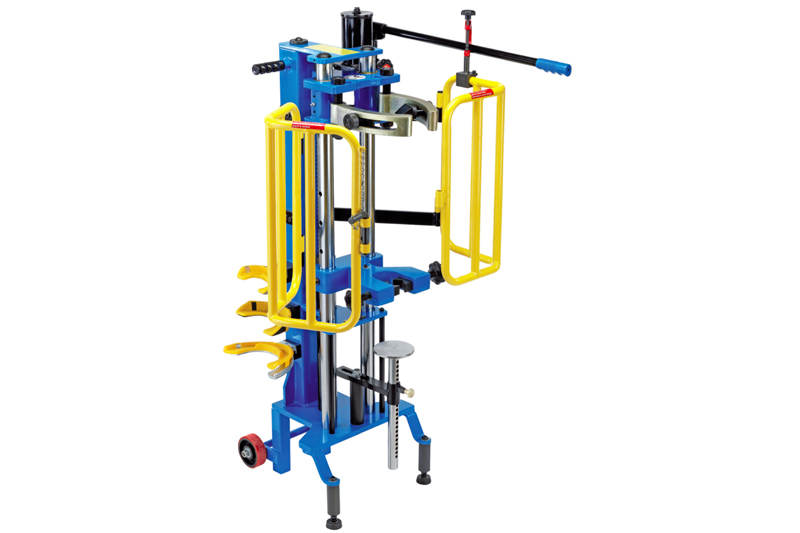
The Draper expert mobile hydraulic spring compressor aims to enable technicians to safely and speedily compress springs during repair or maintenance of suspension strut and damper assemblies.
It’s a powerful piece of kit offering mechanics a ‘total solution’ for all springs, including all Mercedes springs, without the need for additional expensive adaptors. Being completely mobile, it allows you to take the machine to the job. And, because it is manually operated, there is no trip hazard from trailing air or power lines.
Before you start…
The hydraulic spring compressor does not require assembly, however there are a few parts which, depending on the job, will need to be fitted before use. Select the correct clamp yoke from the three supplied with the machine, or the 30-70mm fixing jaw and slide in the hydraulic pump handle.
Best practice
- Always ensure the safety guard is closed before operating the compressor.
- Stand in front of the compressor when using it, keeping your hands away from the fixing base and shock absorber.
- Always lock the pump handle when it’s not in use.
- Ensue the compressor is stable and on a flat, level surface able to support the weight of the unit.
- Adjust the height of the lower fixing base according to the type or size of the shock absorber.
- If using the lower fixing jaw, refer to the vehicle manufacturer for the correct locking position.
- Only qualified technicians should operate the compressor and only after they have read and understood the instruction manual.
Step 1: If you’re using a fixing yoke put the lower section of the shock absorber spring on the fixing yoke and rotate the shock absorber so that the spring can be held as low as possible.
Step 2: Ensure all of the bolts of the fixing yoke have been tightened.
Step 3: Adjust the lower supporting base to support the base of the shock absorber.
Step 4: Adjust the upper fixing jaws according to the size of the shock absorber and spring. Ensure all bolts are tight.
Step 5: Close and lock the safety gate.
Step 6: Before compressing, check that the shock absorber and spring are secure. Then use the hydraulic handpump to compress the spring.
Step 7: To release the compressed spring, gradually release the pump pressure by turning the pressure knob anti-clockwise.
Top Tip: Never compress the spring so much so the coils touch and make sure you don’t leave a compressed spring unattended or compress the spring for a long period