Josh Jones explains why system familiarity and knowledge are such crucial weapons in your diagnostic arsenal.
I am keen to share a gem from this months adventures in the workshop, as I thought the scenario was good food for thought. I felt it really backed up my theory that to be effective in diagnosing vehicle issues, the single most important factor is knowledge of the way components operate when they are intact and functional. I hope you agree after reading this.
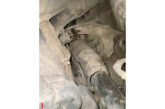
The vehicle in question was a 2004 MY Seat Leon TDI PD, with engine code ARL. This one came to me via a local garage, following a turbo replacement. The situation at the point at which I received the car was fairly uncomplicated. The customer had asked for help in the first instance (at the garage) after breaking down and being recovered due to a suspected turbo fault. The garage was easily able to identify the fault as turbo-related due to excessive shaft play and a shedload of oil coming out of the exhaust.
After replacement, the necessary checks were carried out to ensure that premature failure of the new unit was not on the cards. The oil pressure available was tested, the oil was changed and checks were carried out on the EGR system. Following the repair being completed, the vehicle was road-tested and this is where the problem began – and also how the vehicle ended up with me. Under load, the engine lacked performance and after a few attempts at hard acceleration, the EML was illuminated and restricted performance mode was enabled.
Whilst having an initial nose about under the bonnet and taking the DTCs from the PCM, I was keen to keep two things at the forefront of my mind. The vehicle had had a recent repair involving components that could affect engine performance in the described fashion and, during road test there was a clear difference between the poor torque output before the MIL illuminated and the restricted performance mode that followed. This made me feel instantly more at ease as I knew I was dealing with a permanent physical fault as opposed to an intermittent one, and these are almost always easier to trace.
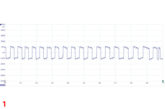
The DTC activating the limp mode was ‘turbocharger underboost condition’ so I needed to confirm the integrity of the charge intake system before proceeding any further. This was confirmed as OK by a smoke test, and the intake system was also checked for obvious blockages, of which none were evident. The engine features a VGT style turbo with output control carried out by a vacuum driven actuator, as opposed to an electrical unit, so I next needed to confirm correct operation of the vacuum circuit. I did this by monitoring the pulse width modulation command from the ECU to the actuator solenoid and comparing it with the amount of vacuum available at the actuator itself.
As the observed duty cycle was adjusted by the ECU in response to accelerator pedal input, I could see a corresponding amount of pressure change in the line so I was confident that the control circuit was operating fine. I had noticed on road-testing that if the accelerator was played slightly and the engine rpm was allowed to climb slowly to above 2500, before asking for full power, the engine speed limit could be reached without the ECU logging a problem and at higher RPM the engine performed almost normally.
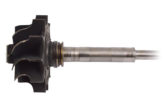
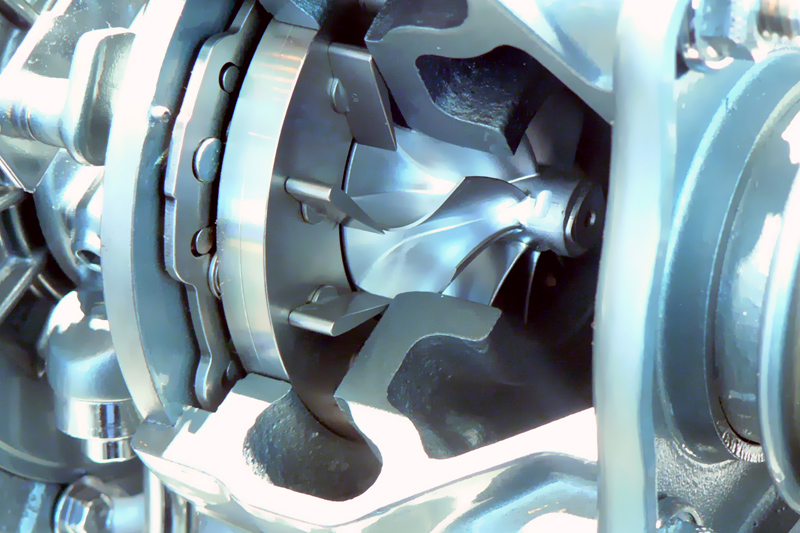
This straight away rang alarm bells and I began to build up an image in my head of what I thought was occurring. This type of turbo design is able to adjust output by altering the trajectory of exhaust gas as it flows into the turbine housing and the vanes are adjusted to produce high boost at lower rpm/high load in order to spool up the turbine quickly, reducing lag. At higher RPM this position is adjusted to ensure an over boost condition does not happen. When maximum boost is commanded, the actuator moves the vane operating arm onto its control limit stop, which is a grub screw adjusted in the turbo factory to achieve the right amount of boost for the application it is to be fitted to.
In this case it was clearly not right, as with the actuator subject to a simulated high amount of vacuum (from my vac gauge), the control arm stopped shy of the screw and I was able to insert a small screwdriver blade into the gap to confirm. This would mean that the turbo vanes were in the wrong position when maximum boost was required but were in the correct position in light load conditions – hence the characteristics noted during road-test. Thankfully, the set-up position of the grub screw is marked with anti-tamper paint at the point of manufacture so there would be no question that it was set up this way from the factory.
The liaison that followed between the turbo company and I was fantastic. I was able to speak to an engineer that understood exactly what I was claiming had happened and a replacement unit was sent out promptly.
It seemed the engineers from the firm were really interested in why the defect had occurred. Following fitment of a new unit, the engine performed normally with good power output in all scenarios. In summary of this fault, I feel the dominating factor in successful diagnosis was system familiarity, especially as the problem was associated with a component that was brand new and had been fitted to correct a related fault! If I had not familiarised myself with the differences between a variable vane turbocharger and an older style ‘waste-gate’ type unit long before encountering this question, I would have been much less equipped to deal with it.
How many possible scenarios are there for the triggering of DTC logging an underboost event? Flipping hundreds I should imagine! In short, the DTC was only a vague pointer in this puzzle; the really useful clue was the physical symptoms being encountered and how they were matched to the characteristics of a faulty component.