Josh Jones had his hands full with an old- school Suzuki Vitara this month. Here, he recalls how refreshing it was to work ‘scan tool-free’ and go back to basics.
I have had a few blasts from the past this month – it really does feel like I have travelled back 15 years to my apprenticeship, and its been fun. Inbetween working on a car fitted with actual K-Jetronic mechanical injection (I appreciate some people reading this now won’t even know what that is, which makes me feel very old indeed) and another fitted with a real life distributor, was a 1998 Suzuki Vitara with a 1.6L G16B engine fitted. This vehicle had been passed to a local garage with a non-start issue and unfortunately they had drawn a blank on the cause, so I was asked to take a look. I welcome the chance to work scan tool-free, and as the vehicle was built before the start of the current millennium, I do not possess a serial communication tool compatible with this vehicle!
The thing I love about this particular type of car is the accessibility of pretty much any component, making it easy to test. Most of us are now used to unobtrusive testing. Gaining access to specific components can be a seriously time consuming process if, in the end, no positive result comes from the graft.
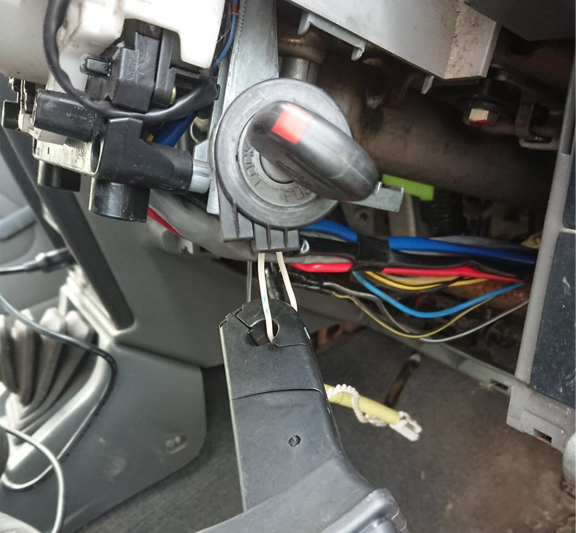
On the Suzuki, however, it was kind of like working on a training rig. For instance, simply look under the dashboard and there is the ECU, held in place by only two 10mm bolts – lovely. Upon cranking, the engine was not noisy and did not display any signs of mechanical fault. So, with my trusty DVOM and scope, I set to work.
Believe it or not, the engine was fitted with single point injection and with the injector harness itself being clear to see and test, I decided the easiest starting point would be to check voltages to establish if the engine ECM was at least powering up, i also wanted to check if the engine’s rotation was being picked up correctly by the crank sensor, and thus initiating fuelling and ignition. The injector was easy to separate as there were simply two wires emerging from the centre of the throttle housing and they were linked to the main wiring loom via a connector. I connected here with a power probe to check operation on cranking, but got absolutely nothing – no ignition supply or switching signal on either wire. Was the ECM even powering up? Upon cycling the ignition switch, I listened for a fuel pump prime and could hear one for definite. In light of this, I was sure the control unit was at least coming to life when the key was turned on.
To check if the spark ignition side of things was operational, I carried out a simple test using the same two wires, in order to save time. With the fuel injector disconnected at the aforementioned plug, I manually activated it with the power probe for a very short period. The injector could be heard to click and the holding pressure in the fuel system from previous ignition cycles delivered a very small amount of fuel into the inlet manifold. I then simply cranked the engine, which straight away coughed into life – briefly – before obviously dying again. I was confident I was looking at a lack of fuel injection as the cause of the non-start condition.
According to a wiring diagram of this particular engine management system, the fuel injector is not only controlled by the ECM but is also electrically driven by it directly, as opposed to the power source coming from a control relay as per most multipoint systems. My next task was to evaluate the integrity of the connections between the injector and ECM, but this is where things got a bit strange for a moment. With the ignition switch turned off and with the injector disconnected at the same multi- plug, I carried out a continuity test from the injector control terminal on the ECU side of the plug and battery negative, simply to check whether or not there was an open circuit. When the ignition was turned on, the test showed an open circuit. When the ignition was turned back off, about five seconds would elapse before the ground path would return, presumably via the ECM. It was at this point that a little nagging thought from earlier came back into my head. Up until this point, I had not paid much attention to the fact that there had been no sign of a ‘check engine’ warning lamp displayed, even in a ‘key on, engine off mode’, which is why I needed to use the fuel pump prime as a rudimentary way of confirming ECM power up.
On a newer model, no EML would have rung alarm bells straight away, but as this vehicle was pre EOBD, I simply did not pay enough attention to the missing lamp. Upon closer inspection of the instrument cluster, I found that there was a poor connection on the PCB. This turned out to be the ‘check engine’ lamp, which was trying its best to frantically flash at me every time the key was turned on, but could not due to the loose bulb. A check of the owner’s manual (which was still present, amazingly) confirmed my suspicion – a flashing lamp was a warning that the key transponder was not recognised!
After this discovery, I wanted to confirm that it was indeed the key transponder itself at fault and not any wiring or immobiliser module issues, as this could have potentially made the vehicle uneconomical to repair. I used my amps probe (see above) to connect to the receiver ring circuit of the immobiliser. When the key was cycled to the ignition position, the immobiliser control unit attempted to probe for a response from the key chip before giving up (see below).
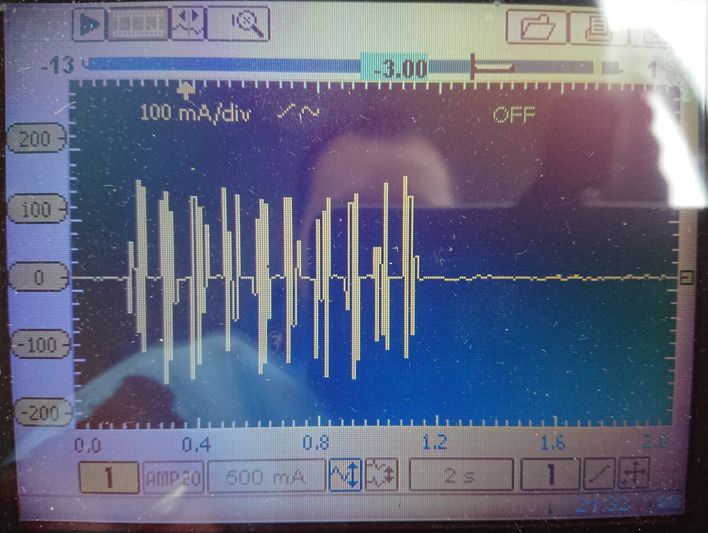
Carrying out the diagnosis this way allowed me to understand the functionality of the factory immobiliser system. It certainly explained the open ECM injector circuit; when the ignition was cycled, the immobiliser obviously isolated it and the key was not being recognised. It was also interesting to note that spark ignition was still operating, even though the fuel system was disabled upon the security system becoming active.
After a call to my friendly local locksmith, it was confirmed that a new transponder was very easy to program. After his visit, I checked to see that – with the current probe – the key was once again responding correctly. You could clearly see a difference – only one ‘pulse’ was needed to communicate before the chip was energised to respond. The rhino was ready to roam the plains once more. Lesson learned!


