Schaeffler REPXPERT Alistair Mason runs through the replacement of the clutch and dual mass flywheel (DMF) on a Nissan Navara.
Vehicle details: Nissan Navara 2.5 DDTI 103,000 miles on the clock
Following complaints of the clutch ‘slipping’, Alistair’s assessment confirmed the cause, and a clutch and DMF replacement was advised. For this repair, Alistair used a four-post ramp, transmission jack, and a self-adjusting clutch installation tool.
Step-by-step procedure
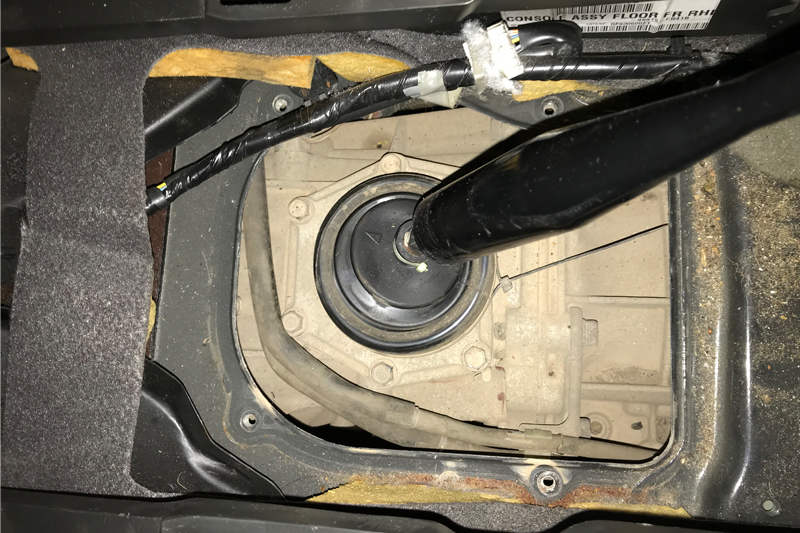
With the vehicle placed on the ramp, open the bonnet and disconnect the negative battery terminal. From inside the vehicle, remove the centre console from around the gearstick (see below), the six bolts that retain it, and the gearstick itself. Raise the ramp to gain access to the underside of the vehicle; start by disconnecting the prop shafts from the gearbox – it is always best practice to mark the flange positions before removing them to eliminate any balance issues when the repair is completed. The front prop shaft can be removed from the gearbox flange, then stowed and secured to the chassis.
Switching to the rear, unbolt the rear prop shaft at the rear flange, disconnecting from the rear axle, then remove the centre bearing fixing bolts. Slide the front joint out of the gearbox and remove the rear prop shaft.
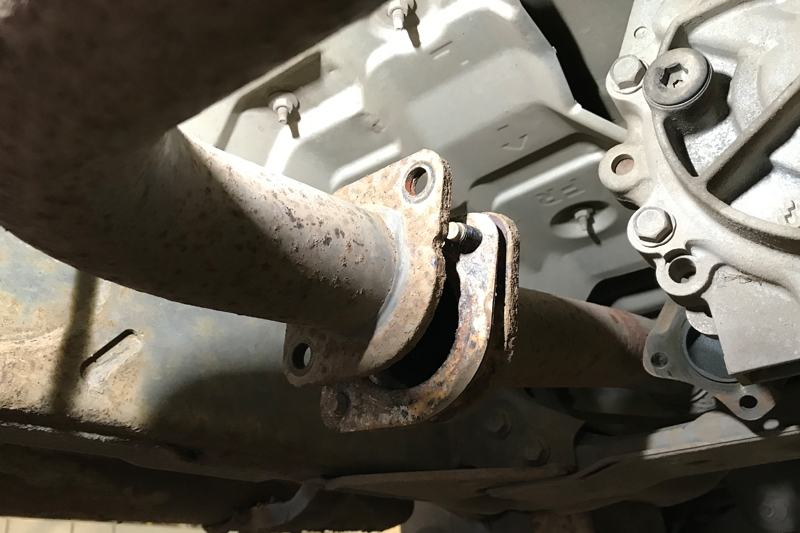
Now disconnect the exhaust, which can be achieved by removing the two nuts on the centre joint (see below), part the exhaust and ease the rear section off its mountings. The rear section can then be stowed against the O/S chassis to give clearance for removing the gearbox.
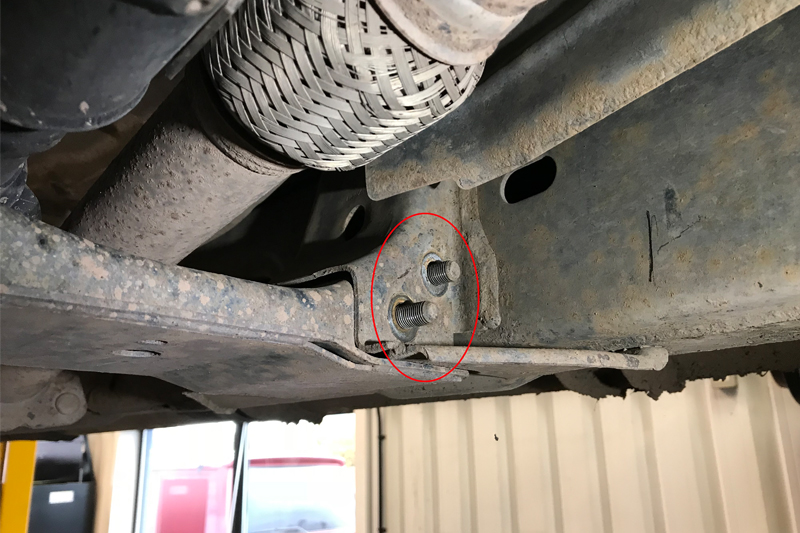
Support the gearbox using a transmission jack, and remove the gearbox cross member by taking away the four retaining bolts (see below) and three gearbox mounting bolts. Work the cross member out of the chassis – this is a tight fit – and stow to the side or support against the O/S chassis. With the cross member removed, disconnect the gearbox wiring loom from the gearbox, remove the two fixing bolts for the clutch slave cylinder, disconnect from the gearbox and stow in a safe area.
Next, remove the lower bell housing bolts, lower the gearbox on the transmission jack to gain access to the upper bell housing bolts, and then remove them – there is one bell housing bolt behind the starter motor inserted in the opposite direction. Once all the bell housing bolts have been cleared, ease the gearbox away from the engine and, when clear, lower the transmission jack and place the gearbox in a safe area.
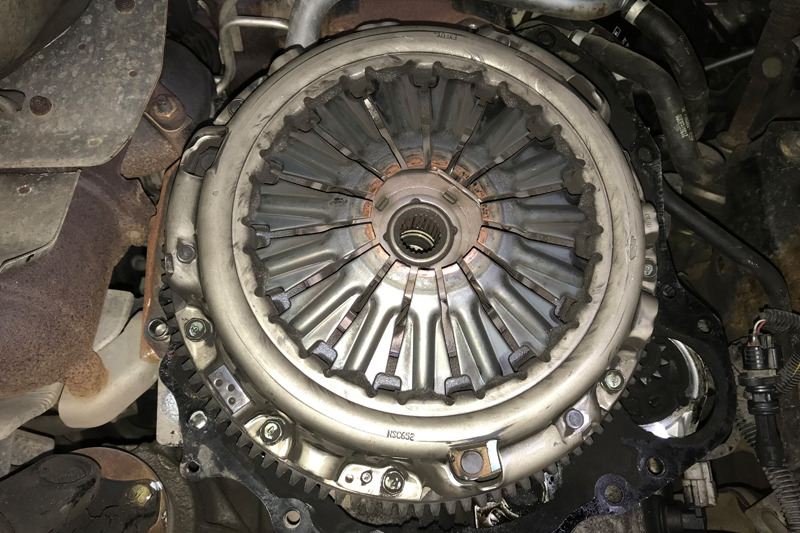
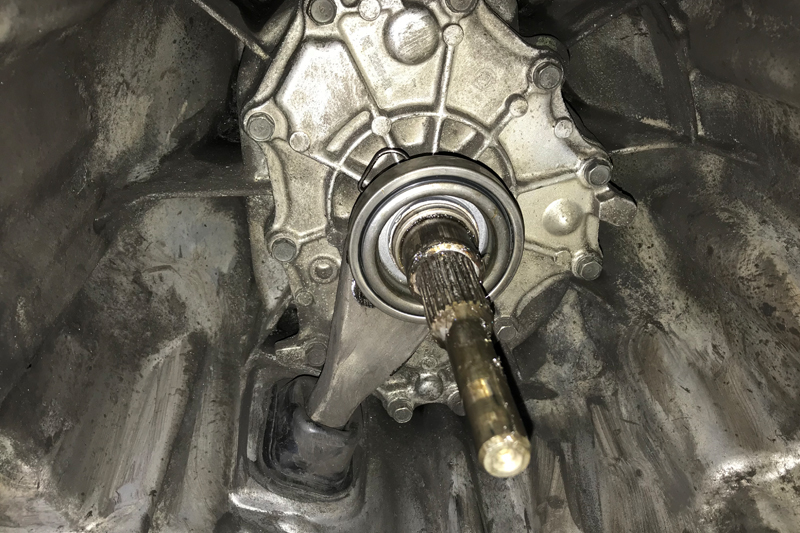
With the gearbox away, remove the old clutch assembly (see below) and DMF. Clean and inspect the back of the engine for any leaks and rectify if required, so as not to contaminate the new clutch components.
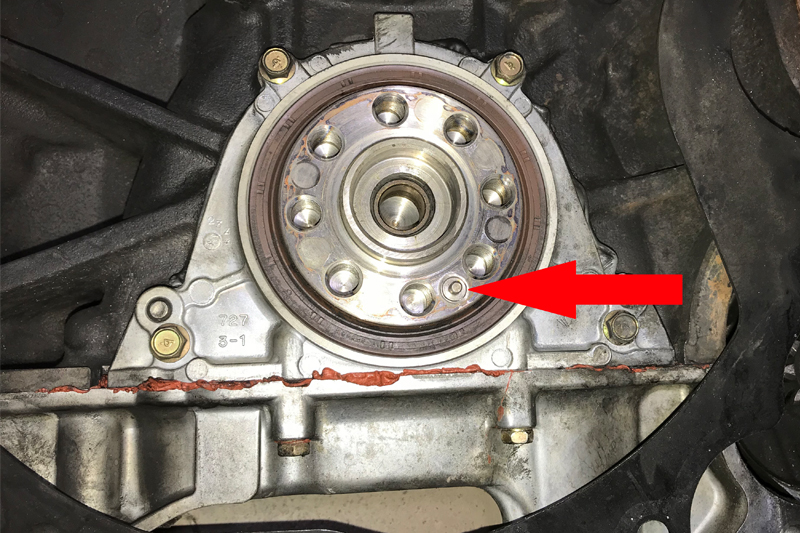
Ensure the new flywheel is correct and mount onto the crankshaft, checking that the alignment pin locates correctly (see below) – there is a bulletin in the box advising this. Using new flywheel bolts, tighten in evenly and sequentially, and torque to the manufacturer’s specification. Torque specifications are available on REPXPERT and on Schaeffler’s DMF Checkpoint app.
Now, remove the release bearing and arm assembly from the gearbox bell housing and clean the inside of it, removing the old clutch dust. Once cleaned, inspect the release bearing guide tube for any wear, and replace if required.
Place a light smear of high-melting point grease on the gearbox input shaft splines, mount the new clutch plate onto the input shaft, and guarantee that it moves back and forth freely, which will help confirm the clutch plate is correct for application, as well as evenly distributing the grease. Remove the clutch plate and wipe off any excess.
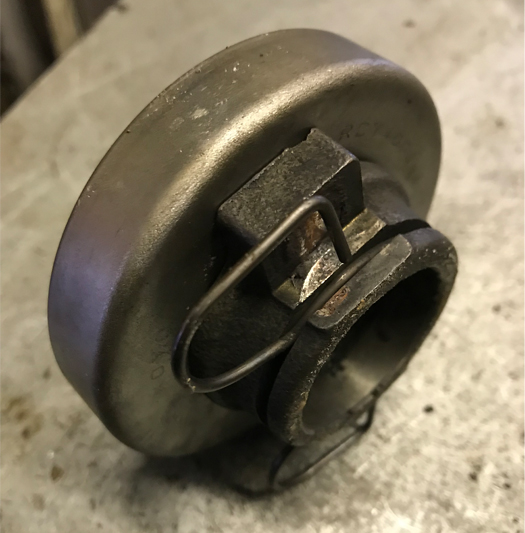
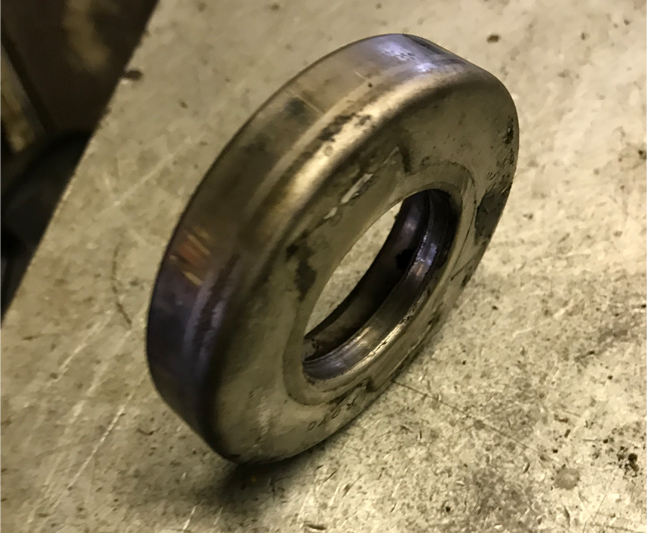
The release bearing centre boss needs to be pressed out of the old release bearing and carefully pressed into the new one (see below).
Once complete, check the release arm for any wear, replace it if required, and then refit to the bell housing and input shaft (see below).
Fit the new clutch assembly, which can easily be identified as self-adjusting, as it has the three small yellow springs in the centre and a red information sticker on the outside of the clutch box, advising the use of a self- adjusting clutch mounting tool.
Mount the clutch plate using a clutch alignment tool and ensure ‘Gearbox Side’ or ‘Getriebe Seite’ marked in the centre of the clutch plate is facing the gearbox. Plate the clutch pressure plate, checking that it aligns on the flywheel dowels, and attach three long studs from the tool kit. Fix the tool onto the studs and secure them in place with three large retaining nuts from the tool kit, ensuring the studs come level with the large nuts, but do not protrude. When in position, tighten the tool, which will ease the new clutch pressure plate into position, with no risk of damage to the new clutch or flywheel (see below).

When the clutch pressure plate/cover is in the home position, secure it using three bolts and remove the self-adjusting clutch tool. Insert the remaining three bolts and torque to the manufacturer’s specification.
Check to make sure everything is fitted correctly, that the gearbox alignment dowels are installed, the back plate is in position, and that nothing is restricting the gearbox fitting. Using the transmission jack, ease the gearbox into position and align onto the dowels.
When the gearbox is in, secure it into place using the bell housing bolts and reinstall in reverse order of removal. After the battery has been reconnected, reset all electrical systems as required.


