
Windscreen repairs offer many businesses in the motor trade the chance to upsell to an existing customer base. One of the reasons that these businesses do not take advantage of this opportunity is a presumption that repairs are a specialist process. This article will show you that repairs are not difficult; the main skills required are patience and observation.
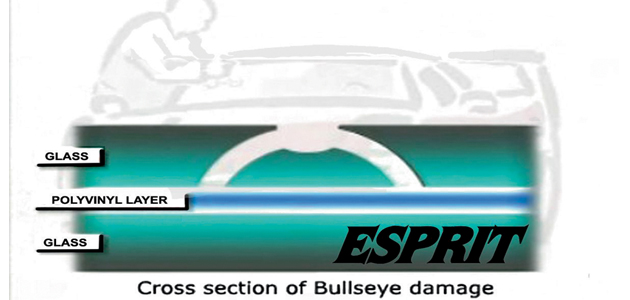
Windscreen repairs are for the repair of laminated glass only. You do not need to determine if the windscreen is laminated or not – if it has a stone chip it must be laminated as the older, toughened windscreen does not chip; it shatters into thousands of pieces.
The repairs suggested here will work by restoring the mechanical strength to the damaged glass and improve the cosmetic aspect of the damage by 90%.
Here we outline how to carry out a windscreen repair:
Preparation
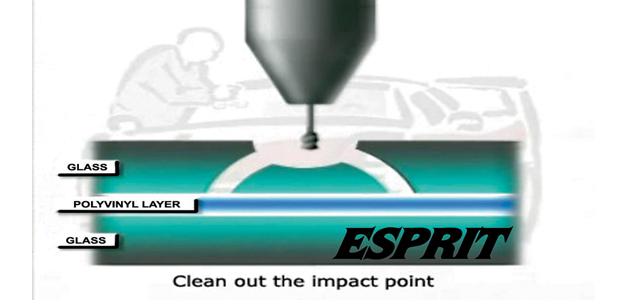
In the centre of all damage is an impact point where the stone hit the glass. This impact point is the natural injection point for the repair resin.
It is possible that the impact point will be blocked with broken glass and dirt, which will restrict the flow of the resin into the break, so it is important to clean out the impact point using a 1mm tungsten drill bur before fitting the observation mirror onto the inside of the windscreen, immediately behind the damaged area.
The next step is to set up the repair bridge – the function of which is to hold the resin injector over the stone chip. The bridge is placed onto the glass with the threaded injector holder over the damaged area and the body pressed down onto the glass. You then push down the lever, tensioning the repair bridge. An injector barrel is also screwed into the threaded hole until it makes firm contact with the glass. This is when one, or both of the two front support feet on the injector holder just move away from the glass surface.
Filling the damage
Using the syringe and needle supplied, 0.2 ml of the windscreen repair resin is put into the injector.
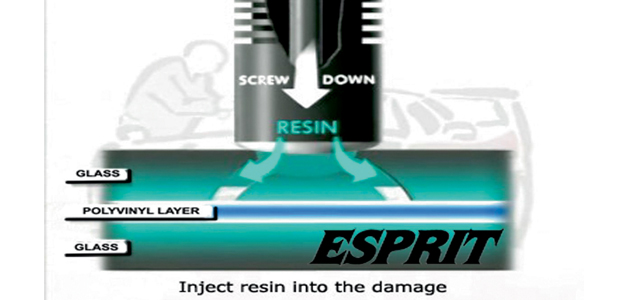
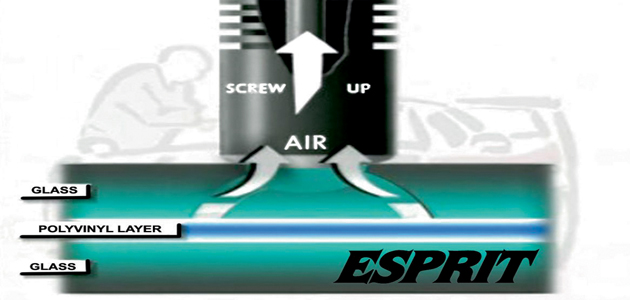
The piston is then screwed into the injector barrel. As the plunger is screwed down, it will begin to compress the resin, building up pressure and forcing the resin into the break.
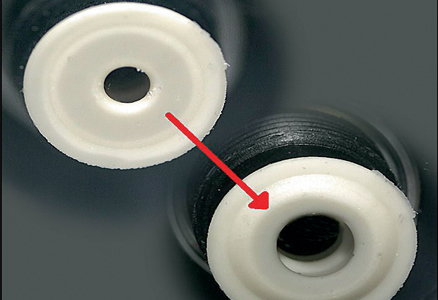
It is important to understand when the injector pressure has built up as insufficient pressure will result in an incomplete fill. To tell when the system is pressurised, you must observe the performance of the injector seal by looking at it in the observation mirror.
When the seal is at rest (no pressure) then the white rubber seal is compressed flat against the glass and the dark hole in the middle is small (2-3mm in diameter). As the pressure builds up, the seal (looking in the mirror) can be seen to expand and also to lift slightly away from the glass surface. As the seal expands, the central hole will grow to a 5-6mm diameter.
When the system is pressurised, wait three minutes to allow time for the resin to penetrate into the break. As the resin is forced into the damaged area, the air is displaced, leading to the visual improvement. When the break has been under pressure for a minimum of three minutes, the piston is unscrewed about 10mm, until the thread becomes visible. This will introduce suction on the backstroke, drawing more air out of the damage. We then repeat the three minute pressure cycle followed by 30 seconds pressure off. This time the glass is warmed immediately behind the damage.
It is now time to inspect the break. Move the long arm that holds the injector to one side, so that the location marker on the arm is aligned with one of the smaller location markers on the body. Wipe away any excess resin and inspect the break. If air remains in the break then repeat the three minute pressure cycle. If the break has filled with resin then finish the repair by curing the resin as follows.
After inspection
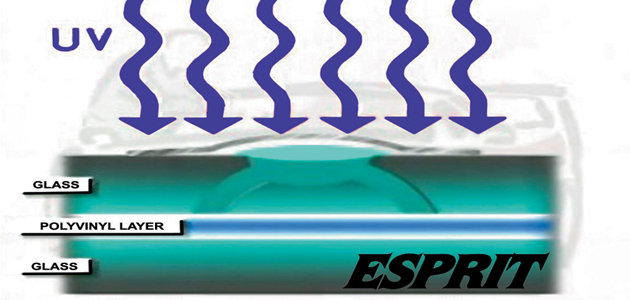
Pit fill resin is applied and covered with a square of the UV film. To cure the resin, press the lamp onto the glass immediately over the repair area, switch the lamp on and leave it for a minimum of five minutes.
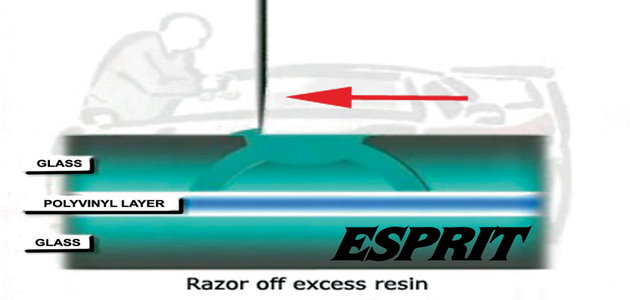
After curing, shave off the excess resin with a single sided razor blade and polish the repaired area using the pit fill polish and a piece of very soft polishing cloth to put the final shine on the pit fill area. The repair is now complete.
Finish off by cleaning any marks from the glass using ordinary glass cleaner – the vehicle can now be washed or driven as required without any further waiting.
Total job time is only 20 minutes and the material cost is about £2.


