Product: Timing belt kit, including water pump (VKMC 01250-1)
Makes: Audi, Ford, Seat, Skoda, VW (various models)
Over the years, the automotive industry has seen the timing system in many makes and models of cars become more and more complex. One example of these changes has been the inclusion of the water pump in this system.
Good technicians will always change the water pump when carrying out a service on the timing system. At the first scheduled belt change, the water pump will have covered the same mileage/kilometers as the rest of the system. By not replacing the pump, the garage is taking a risk by assuming that it will last through to the next scheduled timing system change.
The technician must consider the fact that the grease in the pump will have deteriorated due to the constant fluctuation of the engine temperature, speed of rotation and the age of the pump. Also, by re-tensioning the pump with a new belt, the seal and the bearings will how have a more robust angular tension placed upon them – this could also cause a future leak.
Removal of the timing system
Make sure you follow all of the vehicle manufacturer guidelines set out for the preparation of the engine, while replacing these components!
1. Safely prepare the vehicle and engine as set out in the vehicle manufacturers’ guidelines and drain the cooling system
In this bulletin the front of the vehicle has been removed (pictured below) to provide detailed photographs and easier access to the system. This is not a necessary step in order to replace the timing system.
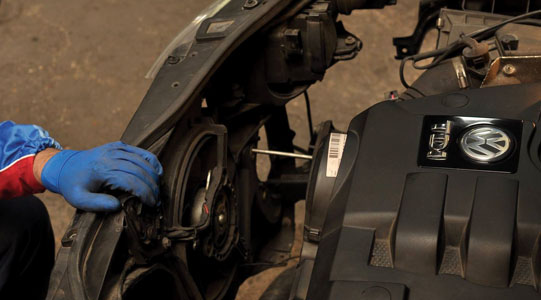
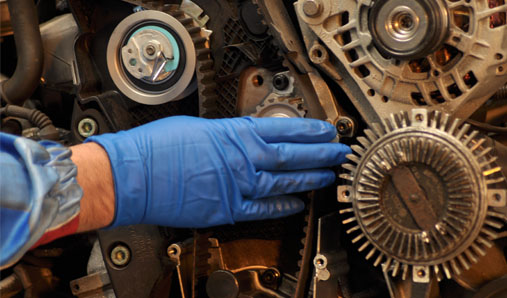
2. Disconnect the battery and then remove the viscous fan coupling (pictured below)
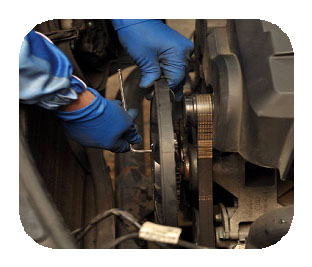
3. Using a 19mm spanner, carefully reverse the tension on the auxiliary drive tensioner and drive belt. Remove the belt and the old tensioner. NEVER re-use an old drive belt! (see picture below)
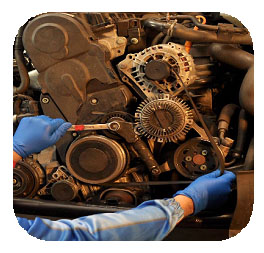
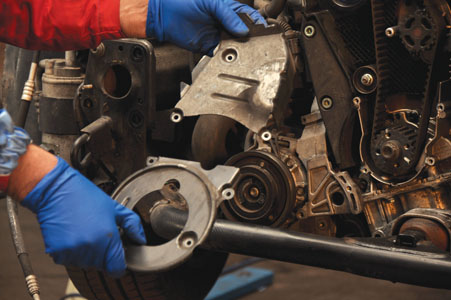
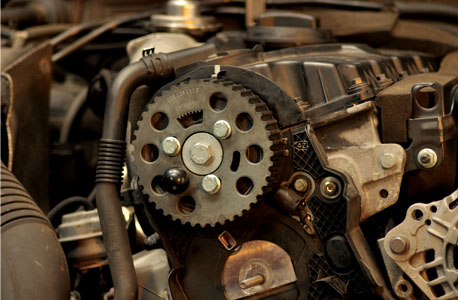
4. Remove the upper timing cover, crankshaft pulley and the lower cover (pictured below), as stated in the vehicle manufacturers’ guidelines.
5. Turn the crankshaft to TDC on the No.1 cylinder. Check that the marks are aligned at 4Z with the notch on the camshaft. Ensuring that the timing marks are aligned, insert camshaft and crankshaft locking tools (see picture below)
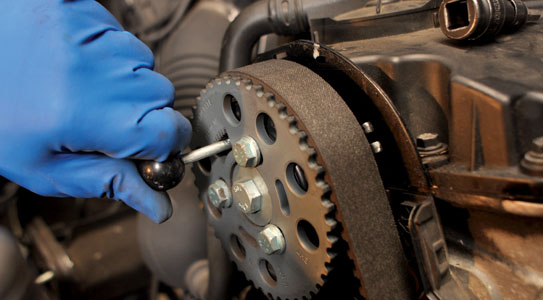
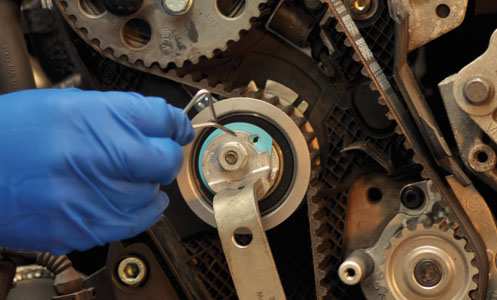
6. Loosen the nut on the tensioner roller and turn the adjustment dial ‘anticlockwise’. Slacken the camshaft sprocket bolts (x3) and remove the idler (see picture below)

7. Remove the belt and the tensioner (see picture below). Remove the water pump, then thoroughly flush and clean the cooling system.
Note: any old coolant, calcium, rust, metal particles and dirt left in the cooling system will seriously damage the new ceramic seal in the water pump during the ‘bedding in’ period. Ensure that the whole engine system and radiators are flushed with clean water before re-assembly
Refitting of the timing system
1. Detailed specific fitting instructions for this timing system application are provided in this kit
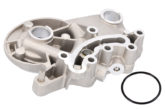
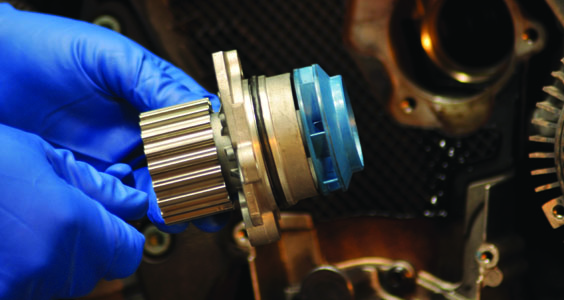
2. Fit the ‘O’ ring to the new VKPC 81626 water pump and install in the engine block (see picture below). NO SEALING PASTE IS REQUIRED! Torque to 15Nm.
3. Ensure that the three retaining bolts on the camshaft sprocket are centred in the holes (see picture below)
4. Check that the retaining pin is correctly fitted in the tensioner (see picture below)
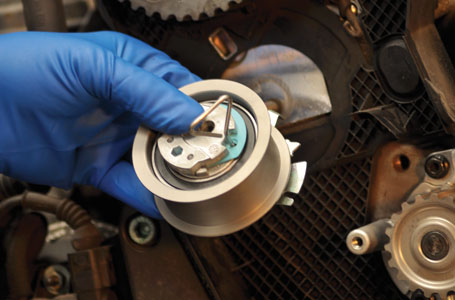
5. Install the new tensioner (VKM 11250). Check that the tensioner positioning pin is located correctly (see picture below).
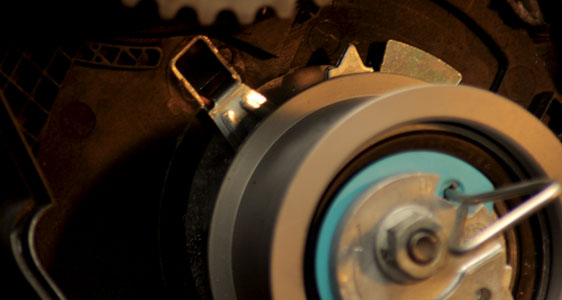
6. Turn the adjustment dial on the tensioner as far as it will go in a clockwise direction (see picture below). Finger-tighten the retaining nut.
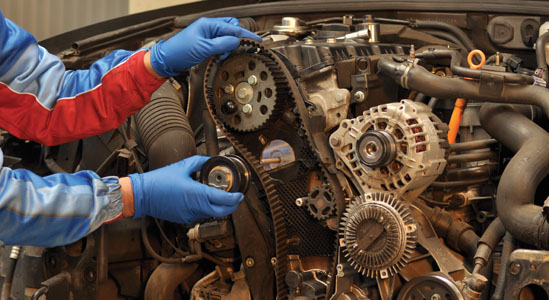
7. Fit the new timing belt (TB01142) around the system in the following order: camshaft; tensioner; crankshaft; water pump (as shown below). Then fit the new idler (VKM 21147) Torque the idler to 20Nm.
8. Loosen the tensioner retaining nut. Rotate the tensioner in an anticlockwise direction, until the retaining pin can be removed (see picture below).
9. Once the retaining pin has been removed, rotate the tensioner in a clockwise direction, until the pointer is aligned in the centre of the backing plate slot
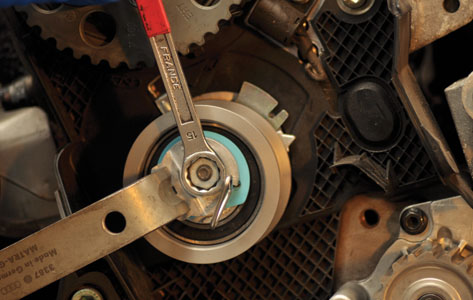
Torque the tensioner nut to 20Nm + an angular tightening of 45°, whilst also ensuring the correct setting of the pointer in the backing plate slot. Torque the three camshaft retaining bolts to 25Nm
10. Remove locking tools and rotate the engine in a clockwise direction twice. Reset the timing and insert all timing locking tools (see picture below). Check that the pointer is still aligned with the backing plate notch.

11. Refit the timing covers, refit the crankshaft pulley and torque to 10Nm plus an angular tightening of 90°. Re-fill the cooling system with the correct manufacturer approved coolant, ensuring that the cooling system is bled following vehicle manufacturer instructions