In its initial stages, Land Rover’s engineers faced some challenges in designing this luxury vehicle which needed to offer outstanding on-road performance whilst maintaining a reputation for off-road capability. Suspension bushes play a part in the solution – with the front lower control arm bushes required to offer compliance for comfort and off-road articulation whilst maintaining steering geometry for sharp and precise handling.
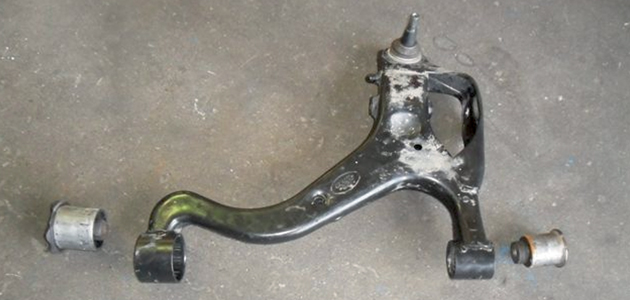
Original Land Rover arm with bushes removed – the oil filled bush is on the left
Land Rover’s design employs a ‘hydraulic’ bush for the rear position on this arm – so, even though at visual inspection the bush looks like any other rubber bush, it is in fact filled with oil. This design of this bush is vulnerable to failure – often as a result of impacts. There is a tendency amongst the drivers of 4×4’s such as the Discovery to believe that as an ‘off-roader’ it can cope with speed bumps and mounting kerbs at a pace not attempted in a ‘normal’ car. In addition, the deterioration of the rubber outer casing can, in time, allow leaks of the hydraulic fluid to develop. The net result is excessive movement in the lower arm.
The assembled arm looks like this

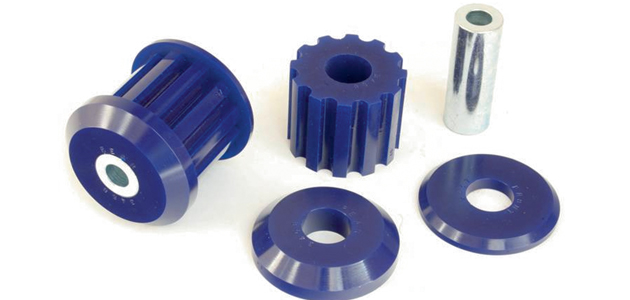
The new bush kit from SuperPro includes some unique design features to replicate the flexibility of the original hydraulic bush, whilst utilising SuperPro materials’ durability and high levels of resilience. More importantly, SuperPro’s unique material formula holds very high rates of tear strength and elongation compared to rubber, regardless of temperature. This has big implications for cold climates and means the SuperPro kit will keep these high levels for longer.
The SuperPro engineers were able to draw on substantial experience of similar bushes on cars from other manufacturers and, having carried out extensive on car evaluation, selected an innovative design with three pieces of polyurethane, including a central section with deep cutaway sections in the polyurethane. These ‘voids’ are key in allowing the material the opportunity to flex and move in line with Land Rover’s original parameters and not creating noise vibration and harshness. The materials’ resilience ensures that the suspension regains its alignment, and because it delivers this without the hydraulic features of the original, is less susceptible to damage and wear. In common with all SuperPro products, these bushes are supplied with a three year/36,000 mile warranty regardless of how cold it gets.
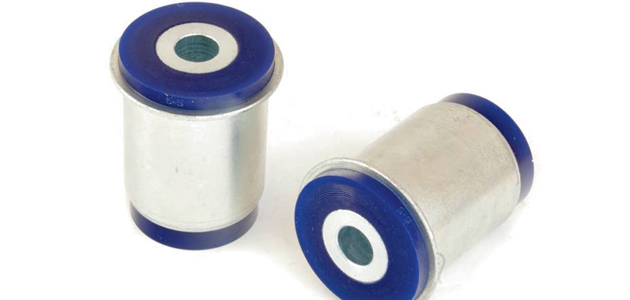
Front control arm front bush Front control arm rear bush (hydraulic replacement)
Bush installation advice
■ Care must be taken when removing the original hydraulic bush as it will not cleanly press out.
■ Drill a hole in the rubber section of the bush and allow the oil to drain out.
■ Carefully heat the steel inner crush tube until the bonding to the rubber has broken and the tube can be pushed out. Heat can then be gently applied to the outside of the control arm until the rubber bond with the outer steel shell has been broken and the remaining rubber can be pushed out. It is not recommended to ‘burn out’ the old bush.
■ If using an oxy-acetylene torch for this process – it is important to work in a well ventilated area and follow all relevant health & safety procedures.
■ Use a hacksaw to carefully cut the steel outer shell and then remove with a chisel. Make sure that the inner faces of the housing are clean and free of sharp edges.
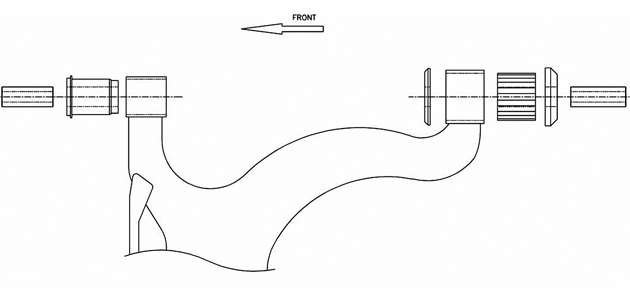
■ The new bushes are assembled as per the diagram (pictured below) – it is essential that plenty of the lubricant supplied is used on the inner bore of the bushes before the new steel sleeve is inserted.
■ The arm should be reassembled into the car using the original land Rover Torque settings – it is recommended to recheck these after 1,000 miles or 1 month. And, in common with all suspension work the car should have a full wheel alignment.
This diagram (below) shows how the new bushes are assembled