
Every day we use products which contain numerous threaded fasteners. Screwed joints are among the most common form of a detachable yet secure fixing between two parts. Although they come in various shapes and sizes, all threaded fasteners have the same purpose: to ensure a durable assembly.
However, the self-loosening of threaded fasteners is a leading cause of catastrophic failure in car engine, transmission and suspension components. Anaerobic threadlocking adhesives, such as the LOCTITE® range from Henkel, are proven to be an excellent method of keeping fasteners firmly in place and there is a wide selection available from which to choose.

There are various threadlocking methods: mechanical devices (tab washers), friction devices (nylon ring), locking devices (saw-tooth flanged bolts and wedge-type locking washers) and material integration-threadlocking adhesives.
Reasons for failure of the different methods include relaxation, caused by a change in bolt tension that leads to a reduced clamping force; self-loosening, as a result of dynamic loading, vibration or changes in temperature; and corrosion, created by water ingress.
Liquid threadlockers benefit by filling all voids, providing vibration resistance and preventing galling and corrosion. They provide excellent durability and controlled bolt tension.
HOW TO APPLY THREADLOCKING ADHESIVE – 5 EASY STEPS
1. PREPARATION: CLEANING
To achieve optimum results, all parts need to be clean and free of oil/grease.
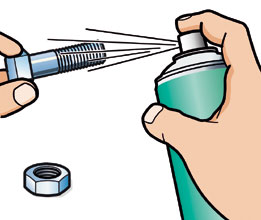
It is recommended to use LOCTITE® SF 7063 to degrease and clean surfaces prior to applying the adhesive.
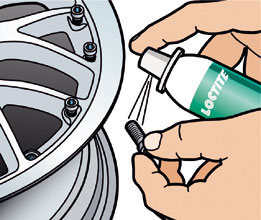
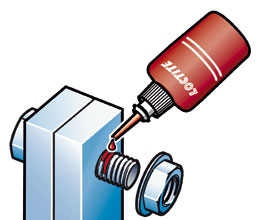
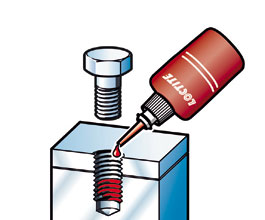
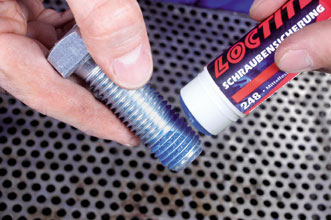
2. APPLICATION: LIQUIDS
Apply the liquid threadlocker to the engagement area. There are different application methods, including:
1. Through-hole. Assemble the bolt first and then apply threadlocker. Fit the nut and tighten to the correct torque.
2. Blind hole. Apply the appropriate amount of threadlocker into the lower third of the blind hole.
3. Post assembly. Assemble the nut and bolt then dispense the product at the edge of the nut and bolt.

3. APPLICATION:
THREADLOCKER STICK
1. Twist the stick to the amount required.
2. Apply sufficient product around the thread of the bolt.
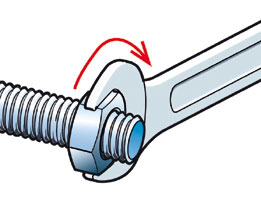
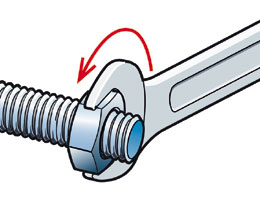
4. ASSEMBLY
1. Assemble and tighten.
2. If several bolts are being assembled, torque them down to the correct value within the fixture time of the product, or use a slow curing product.
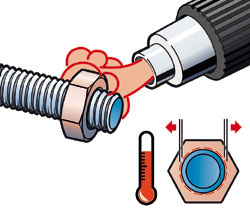
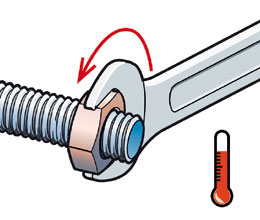
5. DISASSEMBLY
A choice of adhesive strengths are available to allow dismantling, if required. If a high strength product is chosen, that can’t be dismantled with standard hand tools, the application of localised heat at approximately 250˚C will allow easy disassembly (while hot).
An online tutorial showing all of these steps is available on the Henkel Vehicle Repair and Maintenance (VRM) portal: www.carrepairsolutions.co.uk.


