In this article we’re replacing the double clutch assembly on a Renault Scenic III, fitted with Renault’s Efficient Double Clutch (EDC) gearbox; this is fitted to Renault’s 1.5 dCI engine.
Double clutch transmissions are becoming more popular on modern day cars and, although this type of job would usually be referred to the main dealer or a gearbox specialist, with some guidance and a short training course from LuK, the independent workshop is very capable of carrying out this repair.
The Renault Scenic I was launched in 1996 as a compact multi-purpose vehicle that was based on the Renault Mégane. The Scenic I ran from 1996-2003, Scenic II from 2003-2009, Scenic III from 2009-present and, in 2016, the Scenic IV was revealed at the Geneva motor show. Renault launched its
EDC gearbox in 2010 and today we see it used on the majority of its models.
Two into one
At first glance, these look like automatic gearboxes with no clutch pedal and an automatic style gearstick but this double clutch transmission is a combination of two parallel half gearboxes, which work together
and are both designed like a traditional manual gearbox.
The engine torque is transmitted to each half gearbox via a specific clutch:
■ One clutch looks after the odd-number
gears (1st, 3rd and 5th);
■ The second clutch covers the even-number
gears (2nd, 4th and 6th), as well as reverse.
At the perfect moment the gears are changed by shifting from one clutch to the other, the first clutch opens whilst the second closes simultaneously which guarantees continuous and smooth traction during gear changes. The gears are pre-selected depending on acceleration or deceleration.
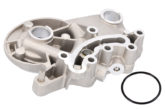
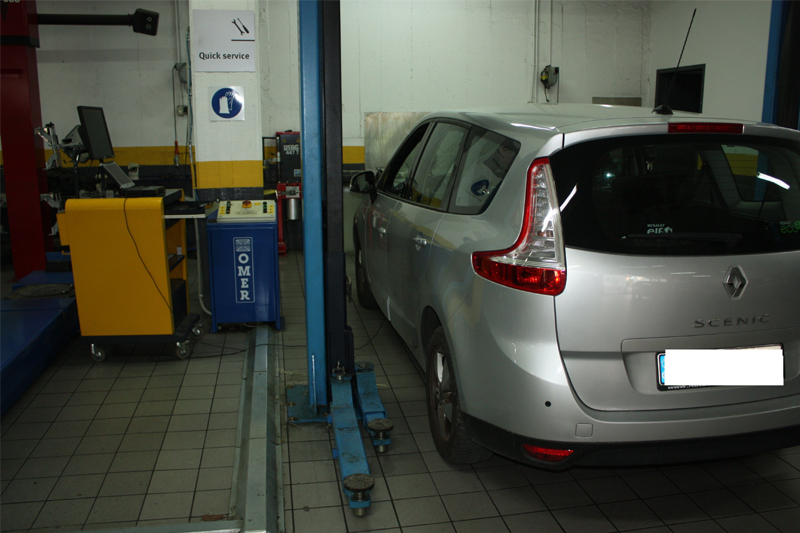
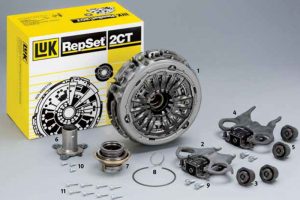
The workshop equipment required for this repair is a two-post ramp, transmission jack, engine support. Special tools required are the LuK standard tool set 400 0418 10 and LuK Renault tool set 400 0423 10, available from any LuK supplier. You should also source LuK’s Repset 2CT clutch kit as this contains
all the necessary components for the replacement of the double clutch system (See below).
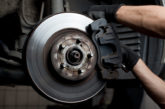
On this particular vehicle a gearbox fault indicator was illuminated and a fault code of ‘1781’ was stored in the gearbox control unit, indicating that the clutch was slipping. As the vehicle had covered over 96,000 miles, clutch replacement was the solution for the fault.
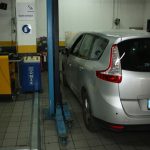
Place the vehicle on the ramp before raising, and then slacken both front driveshaft nuts as these can be very tight and need to be removed during the repair. You should also ensure you have the locking wheel bolt key (if required) and slacken with a bar. Starting in the engine bay, remove the engine cover
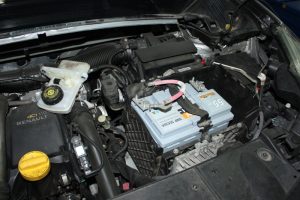
and then disconnect and remove the battery (See below).
Now remove the battery carrier plate and disconnect the plug from the turbo boost control solenoid.
Unclip the battery wiring loom from the gearbox mounting and stow to give greater access to the gearbox area, before removing the gear selector cable from the gearbox by disconnecting the ball joint from the selector mounting ball (See below) and disconnecting the cable outer from the gearbox and storing
in the bulkhead area.

Before raising the vehicle, we must lock the steering wheel in the straight ahead position to ensure the
column doesn’t rotate and cause problems to the steering angle sensor and air bag slip ring when the steering rack is removed. Once locked, remove the pinch bolt from the universal joint at the bottom of the steering column by the pedal box and disconnect.
Radiator grill
Raise the vehicle to waist height, remove the central part of the front radiator grill and the deflector under the radiator and then the air box assembly. Now remove both front wheels, the engine under tray and the left wheel arch liner. Detach both track rod ends and bottom ball joints from the front hub
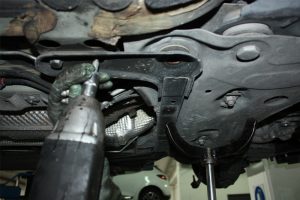
assemblies, remove the anti-roll bar links from the struts, remove the drive shaft nuts and release the drive shafts from the hubs. Support the front sub frame with a transmission jack (See below), remove the six retaining bolts and gently lower the sub frame with the steering rack still attached.
Once free, lift off and store in a safe area. At this point, remove the wiring loom from the gearbox control unit and sensors, remove the intake pipe, remove the bolt from the wiring loom retaining channel and stow the loom safely out of the way.
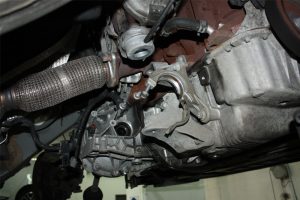
Now remove the starter motor and the gearbox drain plug and drain the gearbox oil. Once the oil has drained, refit and torque the drain plug, before removing both drive shafts. You should also release the intermediate bearing holder on the right drive shaft (See below).
Remove the front bumper and then the intercooler support bracket, before removing the bolts from the front panel and replacing with two long bolts to act as guides. Also support the panel and slide the panel forward to gain more room for gearbox removal.
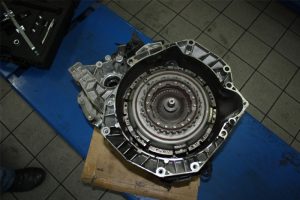
Remove the bell housing bolts, leaving two to support the gearbox that can easily be removed when the engine and gearbox are supported, then support the engine and gearbox, remove the gearbox mountings and lower the gearbox to a position that it is ready to be removed. Now remove the final two bell housing bolts and ease the gearbox out (note: the gearbox will be heavy as the double clutch is retained on the gearbox and not on the engine). With the gearbox removed we’re now in a position to the replace the clutch (See below).
LuK trained and certified technicians can replace the double clutch assembly and engagement mechanism. Release the transport locks and adjust the clutch with the LuK special tools 400 0418 10 and 400 0423 10. Check the DMF anti-back lash ring for damage; our customer requested that we
change the dual DMF whist the gearbox was removed.
With the DMF replaced and the new double clutch fitted to the gearbox we can now refit the gearbox in reverse order of removal; always check for correct position and alignment of mountings and bolts and
torque to the manufactures specification.
Refill the gearbox with the correct quantity and quality of oil and, once the car is running, carry out basic settings and then adaptions on the gearbox control unit with a compatible diagnostic machine, always
remembering to reset the electrical consumers after the battery has been disconnected i.e. clock, radio, electric windows, etc.