
The Octavia has proved a popular purchase in the UK after gaining a reputation for reliability and qualit yand, as a result, it is now a popular sight in the aftermarket scene. Nothing out of the ordinary is needed to complete the job, the only special tools required are a transmission jack, an engine support cradle and a long axle stand. A two-post ramp was used in this example however a four-post ramp may not provide enough clearance.
For safety reasons its considered best practice to disconnect the battery earth lead before commencing work. If the vehicle has alloy wheels it may be fitted with anti-theft wheel bolts, so make sure you have the key before you start.
Open the bonnet and lift off the engine cover. Remove the battery cover and disconnect the battery terminals. Unplug the Mass Airflow Sensor (MAF) and remove the air filter housing (pictured below) attached to the front slam panel.
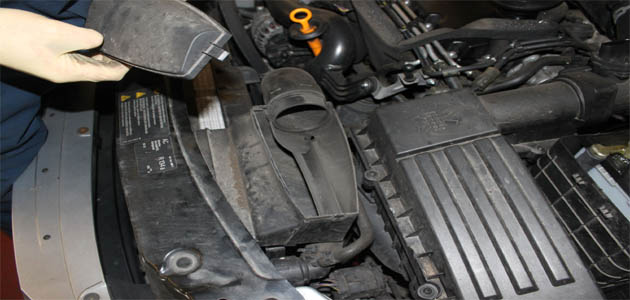
Continue to remove the remainder of the housing and the air filter assembly connected to the inlet manifold. Remove the clamp holding the battery in place and lift the battery out of the tray.
Remove the front part of the battery surround and undo the fixing bolts (pictured below) on the base of the battery tray.

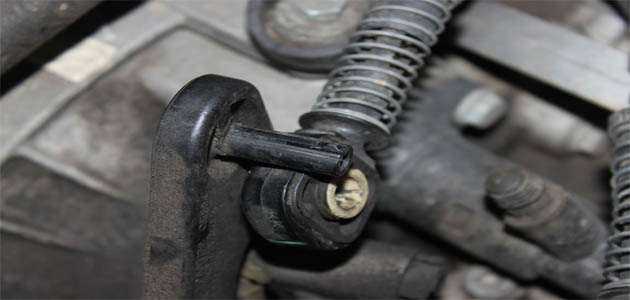
Remove the tray and disconnect the gear linkage cables (pictured below) and the securing bracket.
Undo the small gearbox steady bracket and remove the slave cylinder. Remove the earth connection (pictured below) from the starter motor bolt head and remove the bolt.

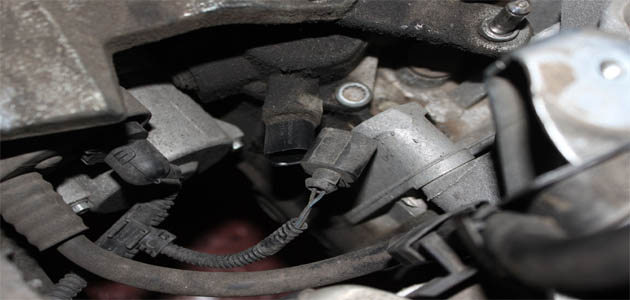
Unplug the reverse light switch (pictured below) and undo the upper bell-housing bolts.
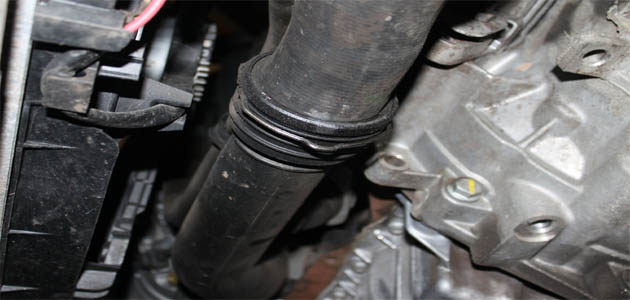
Use the engine cradle to support the engine and remove the gearbox mounting bracket. Raise the vehicle and remove both front road wheels. Undo both front hub nuts and remove the intercooler pipe (pictured below) for better clearance.
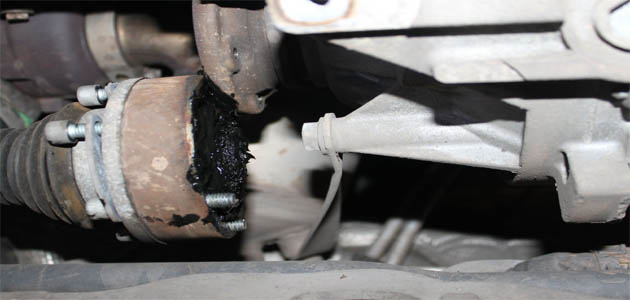
Undo and release the lower arm nuts and the gearbox rear steady bar. Undo the lower starter motor bolt and stow the unit to one side. Remove the nearside wheel arch liner and remove both driveshafts. Remove the inspection back plate on the gearbox and remove the exhaust manifold support bracket (pictured below).
While supporting the gearbox remove the final lower bell housing bolts and lower the gearbox carefully to the floor. DMF inspection With the clutch removed, check the dual mass flywheel (DMF) for signs of heat stress and evidence of grease loss. The DMF should also be tested for freeplay and rock between the primary and secondary masses (LuK tool number 400 0080 10 is specifically designed for this purpose on all LuK manufactured DMFs). Full instructions and tolerance data for all LuK DMFs are contained on a CD which comes with this special tool.
Clean the first motion shaft splines and any debris from the bell housing (especially important when a release bearing has failed). Put a small dab of high melting point grease (not a copper-based product) on the first motion shaft splines and make sure the new driven plate slides freely back and forth. This not only spreads the grease evenly but also makes sure you have the correct kit. Wipe any excess grease off the shaft and driven plate hub. Using a universal alignment tool and checking the driven plate is the correct way round (note “Getriebe Seite” is German for “Gearbox Side”) the clutch can be bolted to the flywheel evenly and sequentially.
Before fitting the gearbox make sure the locating dowels are in place and not damaged. Refit any that have become dislodged and refit the gearbox. Make sure the gearbox bell housing bolts are secured before lowering the jack. Refitting is the reverse of the removal.


