The S-Max is a common sight in the UK after gaining a reputation for reliability and quality. As a result, it is now a regular fixture in the aftermarket scene. A clutch replacement is really easy to do, and, with a few pointers from LuK, it should be easy to beat the book time of around five hours.
Nothing out of the ordinary is needed to complete the job; the only special tools required are a transmission jack, an engine support cradle and a long axle stand. A twopost ramp was used in this example, as a fourpost ramp may not provide enough clearance.
For safety reasons, it’s considered best practice to disconnect the battery earth lead before commencing work. If the vehicle has alloy wheels, it may be fitted with anti-theft wheel bolts, so make sure you have the key before you start.
Engage the steering lock
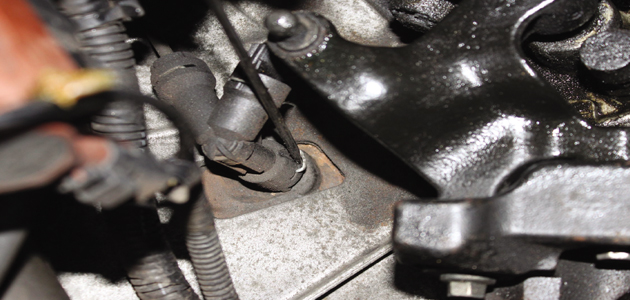
Start by undoing the bolt (Fig 1 below) located in the driver’s foot-well that secures the steering column to the rack (it’s a good idea to engage the steering lock with the wheels pointing straight before removing).
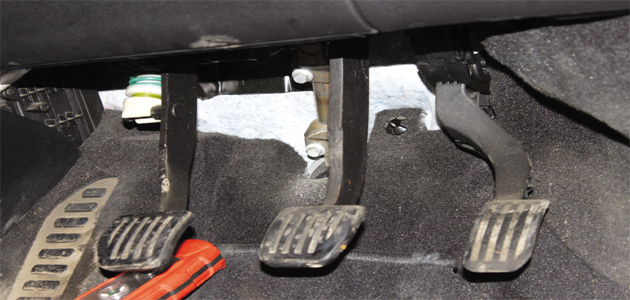
(Fig 1)
Open the bonnet and remove the engine cover. Disconnect the Mass Air Flow (MAF) sensor, and undo the jubilee clip securing the air-filter housing to the inlet manifold pipe. Detach the inlet pipe and unclip the wiring harness clipped to the side of the air-filter. Remove the complete air-filter housing by pulling it upwards sharply to release it from its rubber mountings. Disconnect the reverse light switch and unclip the battery tray cover by releasing the lugs (Fig 2 below) on either side.
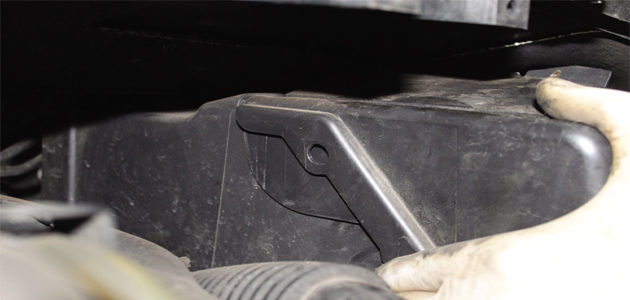
(Fig 2)
Unbolt the earth connection located down the side of the battery tray (Fig 3 below) and stow it to one side.
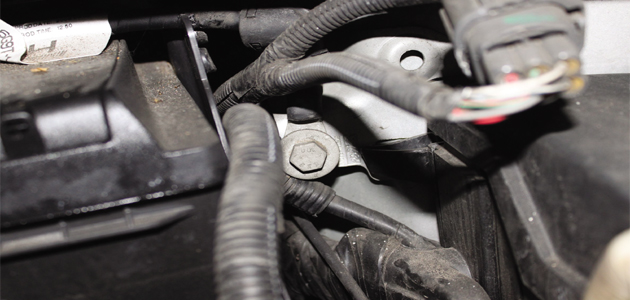
(Fig 3)
Remove the two positive battery connections and stow them both to one side. Undo the battery clamp and slide the battery out of the tray. Undo the three bolts securing the battery tray to the chassis and disconnect any electrical connections attached to the tray.
Remove the tray and undo the earth connection on the gearbox mounting and the wiring harnesses attached to the gearbox.
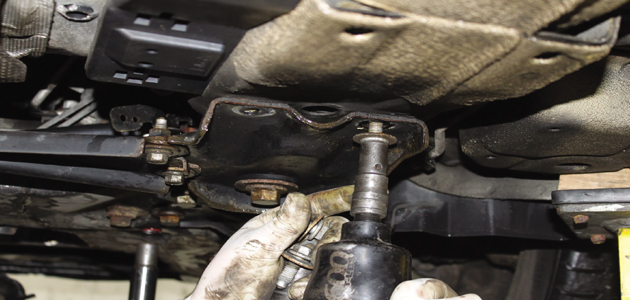
Unclip the gear selector cables and release them from the securing bracket before stowing them to one side. Remove the gear selector cable support bracket and disconnect the slave cylinder (Fig 4 below), remembering to plug both ends to prevent any leakage.
(Fig 4)
Support the engine with the cradle and remove the upper bell-housing and starter bolts. The gearbox support bracket can now be removed.
Raise the vehicle and remove the nearside wheel and the single hub bolt. Lower the nearside wheel arch liner, and remove the large plastic undertray. Undo and remove the rear gearbox support mount, remembering that the exhaust clamp (Fig 5 below) can be slackened to enable the steel cover to be removed.
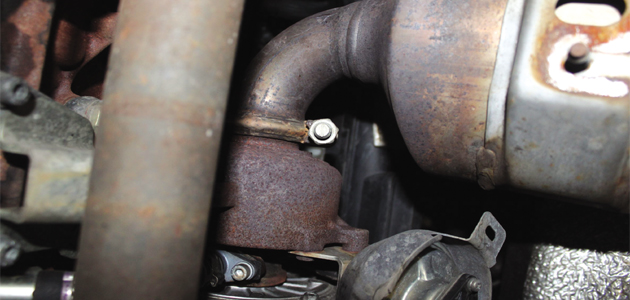
(Fig 5)
Undo the jubilee clip securing theintake pipe to the intercooler, and unbolt the fixings running under the oil sump. Move the pipe to one side. Undo the nearside lower arm fixings to the chassis, and release the arm (Fig 6 below), so that it can be stowed to one side.
(Fig 6)
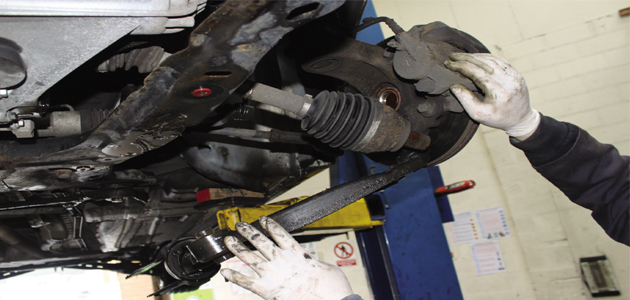
Drain the gearbox fluid and remove the short driveshaft from the hub and the gearbox. Undo the rear subframe brace (Fig 7 below) and, while supporting the subframe, slacken all the bolts securing it to the body.
(Fig 7)
Lower the subframe down on the gearbox side, so that there is enough space to move the gearbox across. Remove the final bellhousing bolts and, with support, slide the gearbox across allowing the subframe to support its weight. The clutch, DMF and CSC can now be worked on.
With the clutch removed, check the dual mass flywheel (DMF) for signs of heat stress and evidence of grease loss. The DMF should also be tested for freeplay and rock between the primary and secondary masses (LuK tool number 400 0080 10 is specifically designed for this purpose on all LuK manufactured DMF’s). Full instructions and tolerance data for all LuK DMFs are contained on a CD which comes with this special tool.
Check the driven plate
Clean the first motion shaft splines and any debris from the bell housing (especially important when a release bearing has failed). Put a small dab of high melting point grease(not a copper-based product) on the first motion shaft splines, and make sure the new driven plate slides freely back and forth. This not only spreads the grease evenly but also makes sure you have the correct kit.
Wipe any excess grease off the shaft and driven plate hub. Using a universal alignment tool and checking the driven plate is the correct way round (note “Getriebe Seite” is German for “Gearbox Side”) the clutch can be bolted to the flywheel evenly and sequentially.
Before fitting the gearbox make sure the locating dowels are in place and not damaged. Refit any that have become dislodged and refit the gearbox. Make sure the gearbox bell housing bolts are secured before lowering the jack. Refitting is the reverse of the removal.


