
The Mercedes W211 E-Class spent seven years in production before being superseded. As a result there is an abundance of these vehicles on the UK’s roads, many of which have covered high mileages and are candidates for a replacement clutch and dual mass flywheel.
Transmission removal
Disconnect the battery after noting the radio code. Unbolt the exhaust brackets from the transmission casing, then unclamp the exhaust centre pipe from the downpipe, and secure it clear of the transmission. Remove exhaust heat shields and any brackets obstructing access to the driveshaft. Support the transmission and remove its rear mounting.
Mark the relative positions of the rubber couplings and flanges on both ends of the driveshaft so that it can be reinstalled in the original position to prevent imbalance/vibration. Remove the bolts at the centre bearing and the transmission and differential flanges, then lower the driveshaft from the vehicle with the help of an assistant.
Remove the earth bonding strap from the transmission casing, leaving it connected at the vehicle body (pictured below).
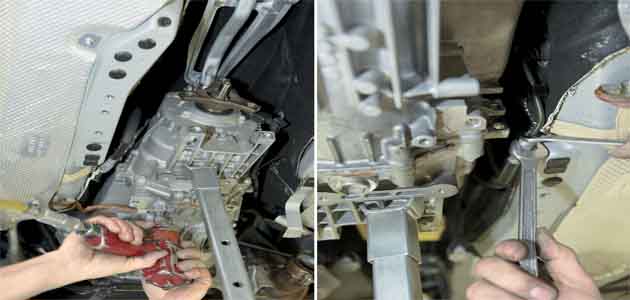
Disconnecting earth strap and CSC line
Separate the hydraulic line to the concentric slave cylinder (CSC) where it joins the rigid pipe from the master cylinder, catching the fluid in a suitable container.
Disconnect the plug for the reverse light switch, then detach the gear lever linkage at the transmission by prising out the clips (pictured below).
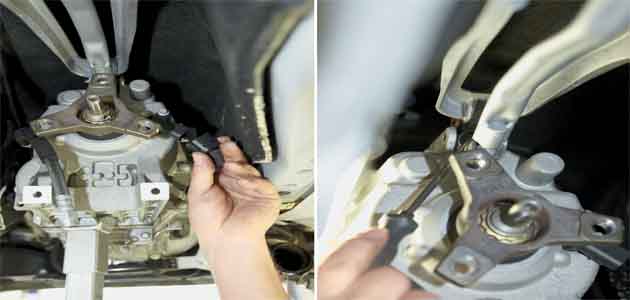
Disconnecting reverse light switch and gear linkage
With a transmission jack in position, the transmission can now be unbolted and withdrawn from the engine (pictured below).
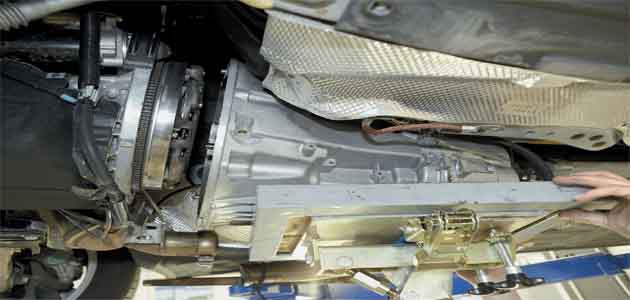
Removing transmission
Clutch and DMF removal
Using only hand tools and working in a diagonal sequence, you should progressively loosen the bolts securing the clutch housing to the DMF before removing the clutch assembly. The DMF can now be unbolted from the crankshaft.
DMF installation
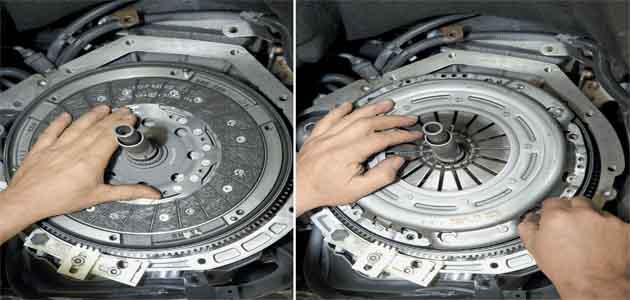
Clean the mating surfaces on the new DMF and crankshaft flange then offer up the DMF and fit the securing bolts hand tight (pictured below).
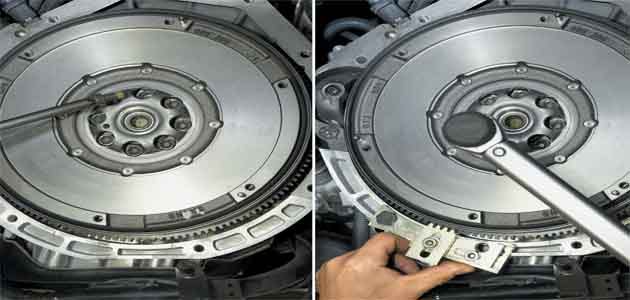
Installing new DMF
Ensure the DMF seats properly to prevent imbalance and noise. Fit a flywheel locking tool to prevent the DMF turning, then tighten the bolts in a diagonal pattern according to the manufacturer’s specifications. For the Sachs DMF fitted here, first torque them to 50 Nm, then angle tighten an additional 90º.
Clutch installation
Prior to installation of the new clutch driven plate, check its lateral runout in case it has altered in transit – this step is important but often overlooked (pictured below).
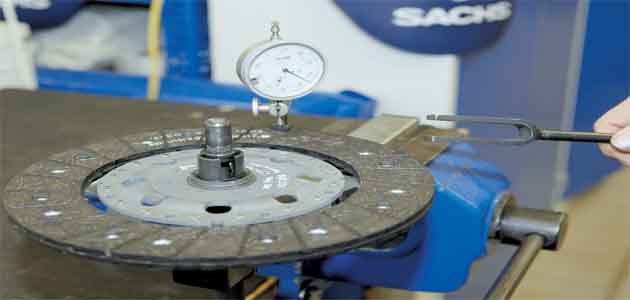
Checking clutch lateral runout
A combination tool consisting of a centring unit and dial gauge is available from Sachs to check runout, which typically should not exceed 0.5 mm.
Carefully apply a suitable lubricant such as Sachs high performance grease (supplied with new clutch kits) to the transmission input shaft splines (pictured below).
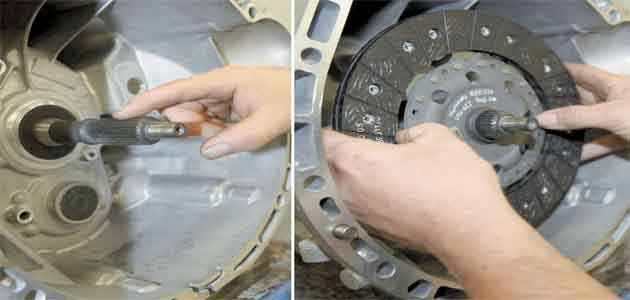
Applying grease to input shaft splines
Slide the clutch driven plate hub back and forth a few times on the input shaft to distribute the grease evenly then remove the driven plate and clean off any excess.
Carefully clean the friction surfaces of the cover assembly and the DMF then use a suitable alignment tool to centre the clutch driven plate on the DMF (pictured below).
Installing driven plate and clutch cover
Fit the clutch cover, progressively tightening the bolts in a diagonal pattern according to the manufacturer’s specifications and torque settings – this is especially important for self-adjusting clutches.
Transmission installation
Before the transmission is refitted it is recommended that the CSC is replaced as a precautionary measure, to avoid having to repeat the entire removal process if it later develops a leak (pictured below).
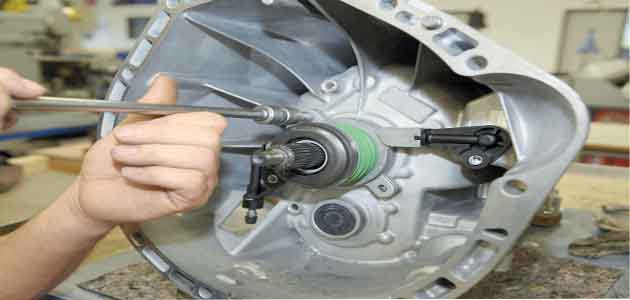
Installing new CSC
To prevent damage to its sealing ring, take care not to manually compress the CSC during fitting.
Lubricate the locating dowels on the transmission bell-housing and their counterparts on the engine flange, then refit the transmission and torque the bolts to the correct setting. Engaging a gear so that the transmission input shaft can be rotated via the output shaft will ease its insertion into the clutch driven plate hub. Finally, close and bleed the hydraulic line to the CSC. The remainder of the refitting process is a reversal of removal.


