Switch Fitting Secrets – How to easily fit a brake light switch
To help technicians to accurately replace a brake light switch, we’ve recently produced a TechAssist bulletin that guides them through the three key steps involved:
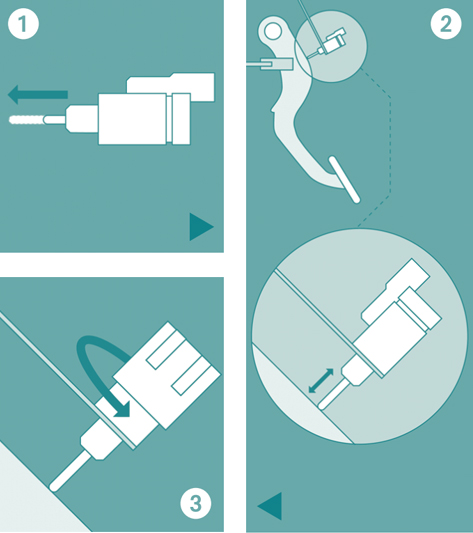
- Pull out the plunger – Many brake light switches will fit multiple vehicles and so will feature a variable plunger length. The plunger is often pushed in when packed, to reduce the risk of damage in transit. When taking the switch out of the box ensure that the plunger is fully extended.
- Push into position – After disconnecting and removing the failed brake light switch, push the new switch into position. The extended plunger will push against the brake pedal and push back into the required position for the vehicle.
- Twist to lock – Once in place twist the brake light switch and the plunger will lock into the new position. Reconnect the wiring and conduct a visual test to ensure that the brake lights now function correctly.
For further information about the Lucas Electrical range of brake switches available from Elta Automotive, click here.


